导航
导航
文章目录󰁋
  1. 一、本地 Docker 环境搭建
    1. 1.1 设置国内镜像源
    2. 1.2 docker 命令基础
    3. 1.3 环境准备
      1. 1、安装 node 镜像
      2. 2、安装 MySQL 镜像
      3. 3、安装 redis 镜像
      4. 4、安装 Nginx 镜像
    4. 1.4 部署 egg 代码
      1. 启动 egg 镜像
  2. 二、用 docker-compose 把服务编排起来
    1. 2.1 编写 docker-compose.yml 文件
    2. 2.2 启动服务
  3. 三、Nginx 容器内部署前端
  4. 四、把 Docker 部署到云服务器
    1. 4.1 安装 docker 环境
      1. 安装工具包
      2. 设置阿里镜像源
      3. 安装 docker
      4. 启动 docker
      5. 设置 docker 镜像源
      6. 安装 mysql 镜像测试
    2. 4.2 安装 docker-compose
    3. 4.3 开放服务器端口
    4. 4.4 部署 egg 项目
      1. 修改代码和配置
      2. 上传本地 egg 服务端代码到服务器
      3. 启动 egg 服务
      4. 测试服务
  5. 五、部署到微信云托管
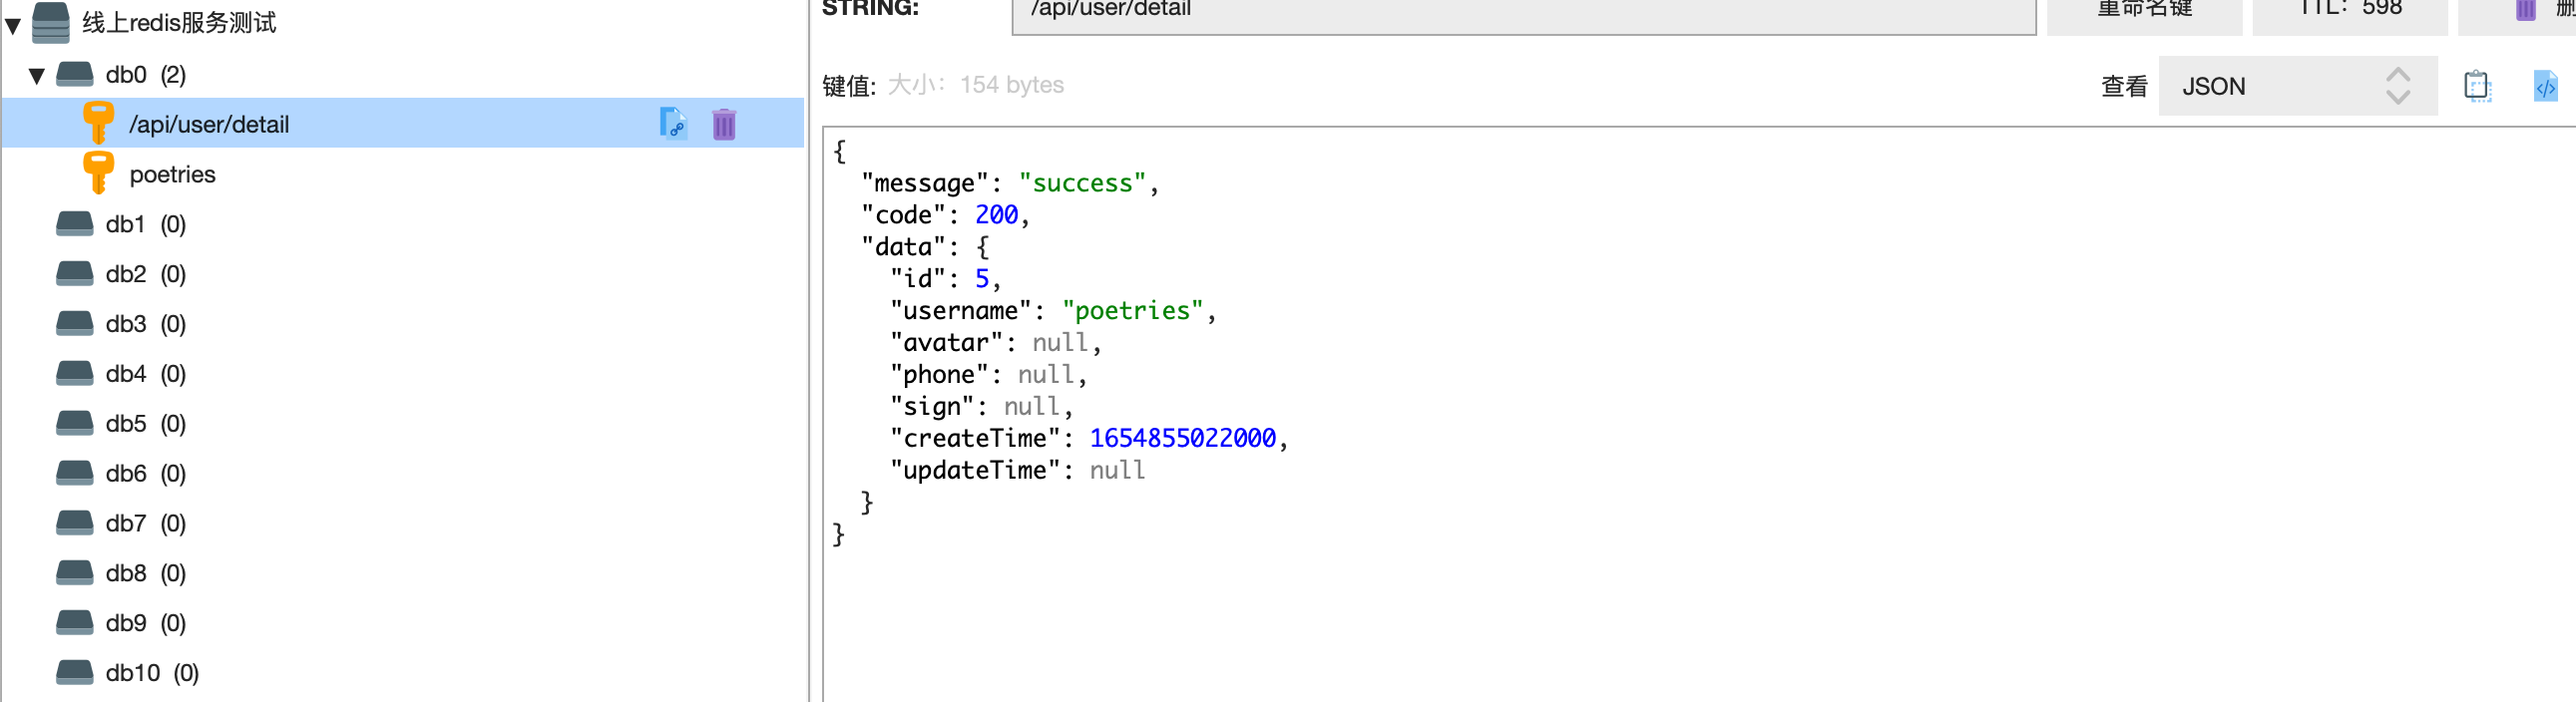
    1. 5.1 redis 服务
    2. 5.2 mysql 服务
    3. 5.3 egg 部署
      1. 修改代码
      2. 新建服务
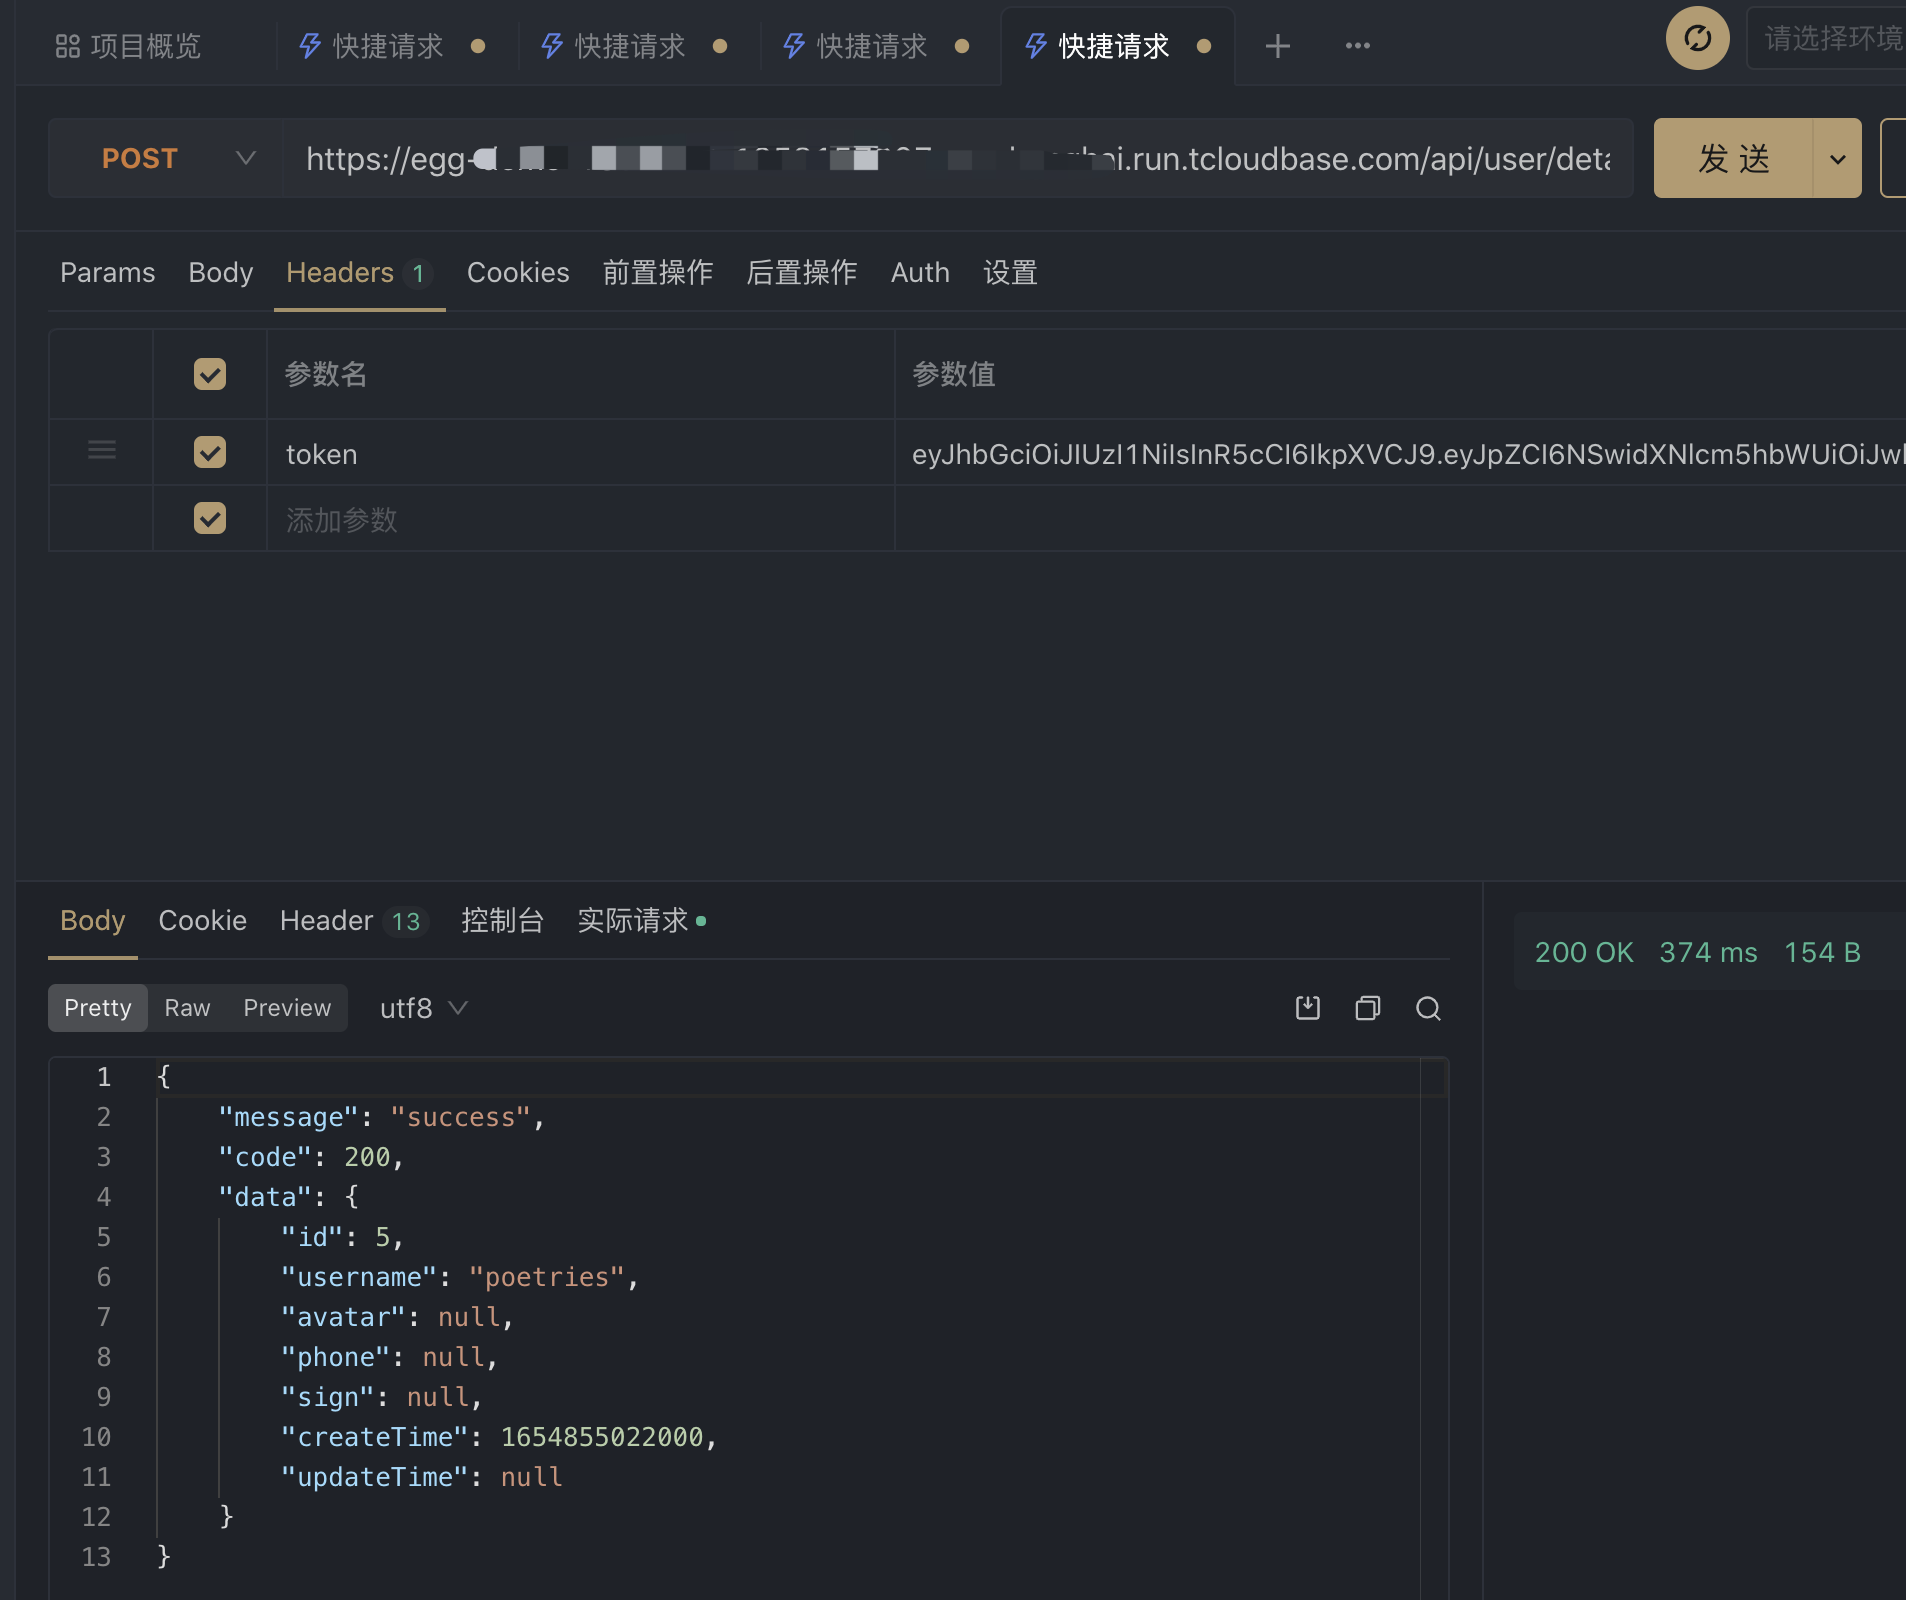
      3. 调试接口
  6. 六、egg 部署到腾讯云 serverless
    1. 6.1 修改 egg 配置
    2. 6.2 命令行部署
      1. 配置 YAML
      2. 部署到腾讯云
      3. 移除
      4. 账号配置(可选)
      5. 注意!!!
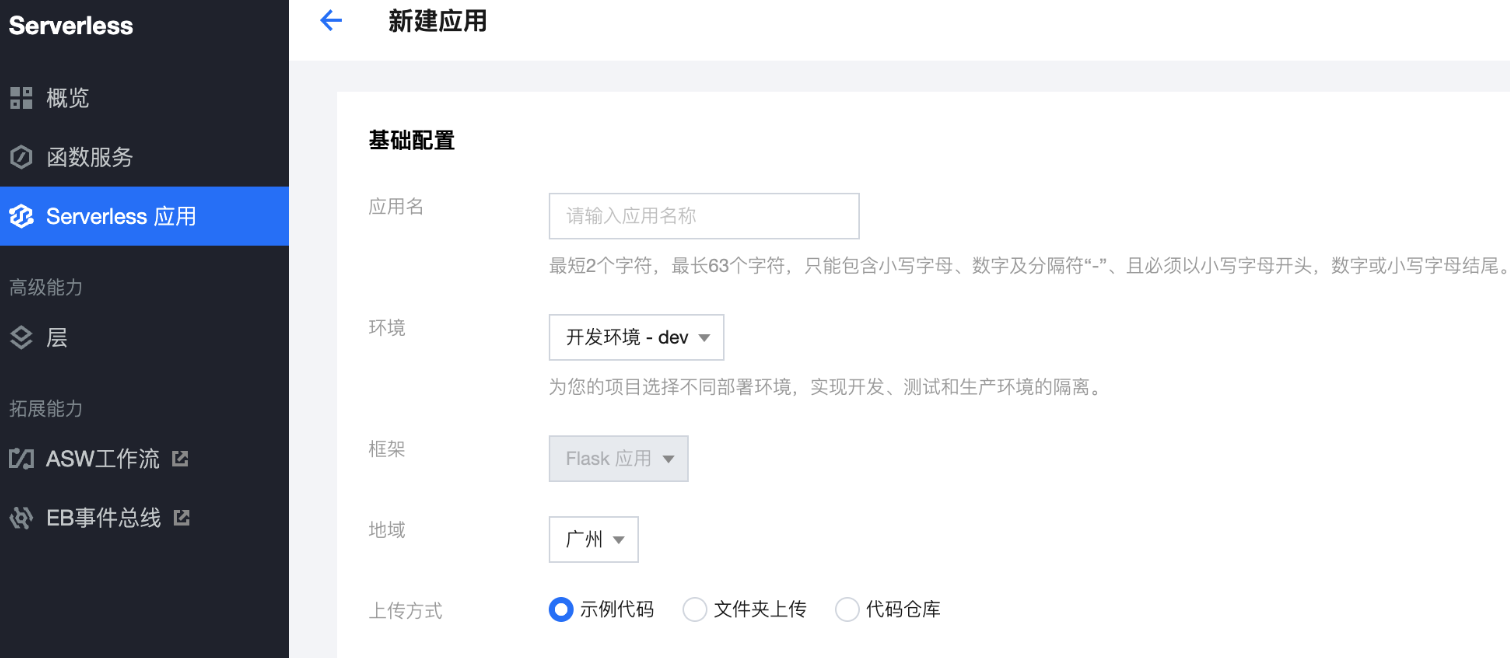
    3. 6.3 控制台创建部署(模板部署)
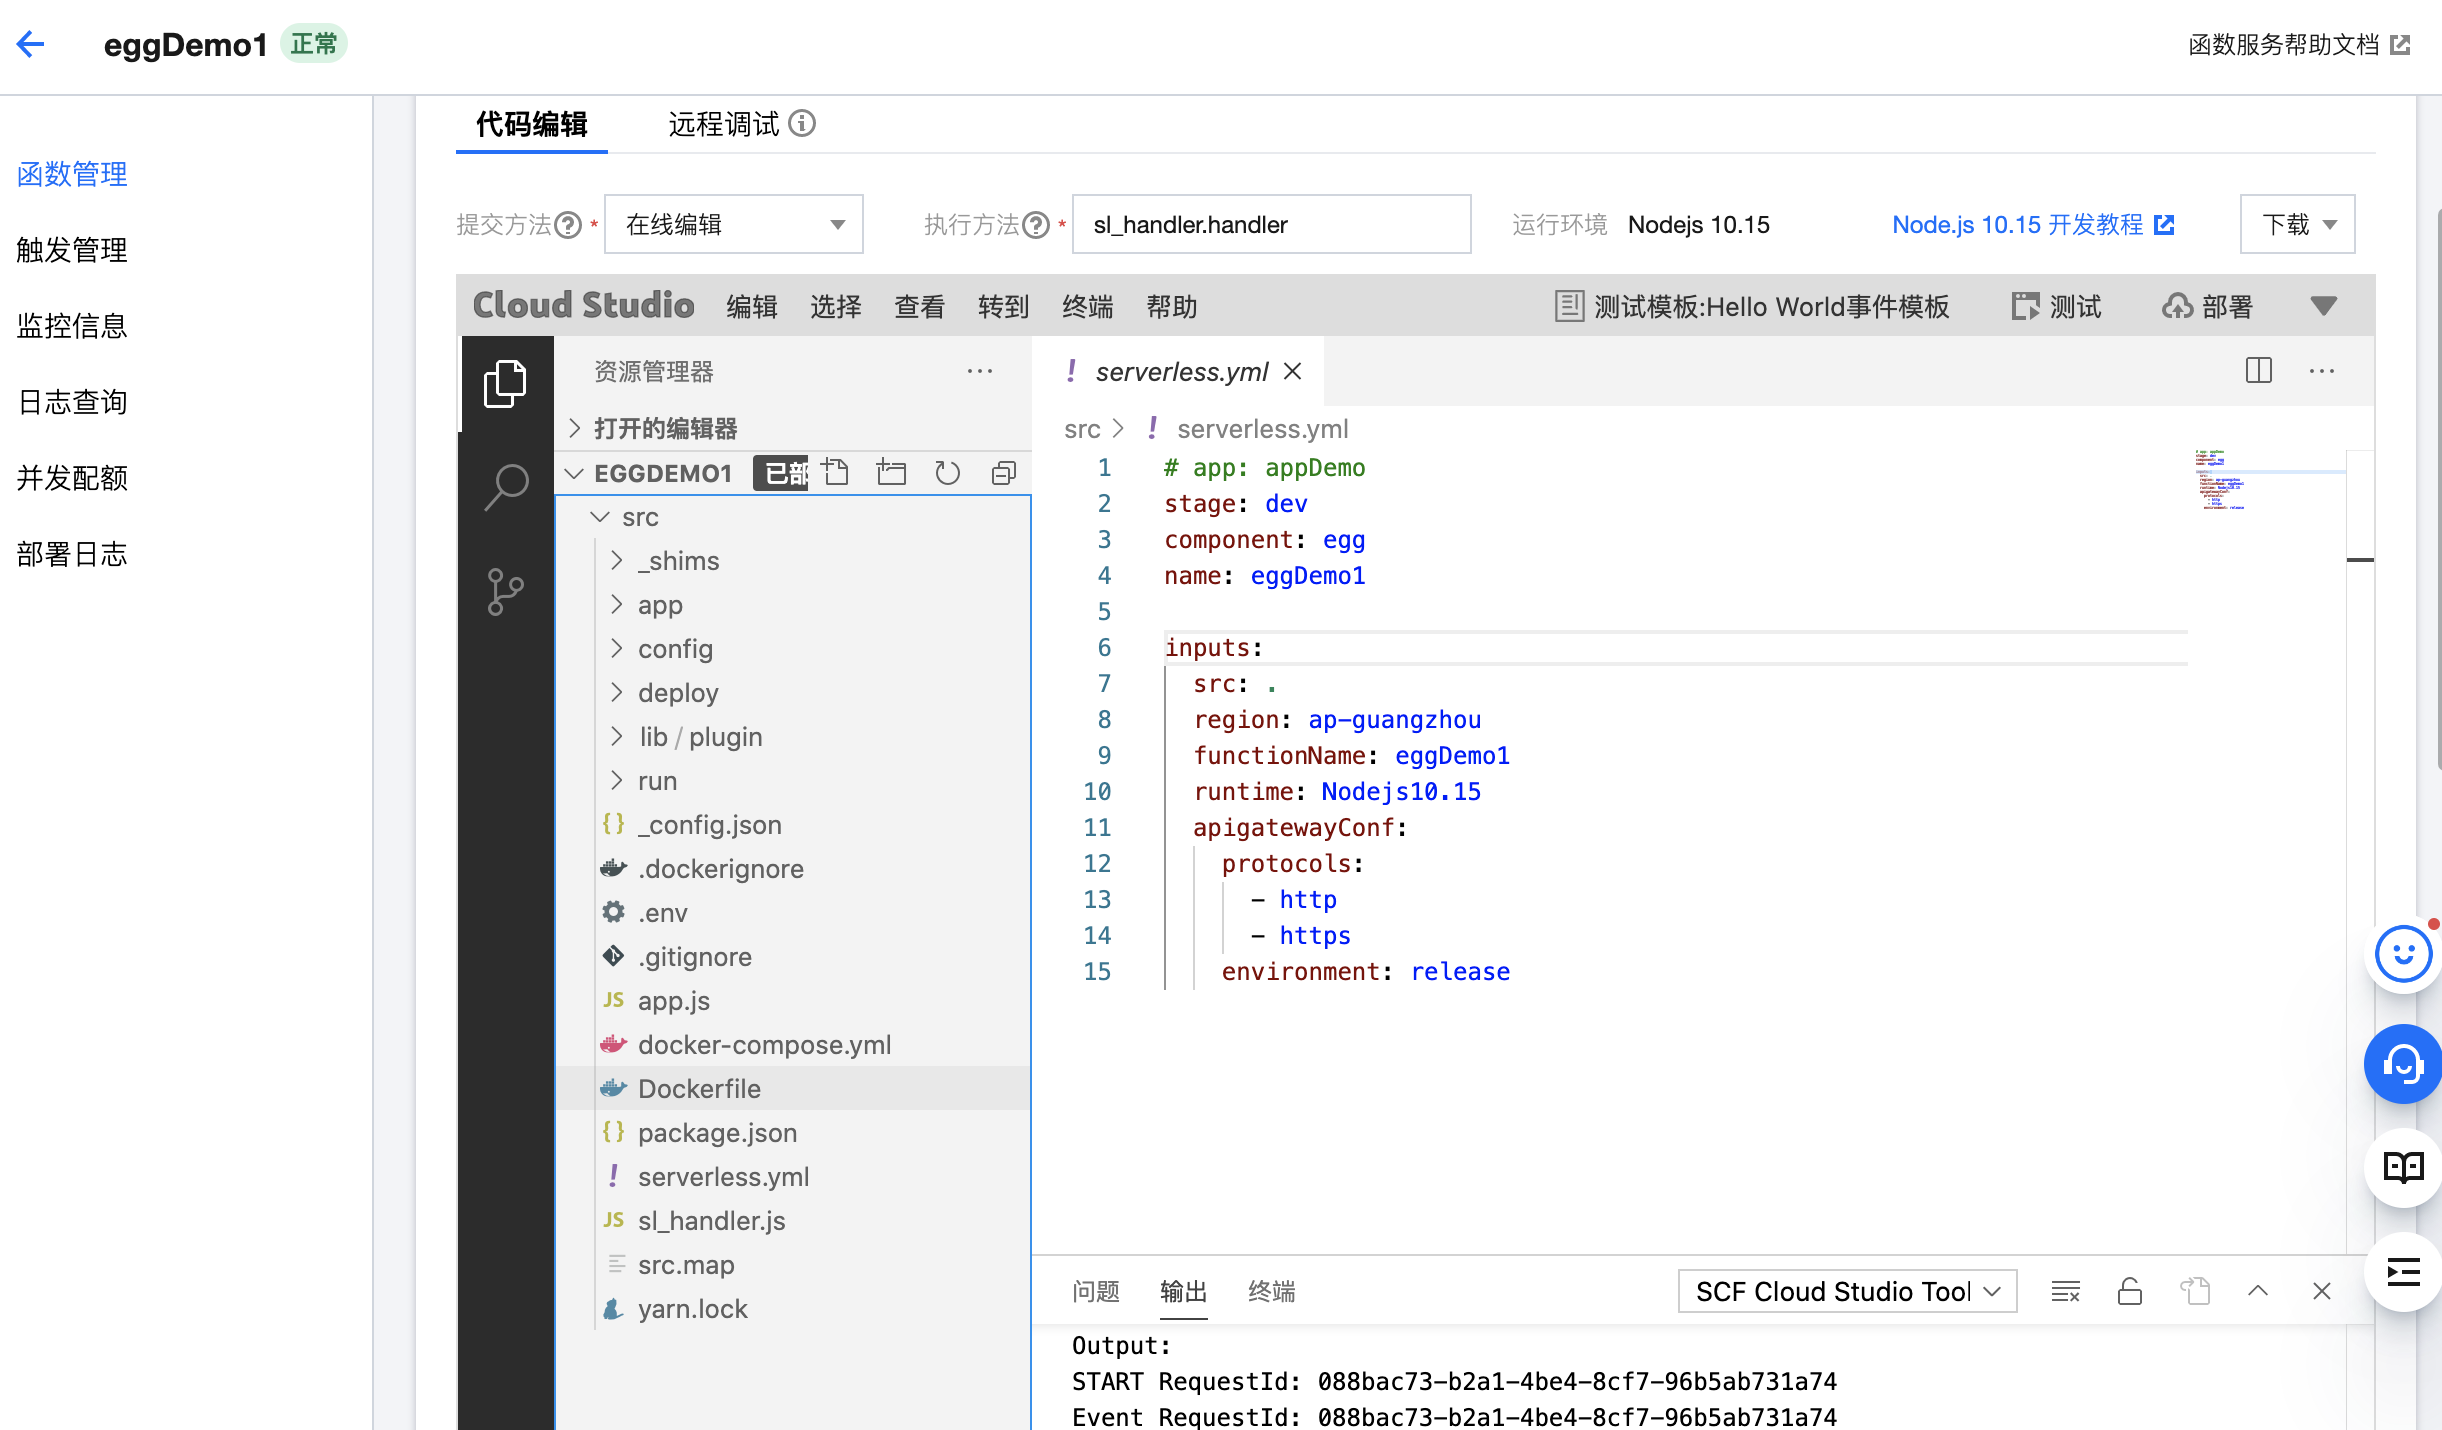
    4. 6.4 控制台创建部署(自定义部署)
      1. 初始化项目
      2. 部署上云
    5. 6.5 测试接口
  7. 七、这套流程放到今天要改哪些地方
  8. 总结
  9. 参考

Egg 项目部署实战 docker-compose 微信云托管 serverless 三种方案

Egg 项目写完,接口在本地 7001 端口跑得好好的,接下来就卡在同一个地方,这玩意儿到底往哪儿放。有人说买台云服务器 pm2 起起来就行,有人说上 Docker,有人说直接 serverless 一把梭。我把这三条路都真跑了一遍,从本地起容器开始,一直到线上接口能被前端页面调通,中间该踩的坑基本都踩到了。

这篇是那次的完整记录,命令、配置文件、每一步该看到什么界面全在里面。你可以当手册翻,也可以顺着读一遍,理解为什么部署这件事会从「一条 docker run」慢慢演化成「一个 compose 文件」再到「一次 git push」。

在本篇文章中,我们将从浅入深,和大家一起学习以下知识:

  • 本地用 Docker 把 node、MySQL、Redis、Nginx 四个环境一个个装起来,搞清楚每个参数在干嘛
  • 用 docker-compose 把这四个服务编排成一组,靠自定义网桥让容器之间用容器名互相通信
  • Nginx 容器里怎么放前端静态资源,怎么把接口反向代理到 Egg 服务
  • 把整套 docker-compose 搬到云服务器上,包括 CentOS 装 Docker、放行端口、Redis 持久化配置
  • 用微信云托管做流水线部署,push 代码自动构建
  • 把 Egg 部署到腾讯云 serverless,包括 CLI 部署和控制台自定义部署两种姿势
  • 这套 2022 年的流程,放到今天有哪些地方要改

一、本地 Docker 环境搭建

先说清楚,这一节手动做的所有事情,到了第二节都会被一条 docker-compose up -d 替代。那还有必要一个一个手动装吗?我的答案是有必要。只有自己敲过一遍 docker run,你才知道 compose 文件里的 portsvolumesenvironment 分别对应命令行的哪个参数,线上出问题的时候才知道该去哪儿看。

mac 下装 Docker 用 brew install docker 就行。这里有个坑要注意,这条命令只装了 CLI,本机没有 daemon,光敲 docker ps 会报 Cannot connect to the Docker daemon。要跑容器还得装 Docker Desktop,也就是 brew install --cask docker,装完打开一次让它把守护进程拉起来。

https://hub.docker.com 拉取镜像速度比较慢,我们推荐使用国内的镜像源访问速度较快 https://hub.daocloud.io

1.1 设置国内镜像源

Docker Desktop 的偏好设置里有个 Docker Engine 面板,改的其实就是 daemon.json 这个文件,写完点 Apply & Restart 就生效。
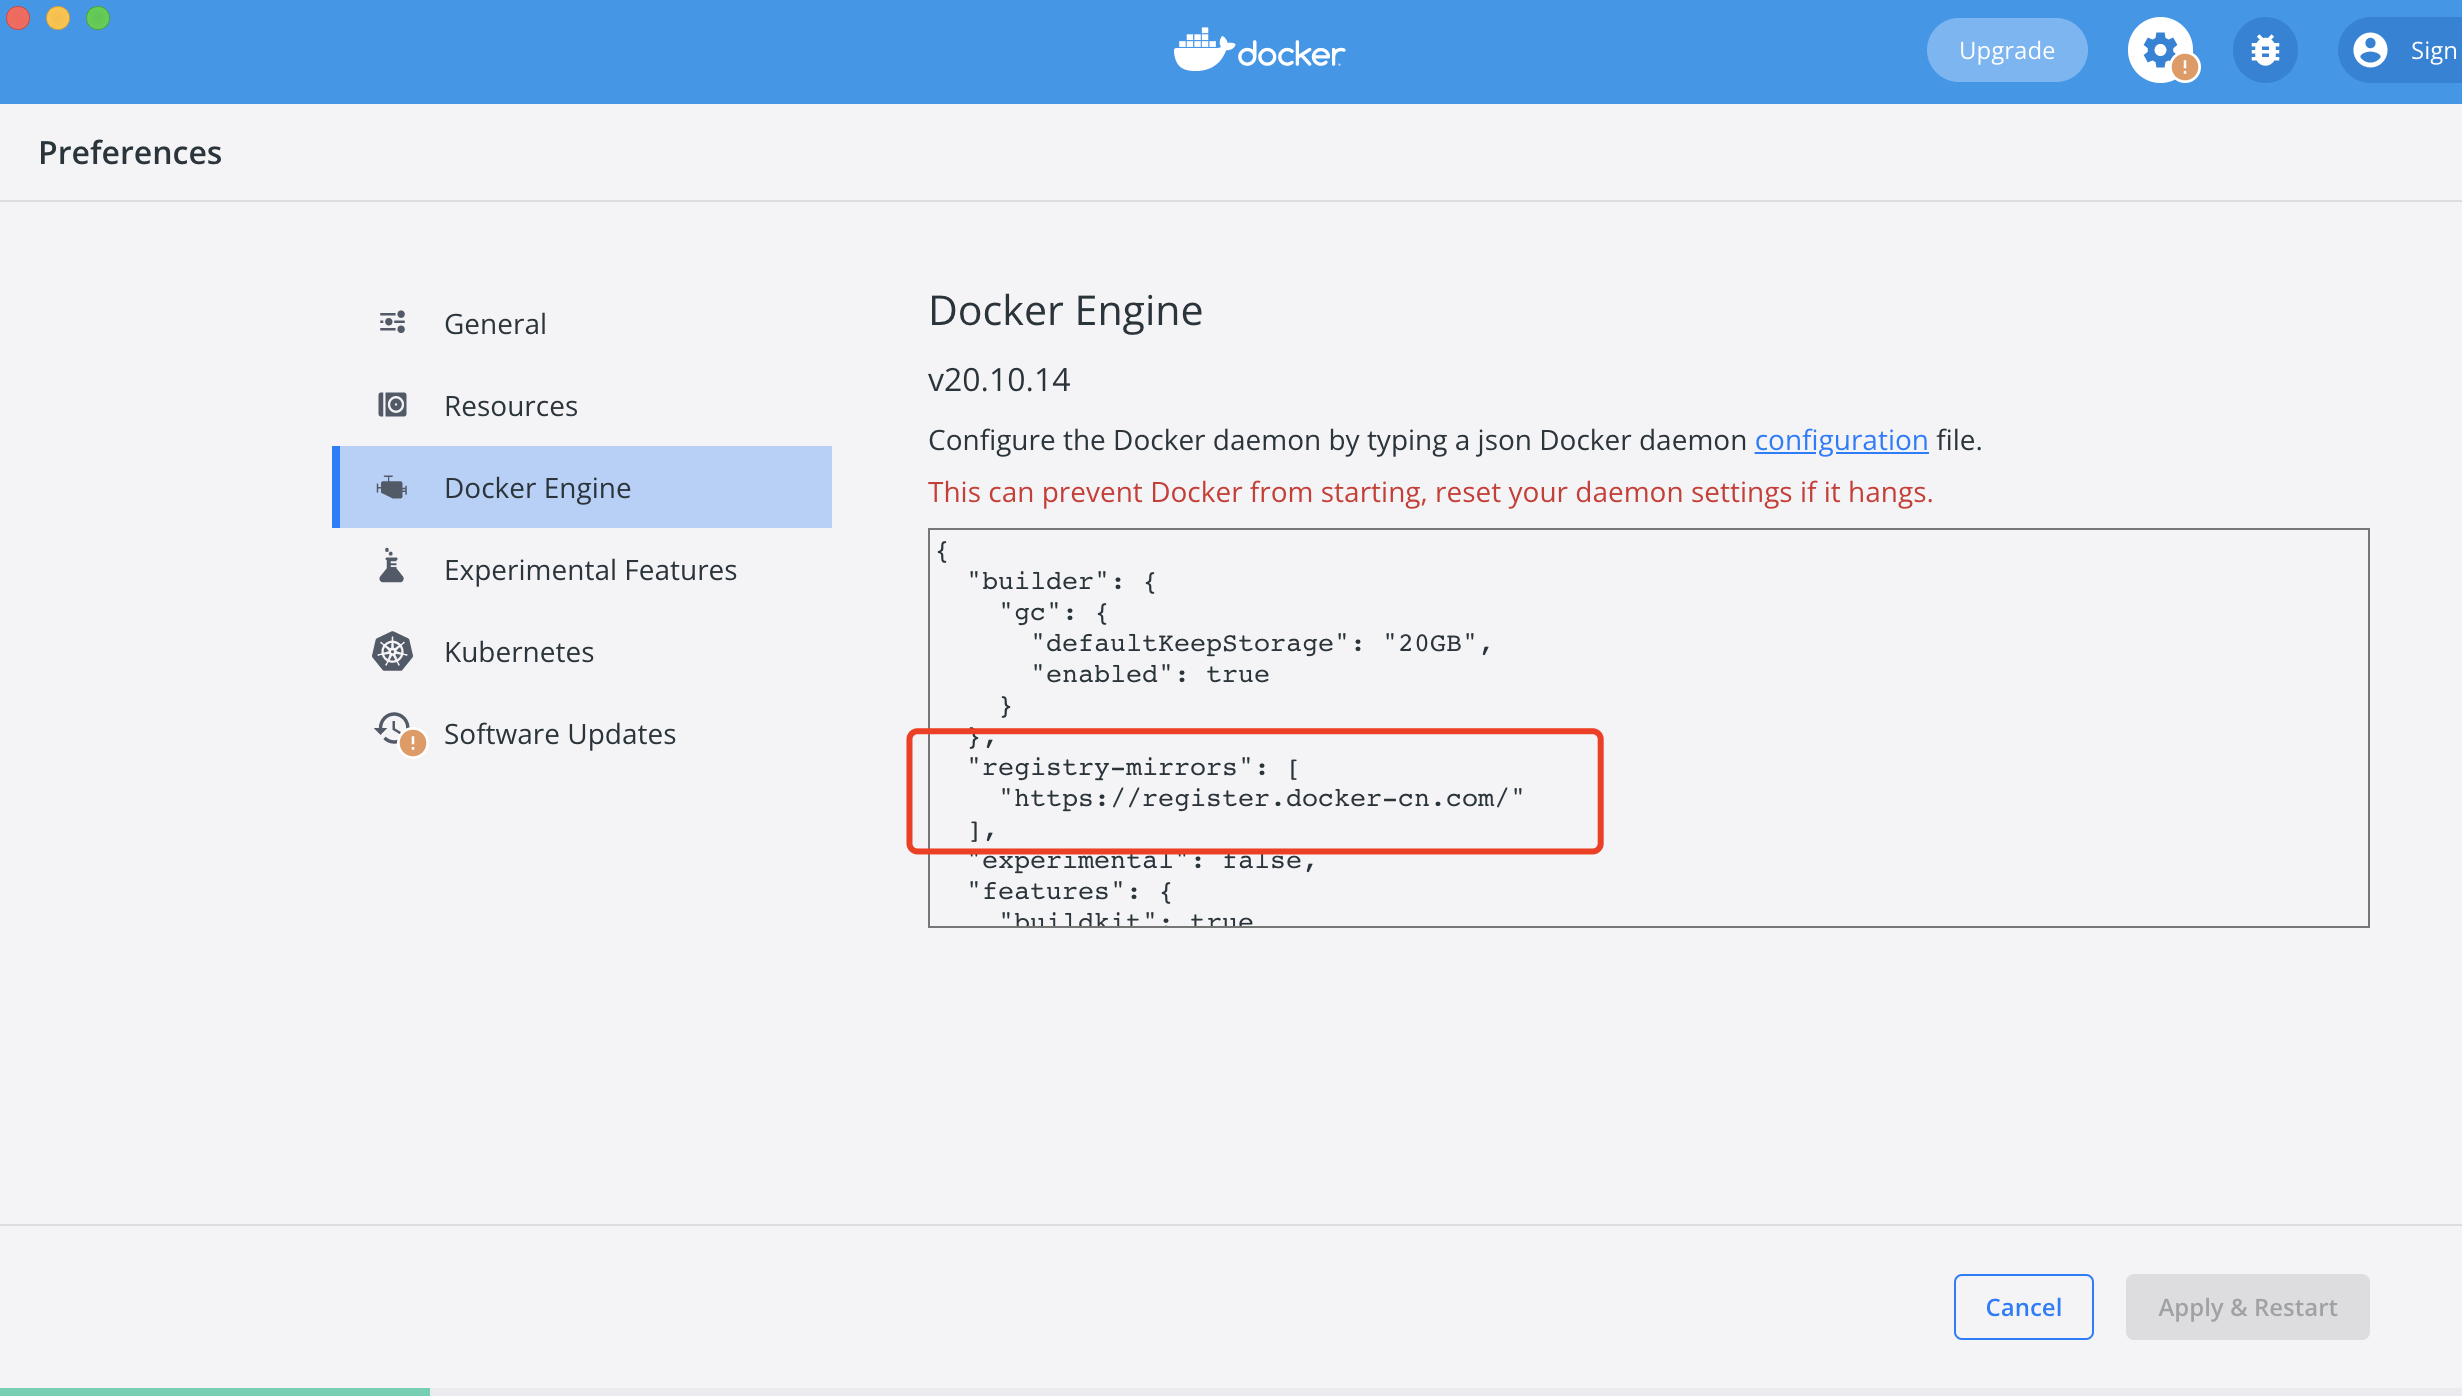
Docker Desktop 中配置 registry-mirrors 镜像加速地址

registry-mirrors 是一个数组,Docker 拉镜像的时候会先走这里配的地址,拉不到才回源到官方仓库。配它的目的很单纯,就是让 docker pull 别卡在 0%。

{
"registry-mirrors": ["https://registry.docker-cn.com/"]
}

改完之后可以用 docker info 确认一下,输出最下面会多一段 Registry Mirrors,能看到你刚才填的地址才算配上了。至于镜像地址本身,这两年国内的公共加速源变动特别频繁,当年能用的今天不一定还在,遇到拉不动别急着怀疑网络,先确认这个源本身是不是已经废了,用你云厂商控制台给的专属加速地址通常最稳。

进入该网站https://hub.daocloud.io获取镜像的下载地址。

1.2 docker 命令基础

后面每一节都会反复用到这几条命令,先过一遍,混熟了排查问题会快很多。

  • docker images 查看镜像
  • docker ps 查看启动的容器 (-a 查看全部)
  • docker rmi 镜像ID 删除镜像
  • docker rm 容器ID 删除容器
  • docker exec -it 1a8eca716169(容器ID:docker ps获取) sh 进入容器内部
  • docker inspect bf70019da487(容器ID) 查看容器内的信息

这里面最值得单独说的是 docker inspect。它吐出来的是一大坨 JSON,包含容器的网络配置、挂载点、环境变量、启动命令,Node 连不上 MySQL 的时候我一般第一个看它,确认容器到底挂在哪个网络上、IP 是多少。docker exec -it 容器ID sh 则是进容器内部,注意有些精简镜像(比如 alpine)里没有 bash,只能用 sh

镜像列表里那些 <none> 的悬空镜像,是重复构建留下的中间产物,占空间还看着乱。

删除none的镜像,要先删除镜像中的容器。要删除镜像中的容器,必须先停止容器。

顺序反了会报 image is being used by stopped container,所以下面这条得在容器清干净之后再跑。

$ docker rmi $(docker images | grep "none" | awk '{print $3}')

完整的清理三连是这样,停容器、删容器、删镜像,一步都不能跳。

$ docker stop $(docker ps -a | grep "Exited" | awk '{print $1 }') //停止容器

$ docker rm $(docker ps -a | grep "Exited" | awk '{print $1 }') //删除容器

$ docker rmi $(docker images | grep "none" | awk '{print $3}') //删除镜像

这三条都是靠 grep 匹配文字来筛 ID 的,属于比较糙的写法,好处是任何版本的 Docker 都能跑。现在的 Docker 其实自带了更安全的清理命令,docker image prune 专门清悬空镜像,docker system prune 连停掉的容器、没在用的网络一起清,用它们不会误伤名字里刚好带 none 的镜像。

1.3 环境准备

一个完整的 Egg 服务跑起来要四样东西,Node 运行时、MySQL、Redis、Nginx。这里拉取nginxnoderedismysql镜像,一个一个来。

1、安装 node 镜像

进入https://hub.daocloud.io 搜索node,切换到版本获取下载地址。

  • docker pull daocloud.io/library/node:12.18
  • docker tag 28faf336034d node 重命名镜像

docker tag 干的事情其实只是给同一个镜像挂一个新名字,不会复制一份数据,所以重命名镜像后IMAGE ID都是一样的。
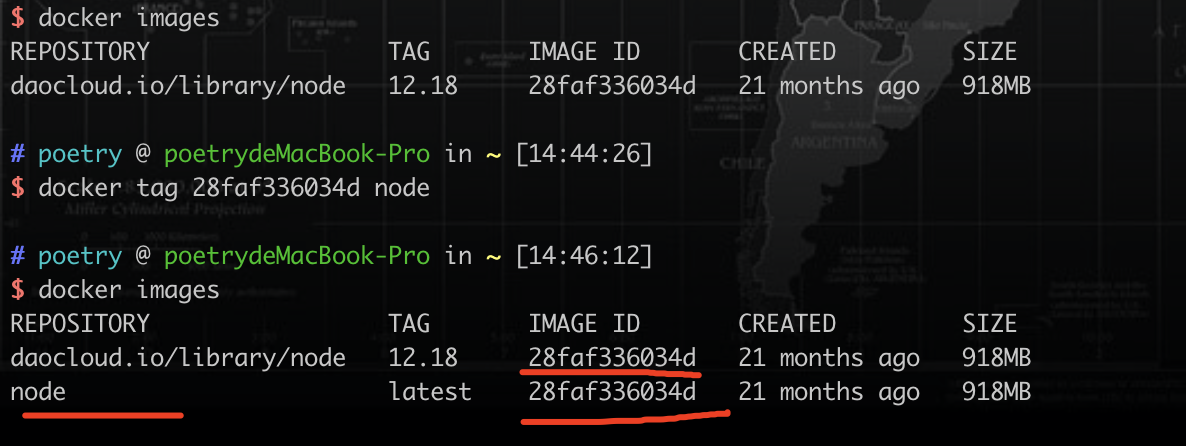
docker images 中重命名前后两条记录的 IMAGE ID 完全相同

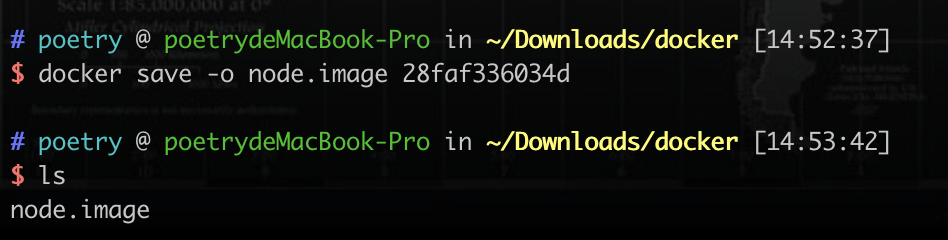
拉一次镜像动辄几百兆,网络不好的时候拉一次要好几分钟。所以我习惯把常用镜像导出到本地存着,换机器或者重装 Docker 直接导回来。也可以导出镜像到本地备份 docker save -o node.image(导出镜像要起的名称) 28faf336034d(要导出的镜像的ID)

docker save 把 node 镜像导出成本地文件

导完验证一下确实能用,我们先删除之前的镜像 docker rmi 28faf336034d -f 强制删除。加 -f 是因为这个镜像上还挂着 tag 和容器引用,不强制删会被拒绝。

强制删除本地 node 镜像

再次导入本地镜像

docker load -i node.image(导入的镜像名称)

导入完你会发现镜像的 REPOSITORY 和 TAG 都是 <none>,这是正常的,docker save 存的是镜像层数据,标签信息没跟着回来。
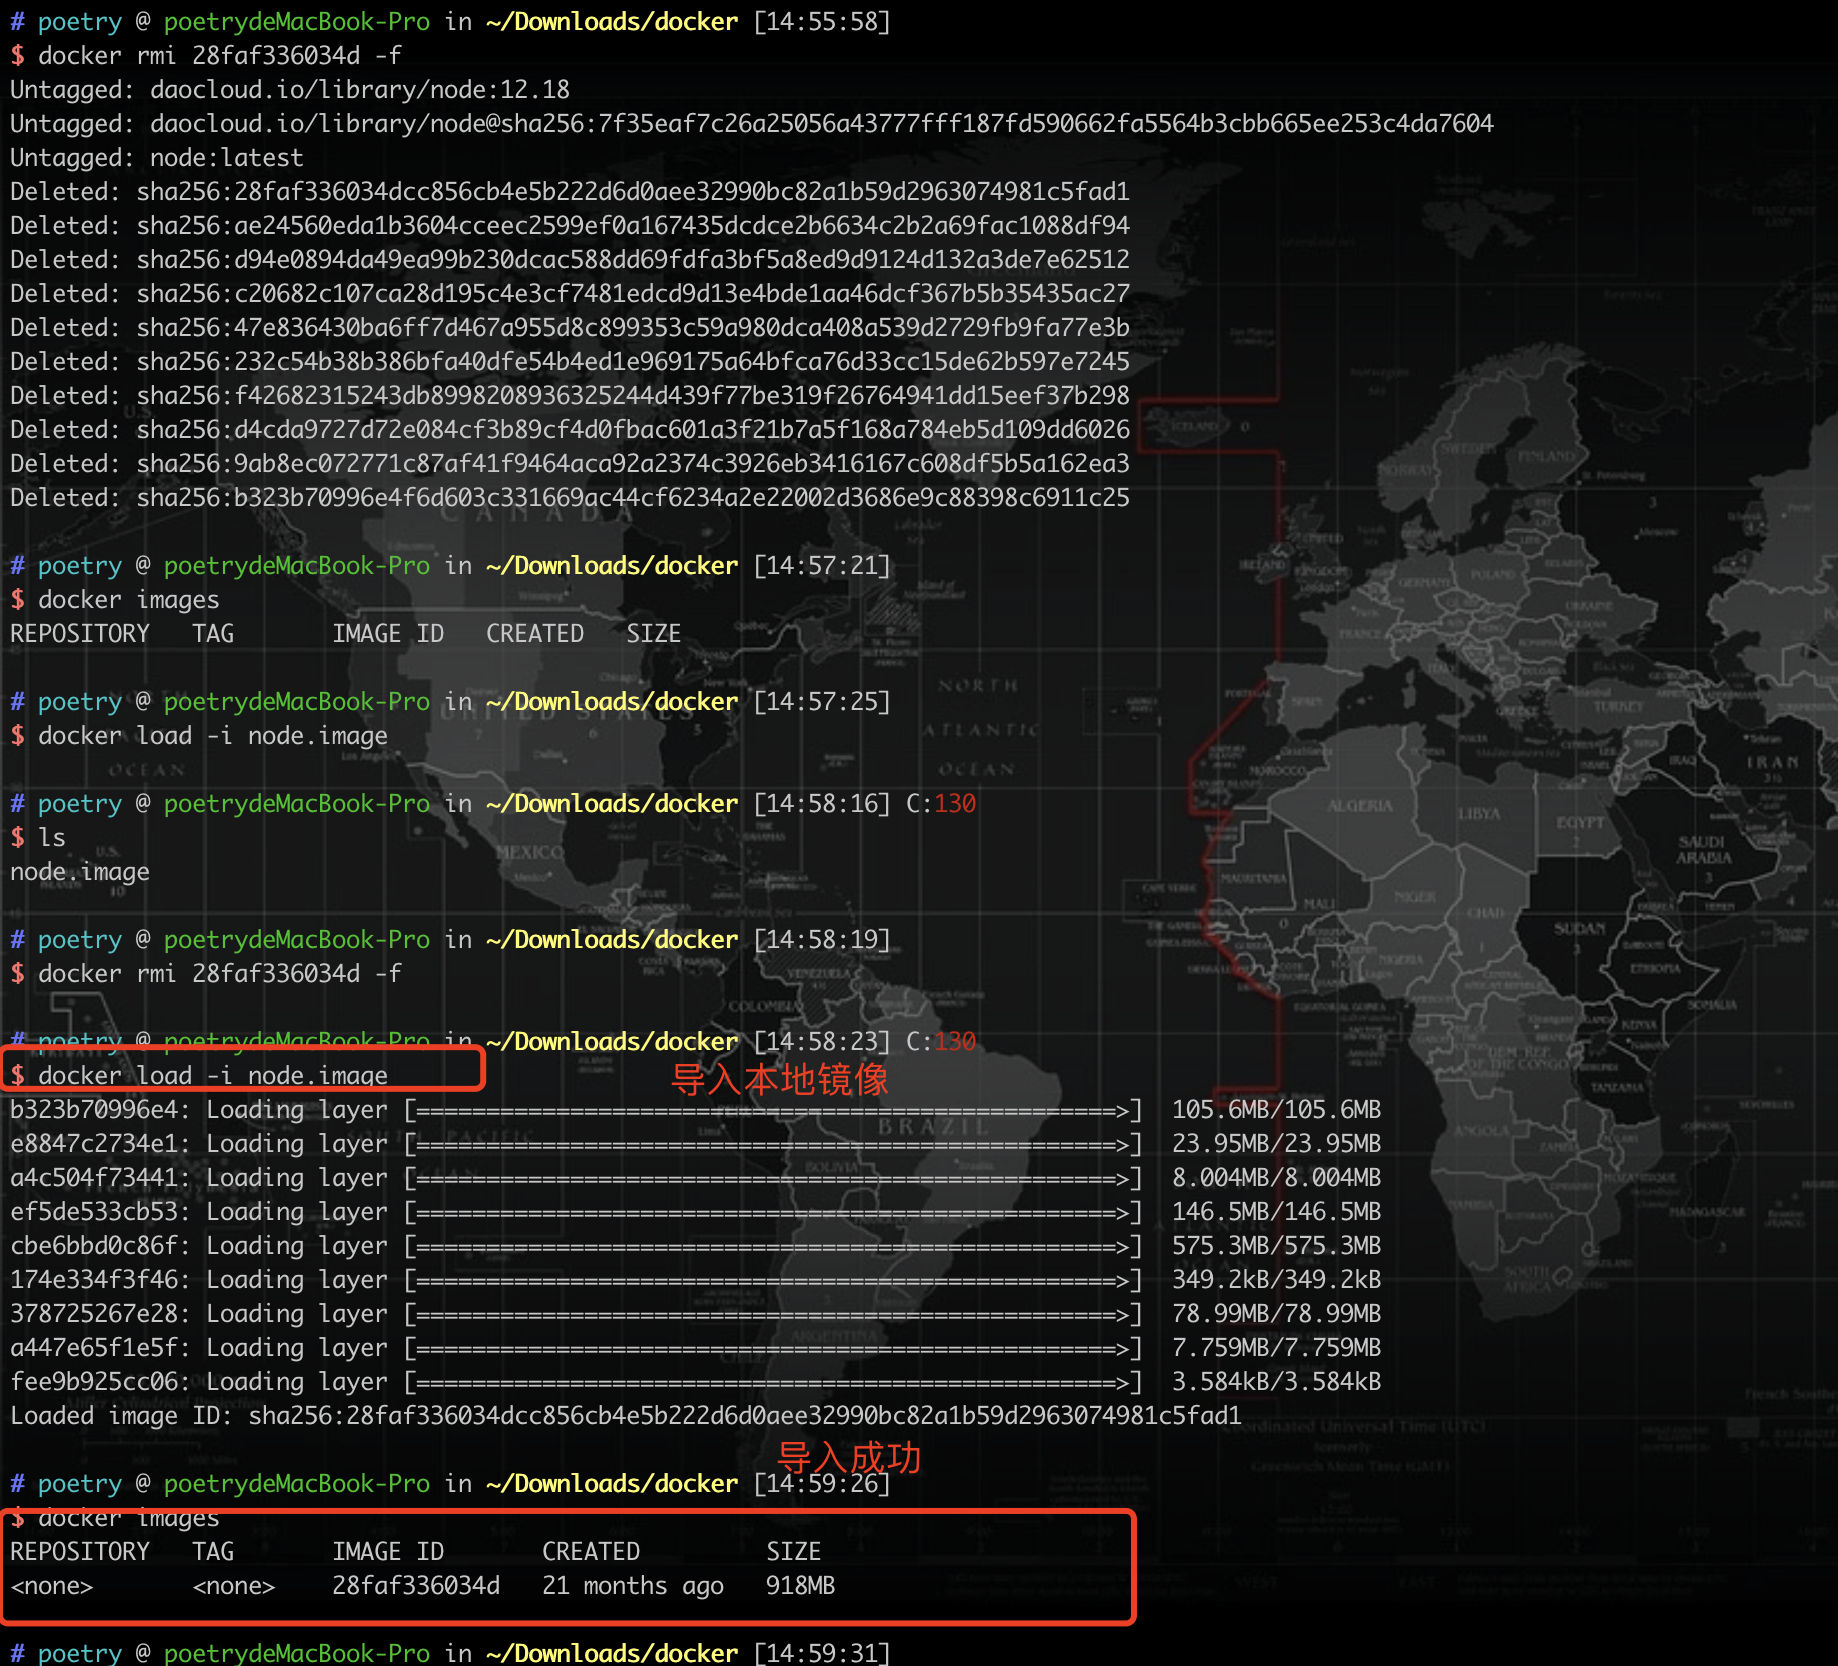
docker load 导入后镜像列表里出现一条无标签记录

然后再次重命名镜像即可

docker tag 28faf336034d node:v1.0(版本v1.0)
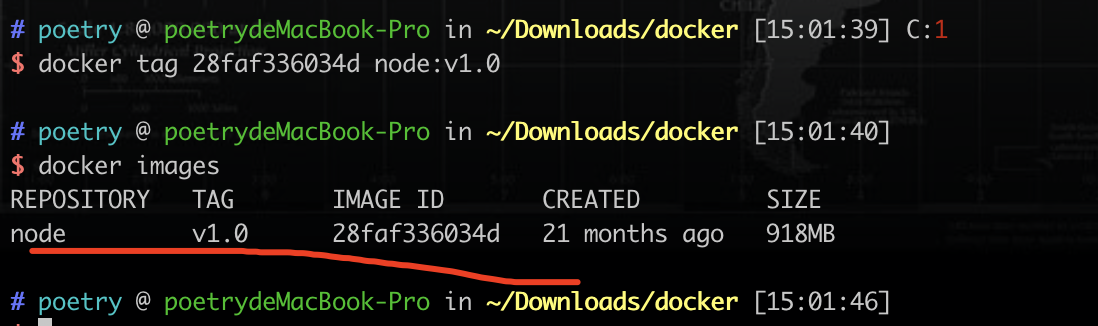
重新给导入的镜像打上 node:v1.0 标签

补一句时效性的话,Node 12 这条线早就结束维护了,当年写这篇的时候它还是可用的 LTS,今天再起新项目不要再挑这个版本,直接用当前的 LTS 大版本,安全补丁和 npm 生态兼容性都会好很多。下面所有出现 node:12.18 的地方,思路照搬,版本号换成你项目实际用的就行。

2、安装 MySQL 镜像

进入https://hub.daocloud.io 搜索mysql,切换到版本获取下载地址。
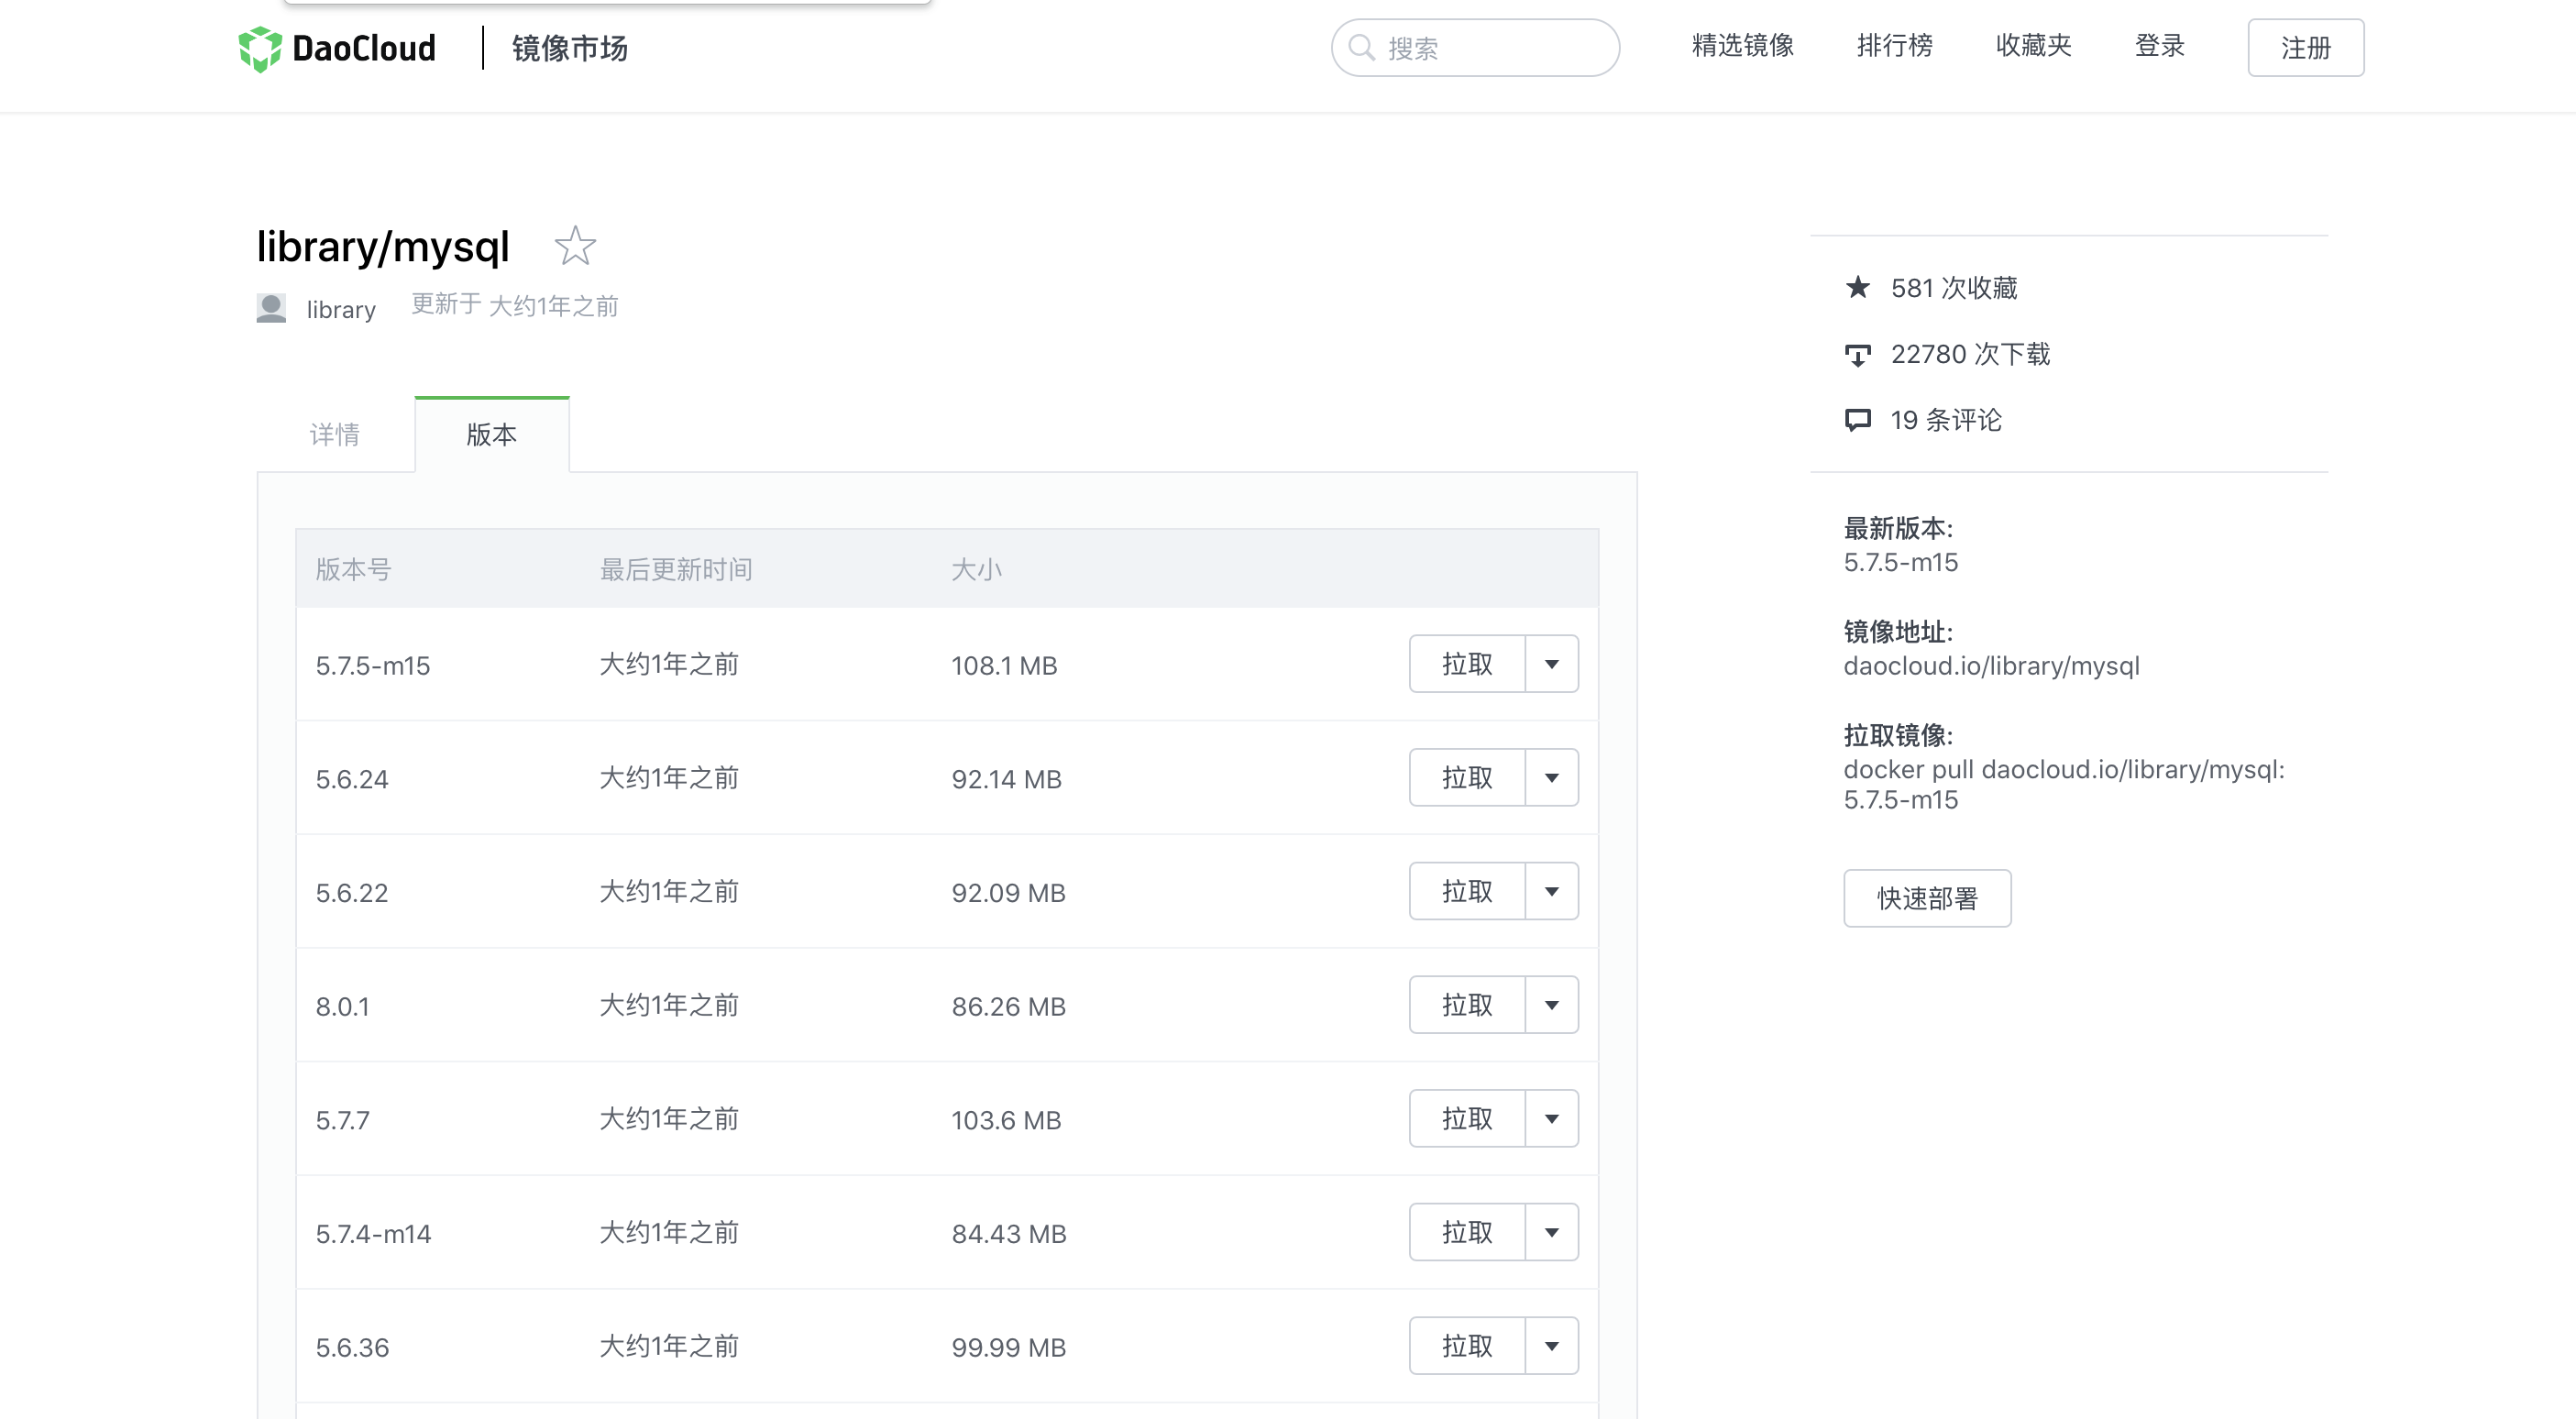
在镜像站搜索 mysql 并选择 8.0.20 版本

  • docker pull daocloud.io/library/mysql:8.0.20

拉取过程会一层一层往下走,每一层对应 Dockerfile 里的一条指令,已经存在的层会直接显示 Already exists 跳过。

docker pull 拉取 mysql 镜像的分层下载过程

启动MySQL镜像

这条命令里参数不少,逐个看一下就明白了。-p 3307:3306 是把宿主机的 3307 映射到容器里的 3306,之所以不用 3306 对 3306,是因为很多人本机早就装过一个 MySQL 占着 3306,撞端口会直接启动失败。-e 注入的环境变量是官方镜像约定好的,容器第一次启动时会读它来初始化 root 密码。

docker run -d(后台运行) -p 3307:3306(本机端口:MySQL运行端口) --name mysql(容器名称) -e MYSQL_ROOT_PASSWORD=123456(设置mysql密码) be0dbf01a0f3(mysql镜像ID)

这里有个坑要注意,MYSQL_ROOT_PASSWORD 只在数据目录为空、也就是容器第一次初始化的时候生效。如果你挂载了 volume 之后再改这个变量,密码是不会变的,重来一次得先把挂载出来的数据目录删干净。

查看当前正在运行的镜像

docker ps -a(正在运行和停止的镜像-a都可见)

不带 -a 只能看到运行中的容器,容器起不来直接挂掉的时候你会看到一片空白,误以为命令没执行。加上 -a 才能看到那条 Exited (1) 的记录,再去 docker logs 里翻原因。

docker ps -a 列出运行中和已退出的容器

删除容器

删除之前需要 stop,也就是 docker stop bac2692e2b9a(容器ID),运行中的容器是删不掉的。

docker rm bac2692e2b9a(容器ID:docker ps获取)

进入容器内部

docker exec -it bac2692e2b9a(容器ID) sh(指定进入方式)

-it 这两个参数经常被一起写,-i 保持标准输入打开,-t 分配一个伪终端,少了任意一个你都敲不了交互式命令。进去之后就是一个普通的 shell,可以直接 mysql -uroot -p 登进数据库确认服务是活的。
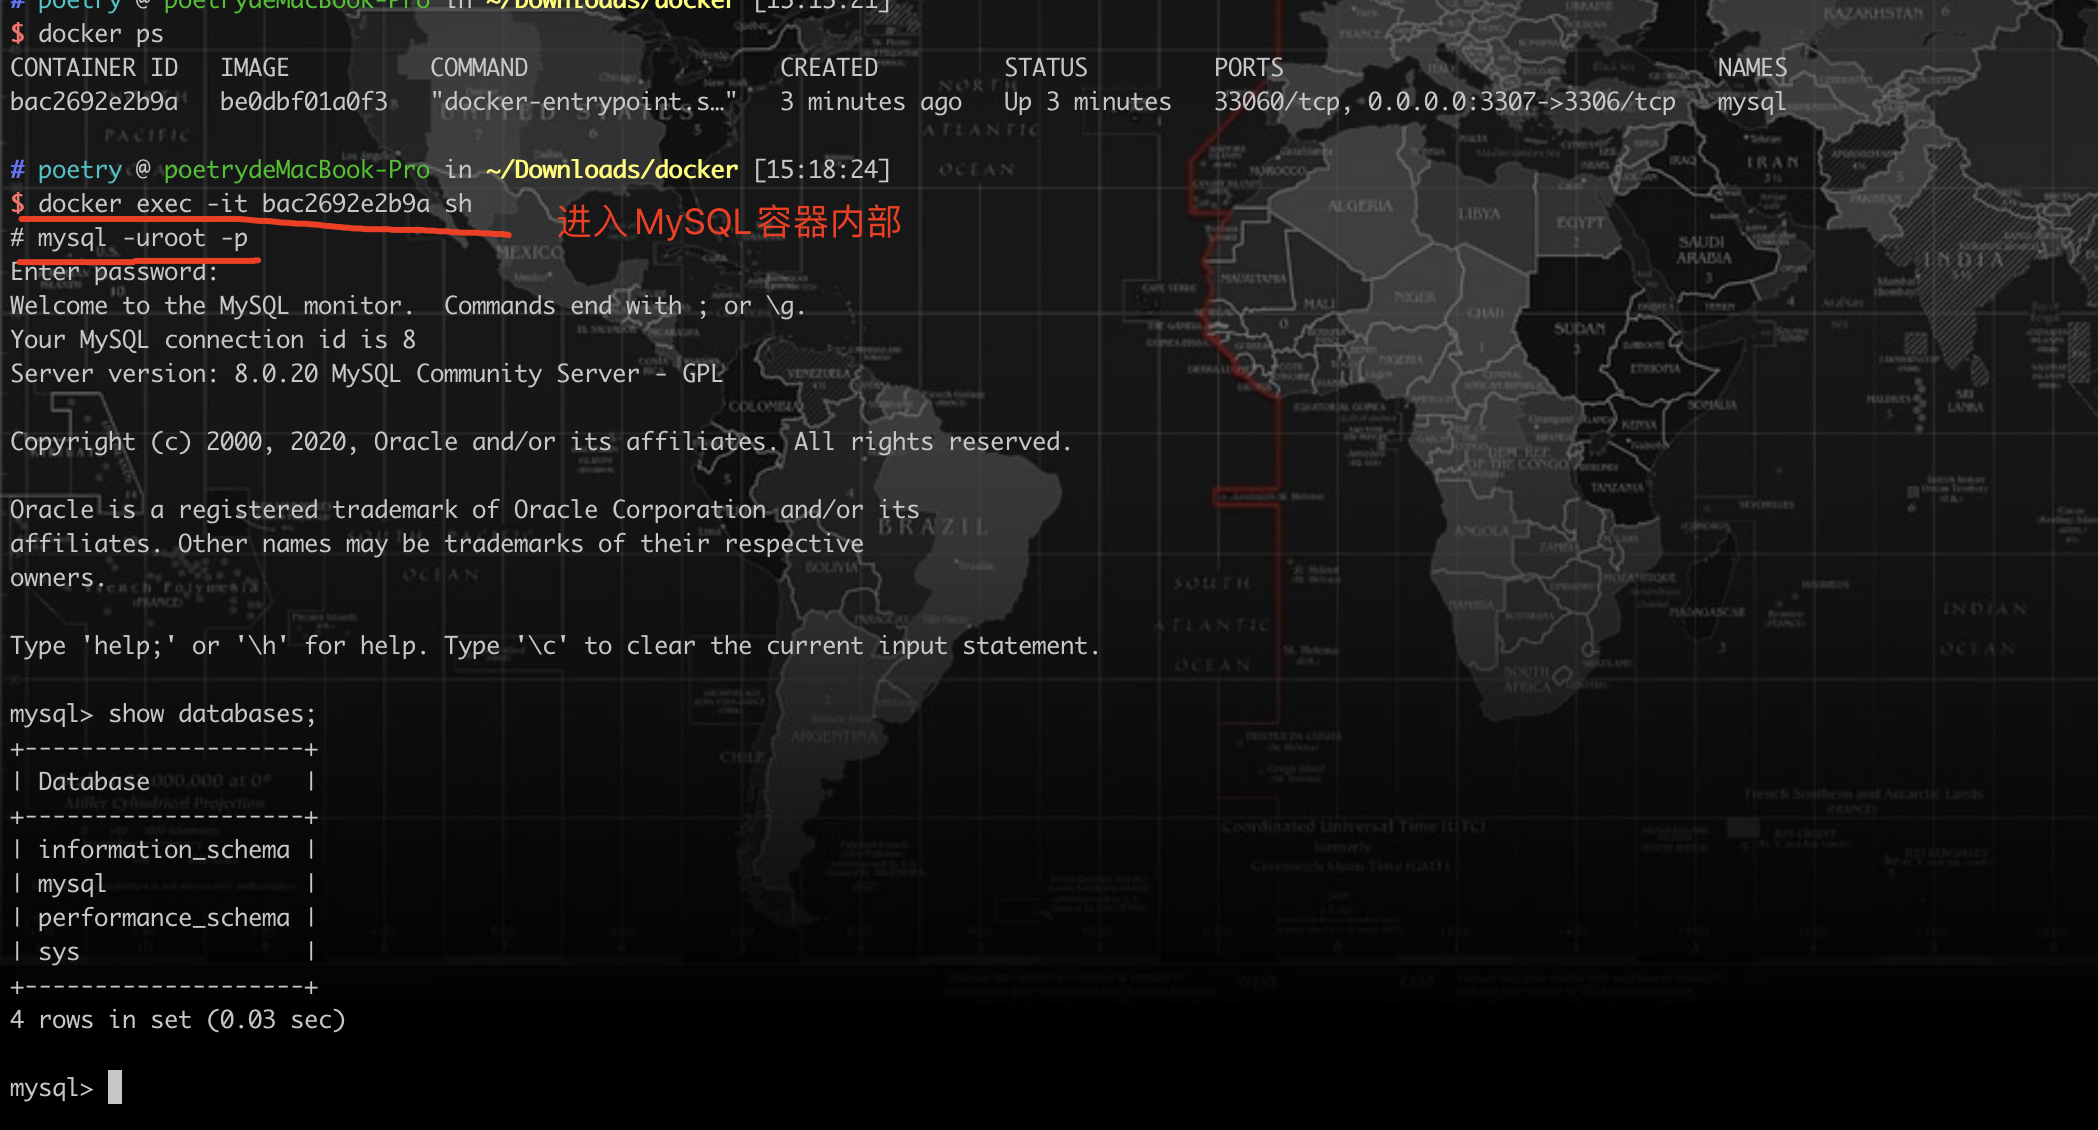
进入 MySQL 容器内部并登录数据库

容器内部能连上只说明服务起来了,还得验证端口映射有没有真的通到宿主机。我们使用Navicat新建一个连接测试一下,主机填 127.0.0.1,端口填映射出来的 3307。
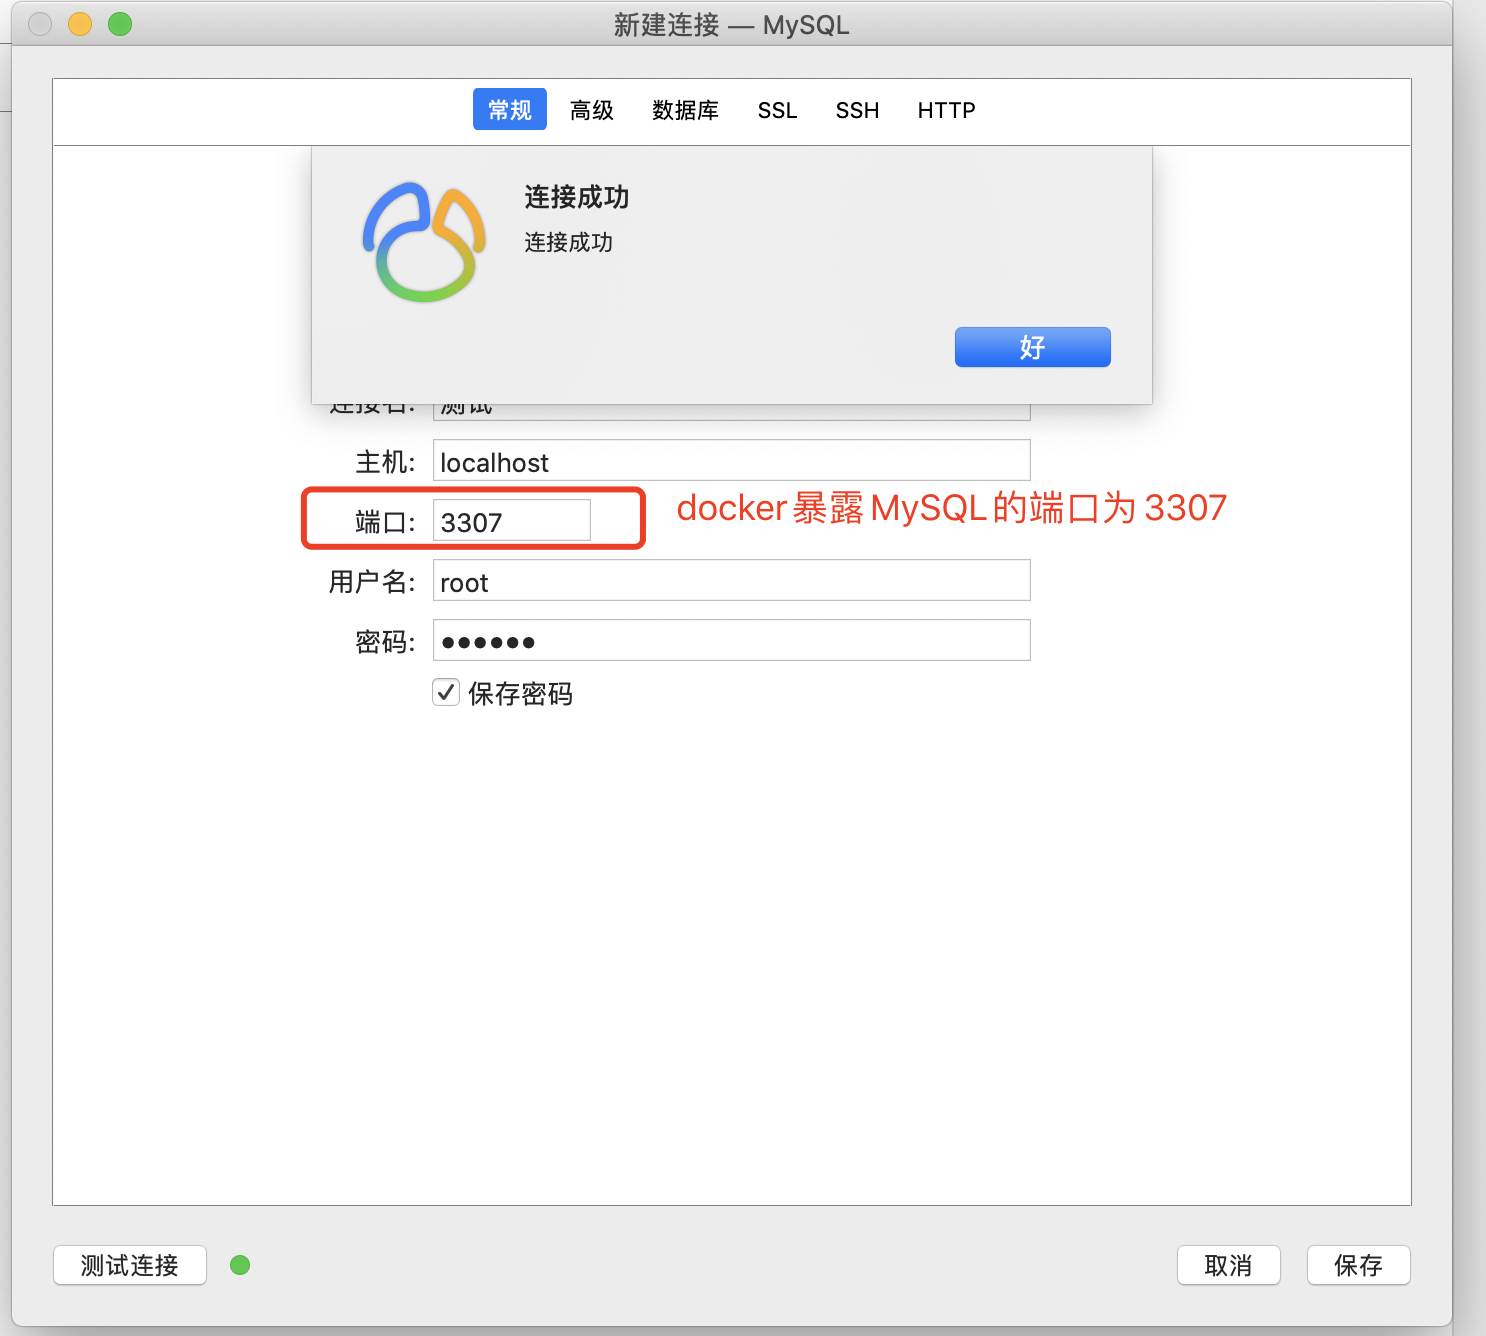
Navicat 通过 127.0.0.1:3307 成功连接容器里的 MySQL

能连上,说明我们使用docker安装MySQL的方式是没问题的。

查看MySQL容器日志

docker logs -f(持续跟随输出)  bac2692e2b9a(容器ID)

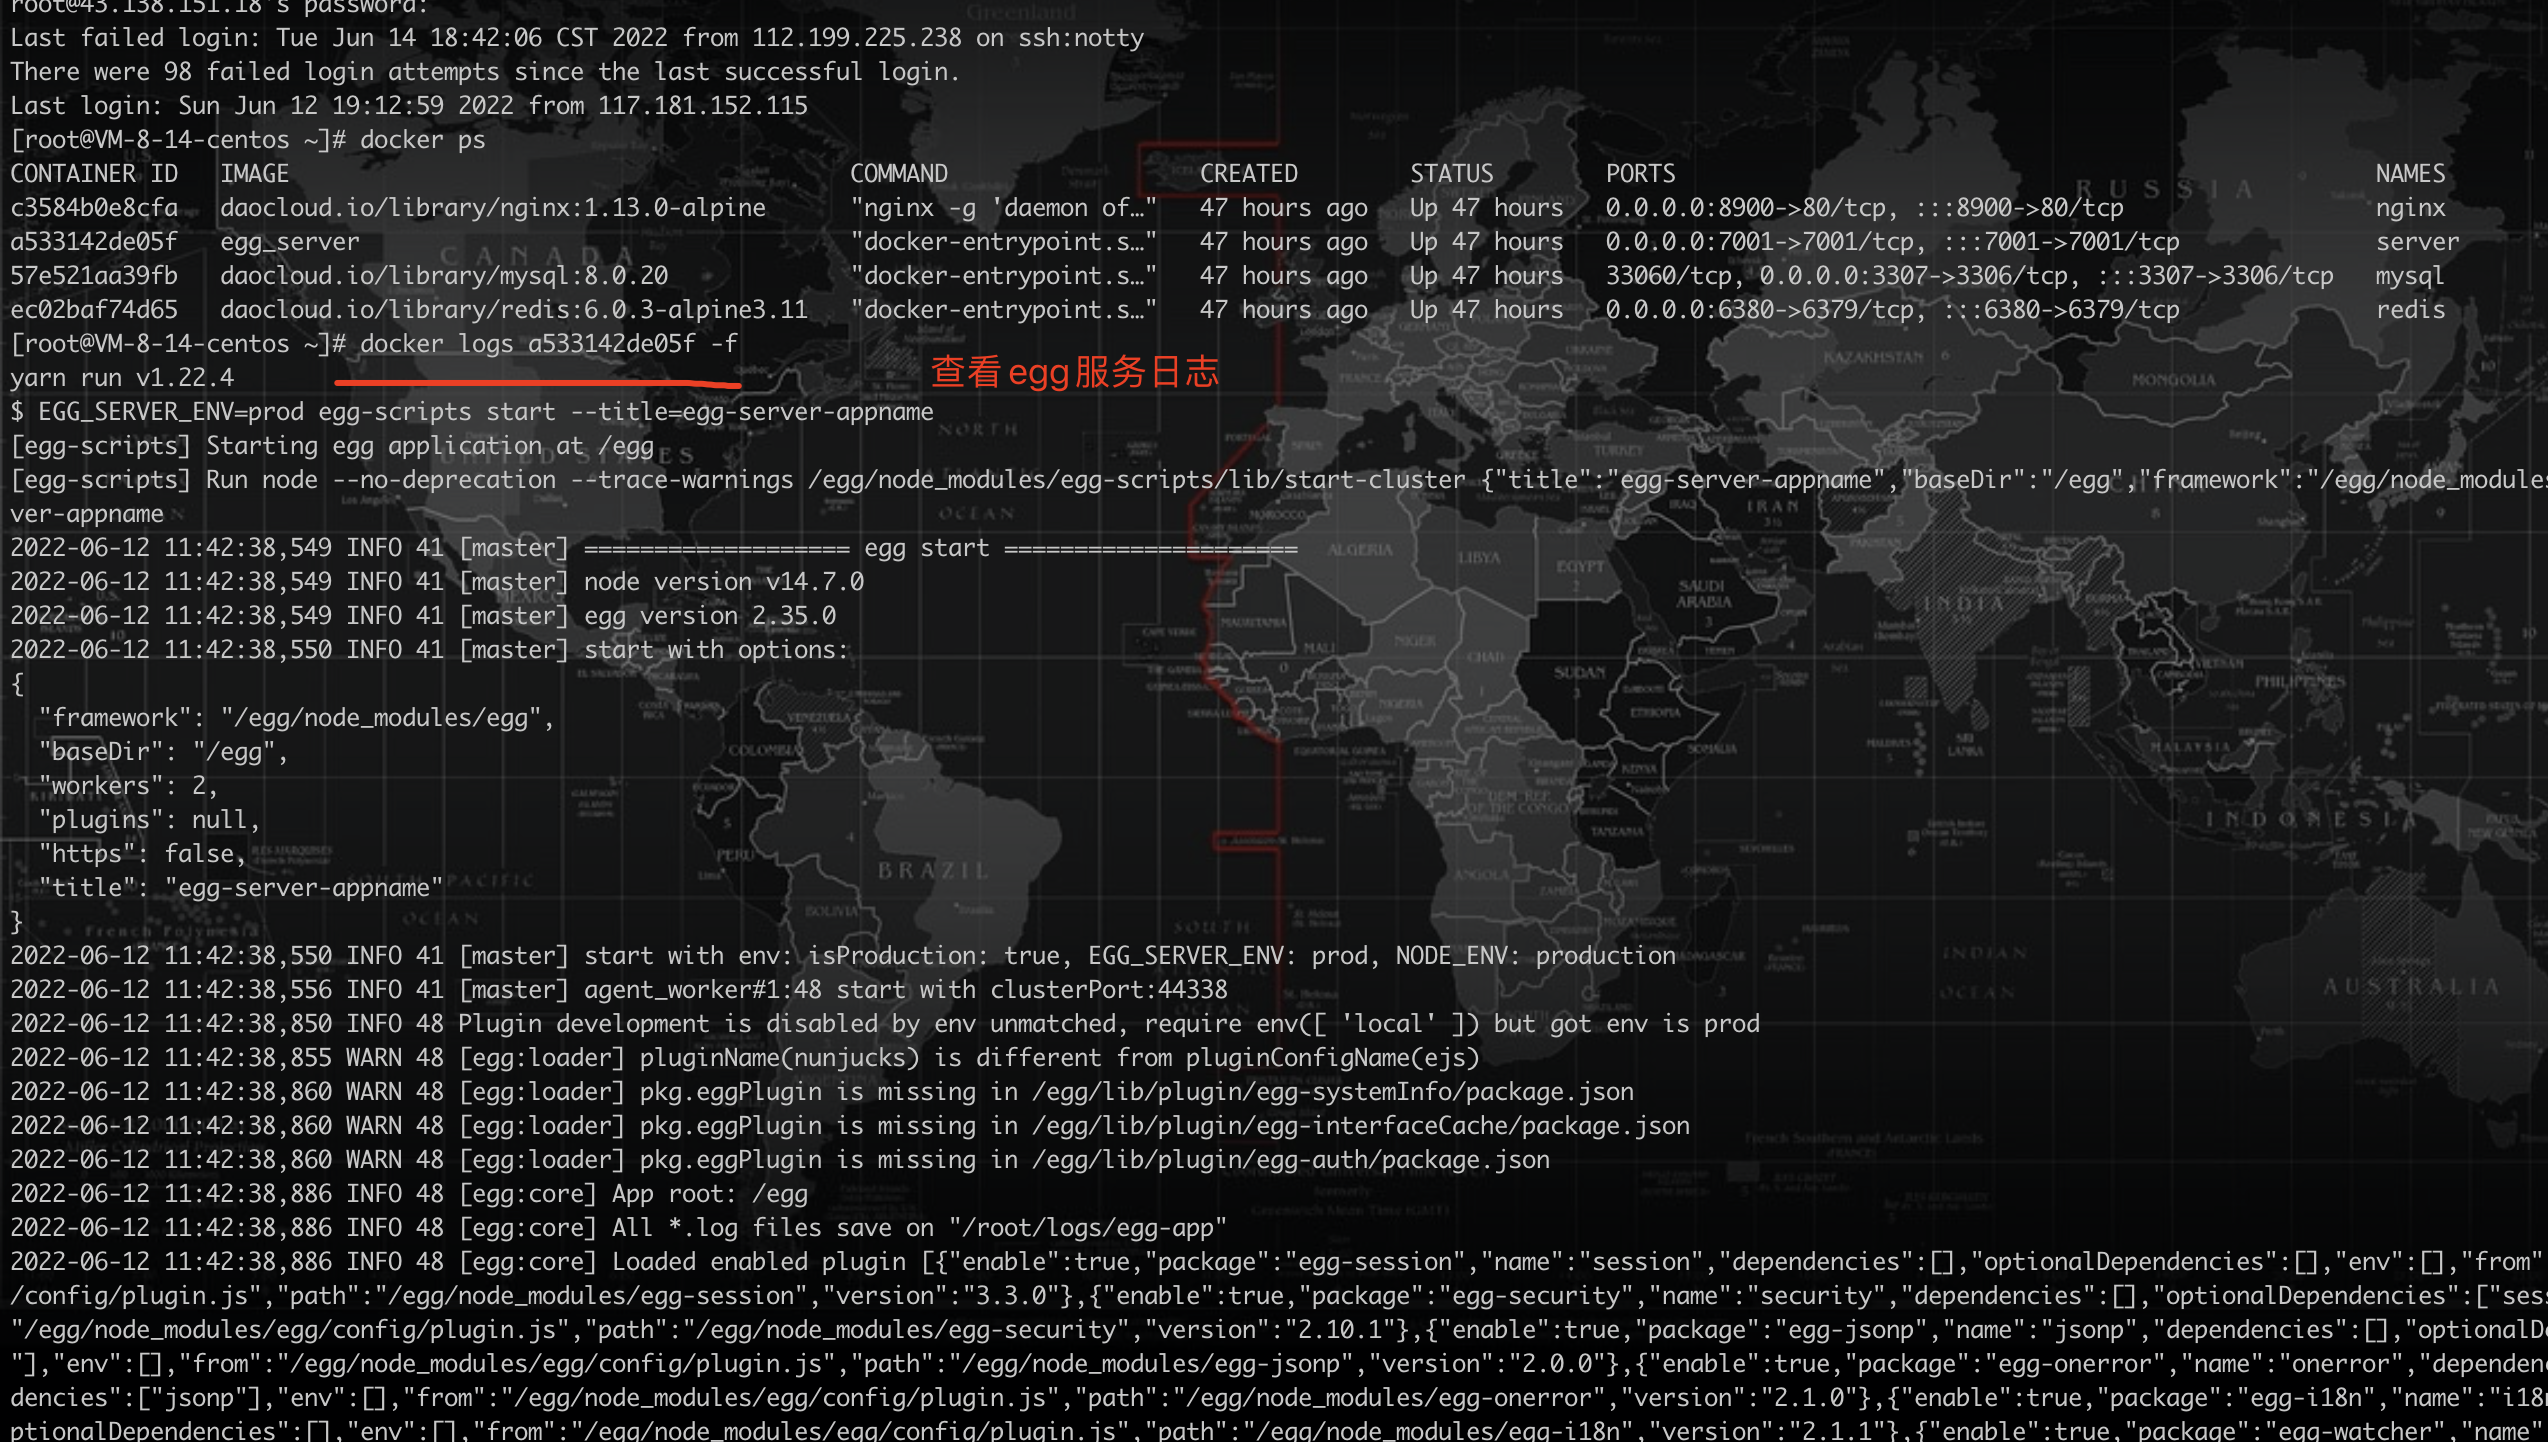
-f 是 follow,效果类似 tail -f,会挂在那里持续打印新日志,按 Ctrl + C 退出。如果你只想看最后几条,用的是 --tail 100 这个参数,两个别记混了。容器起不来的时候,答案九成写在这里面。

docker logs 输出 MySQL 容器的启动日志

重启容器

如果修改了容器配置,我们需要重新启动容器。

docker restart bac2692e2b9a(容器ID)

设置MySQL权限

mysql8.0后,需要设置,否则node连接不上

这个我踩过,而且排查了挺久。现象是 Navicat 能连、容器里能登,唯独 Egg 里的 mysql2 驱动报 ER_NOT_SUPPORTED_AUTH_MODE。原因是 MySQL 8 把默认认证插件从 mysql_native_password 换成了 caching_sha2_password,老一点的 Node 驱动不认这套握手。解法就是把 root 用户的认证方式改回去。

docker exec -it bac2692e2b9a sh

mysql -uroot -p
# 远程连接权限
GRANT ALL PRIVILEGES ON *.* TO 'root'@'%' WITH GRANT OPTION;

# 刷新权限
FLUSH PRIVILEGES;

# 更新加密规则
ALTER USER 'root'@'localhost' IDENTIFIED BY 'password' PASSWORD EXPIRE NEVER;

# 更新用户密码
ALTER USER 'root'@'localhost' IDENTIFIED WITH mysql_native_password BY '123456';

# 刷新权限
FLUSH PRIVILEGES;

五条命令跑完,FLUSH PRIVILEGES 让改动立刻生效,不用重启容器。
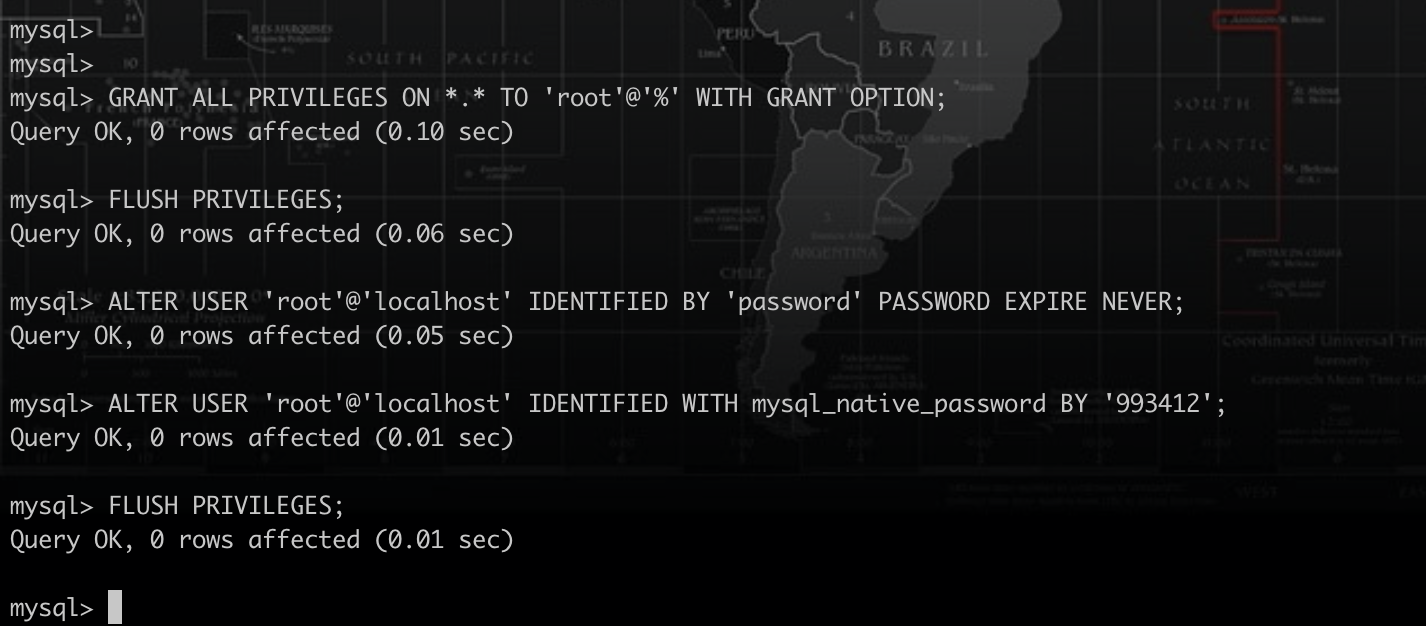
在容器内执行授权和修改加密规则的 SQL

这里我要补一个原文没写清楚的点。上面 GRANT 授权的对象是 'root'@'%',但两条 ALTER USER 改的却是 'root'@'localhost'。在 MySQL 里这是两个独立的账号记录,改了 localhost 的认证插件,对远程连接一点用都没有。官方镜像默认会创建 root@'%',所以从容器外面连进来的 Node 客户端,实际匹配到的是它。要真正解决驱动握手失败,得对 % 这条也执行一次。

ALTER USER 'root'@'%' IDENTIFIED WITH mysql_native_password BY '123456';
FLUSH PRIVILEGES;

再说一句现在的做法。mysql_native_password 属于向后兼容的老插件,安全性不如 caching_sha2_password,能升级驱动就优先升级驱动,mysql2 这些年早就支持新握手了,实在改不动依赖再退回来用这一招。

3、安装 redis 镜像

Egg 这边 Redis 主要拿来放会话和接口缓存,镜像挑的是 alpine 版本,体积小很多。
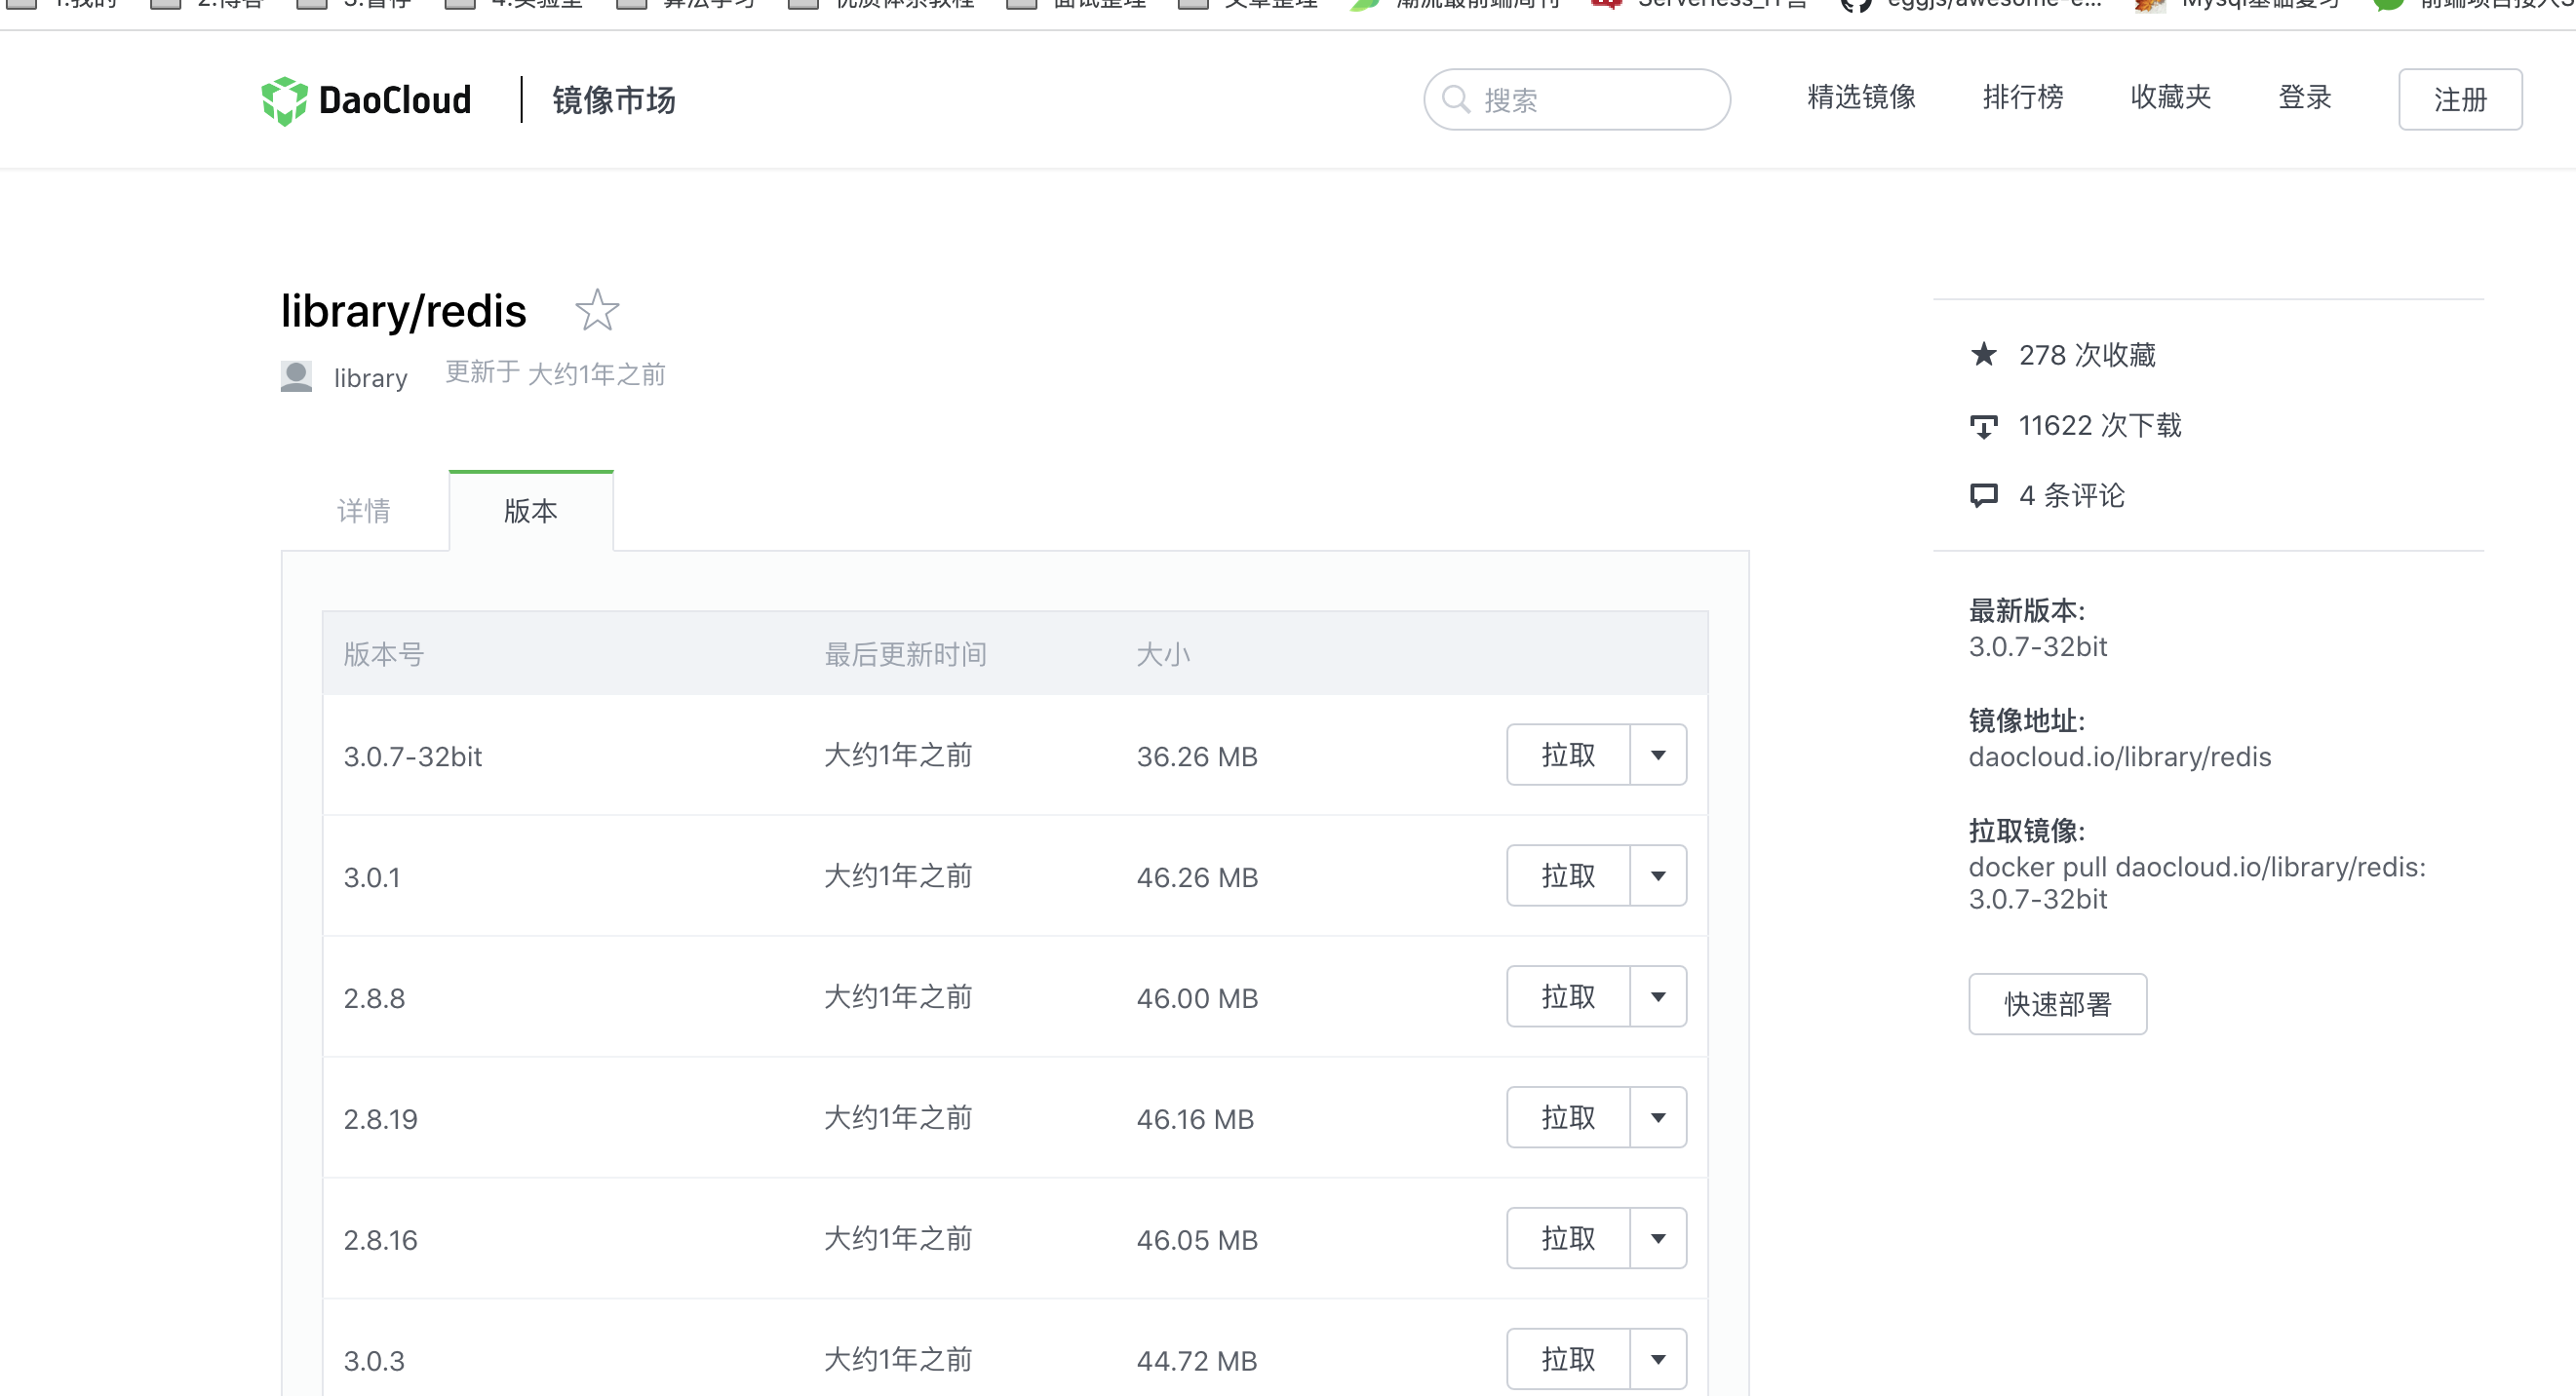
在镜像站选择 redis 6.0.3-alpine3.11 版本

docker pull daocloud.io/library/redis:6.0.3-alpine3.11

启动Redis镜像

注意 --requirepass 123456 的位置,它写在镜像 ID 后面。这个位置的参数不是给 docker run 的,而是覆盖容器启动命令、直接传给 redis-server 的,等价于在配置文件里写了一行 requirepass。很多人把它写到镜像 ID 前面,然后收到一个 unknown flag 的报错,问题就出在这。

docker run -d -p 6380:6379 --name redis 29c713657d31(镜像ID) --requirepass 123456(redis登录密码)

启动之后 docker ps 能看到 redis 容器在跑,端口映射是 6380 到 6379。
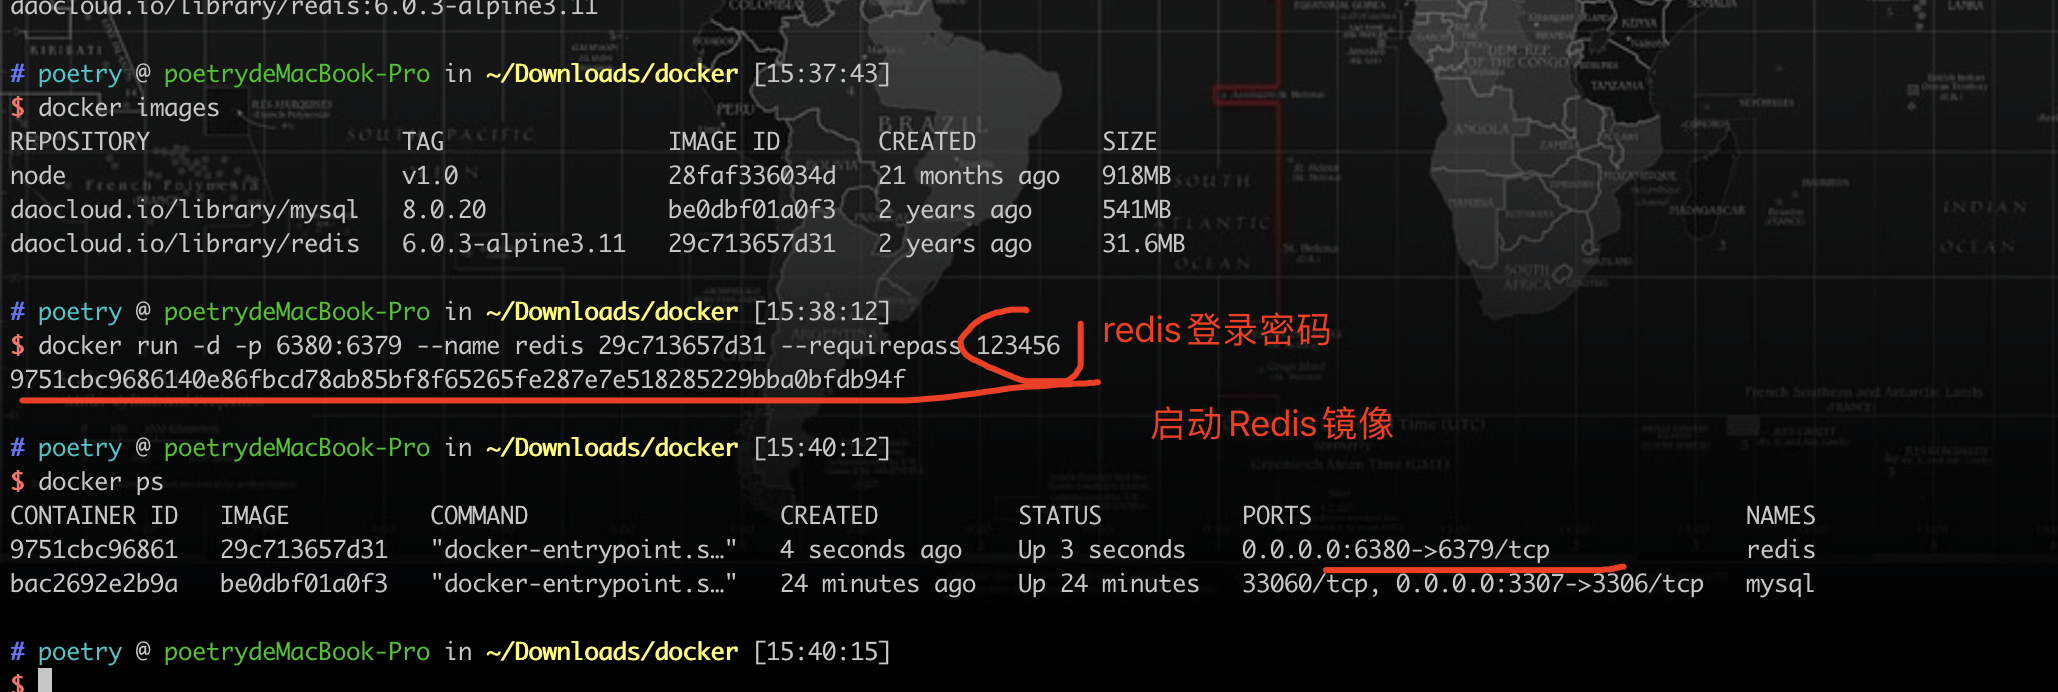
docker ps 中 redis 容器处于运行状态

密码也可以不在启动时传,或进入redis镜像后在输入密码,进到 redis-cli 里执行 auth 123456 是一样的效果。
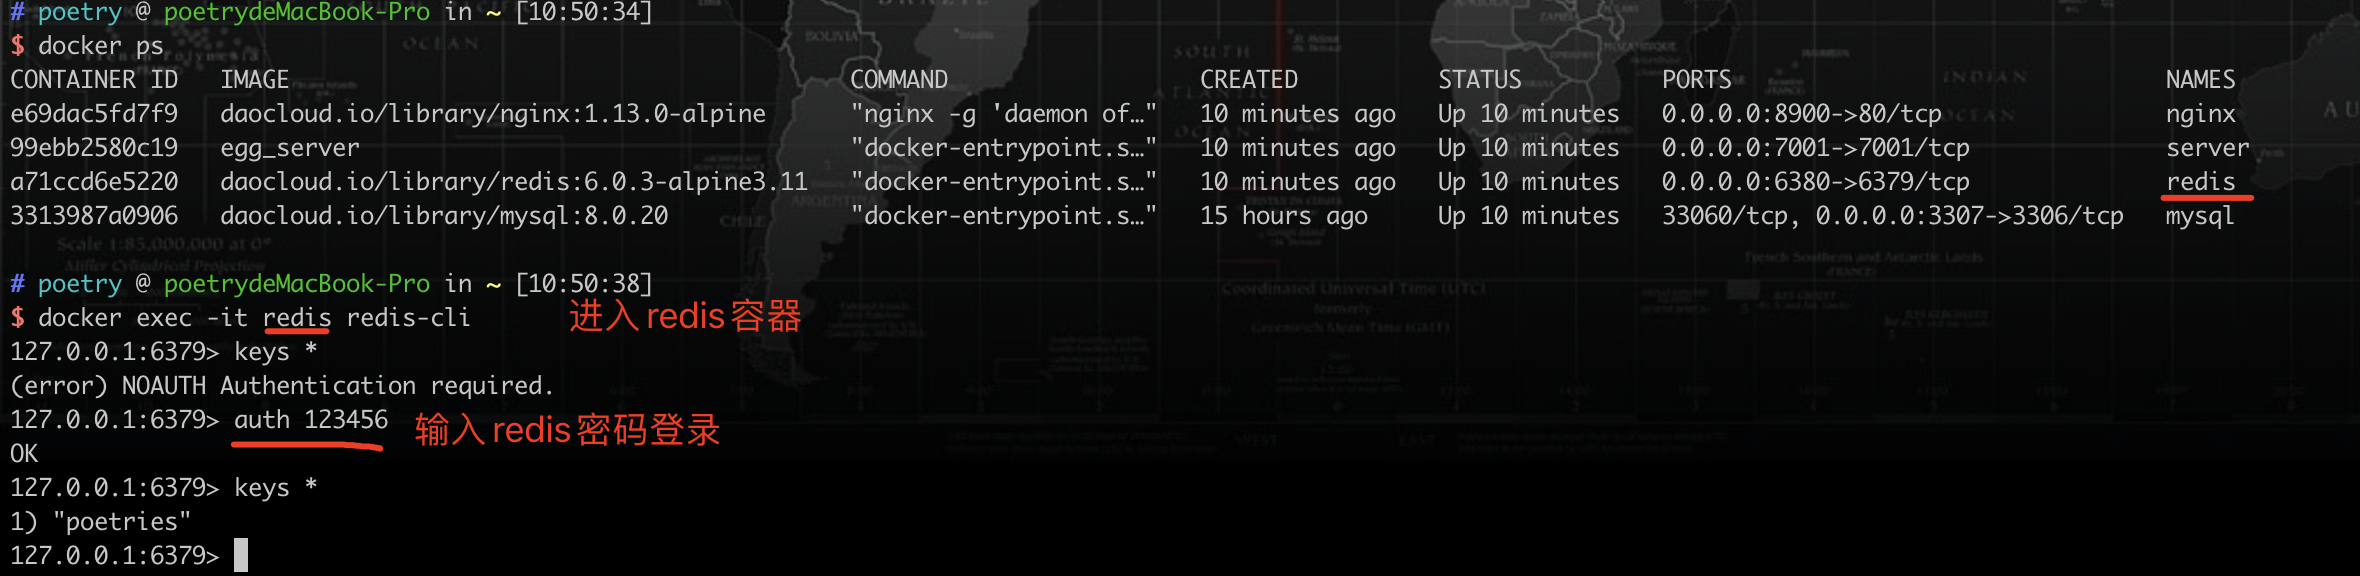
在 redis-cli 中用 auth 命令输入密码

交互式进入redis容器

docker exec -it 9751cbc96861(容器ID) sh

进去之后敲 redis-cli,随手 set 一个键再 get 出来,能读到就说明服务是健康的。
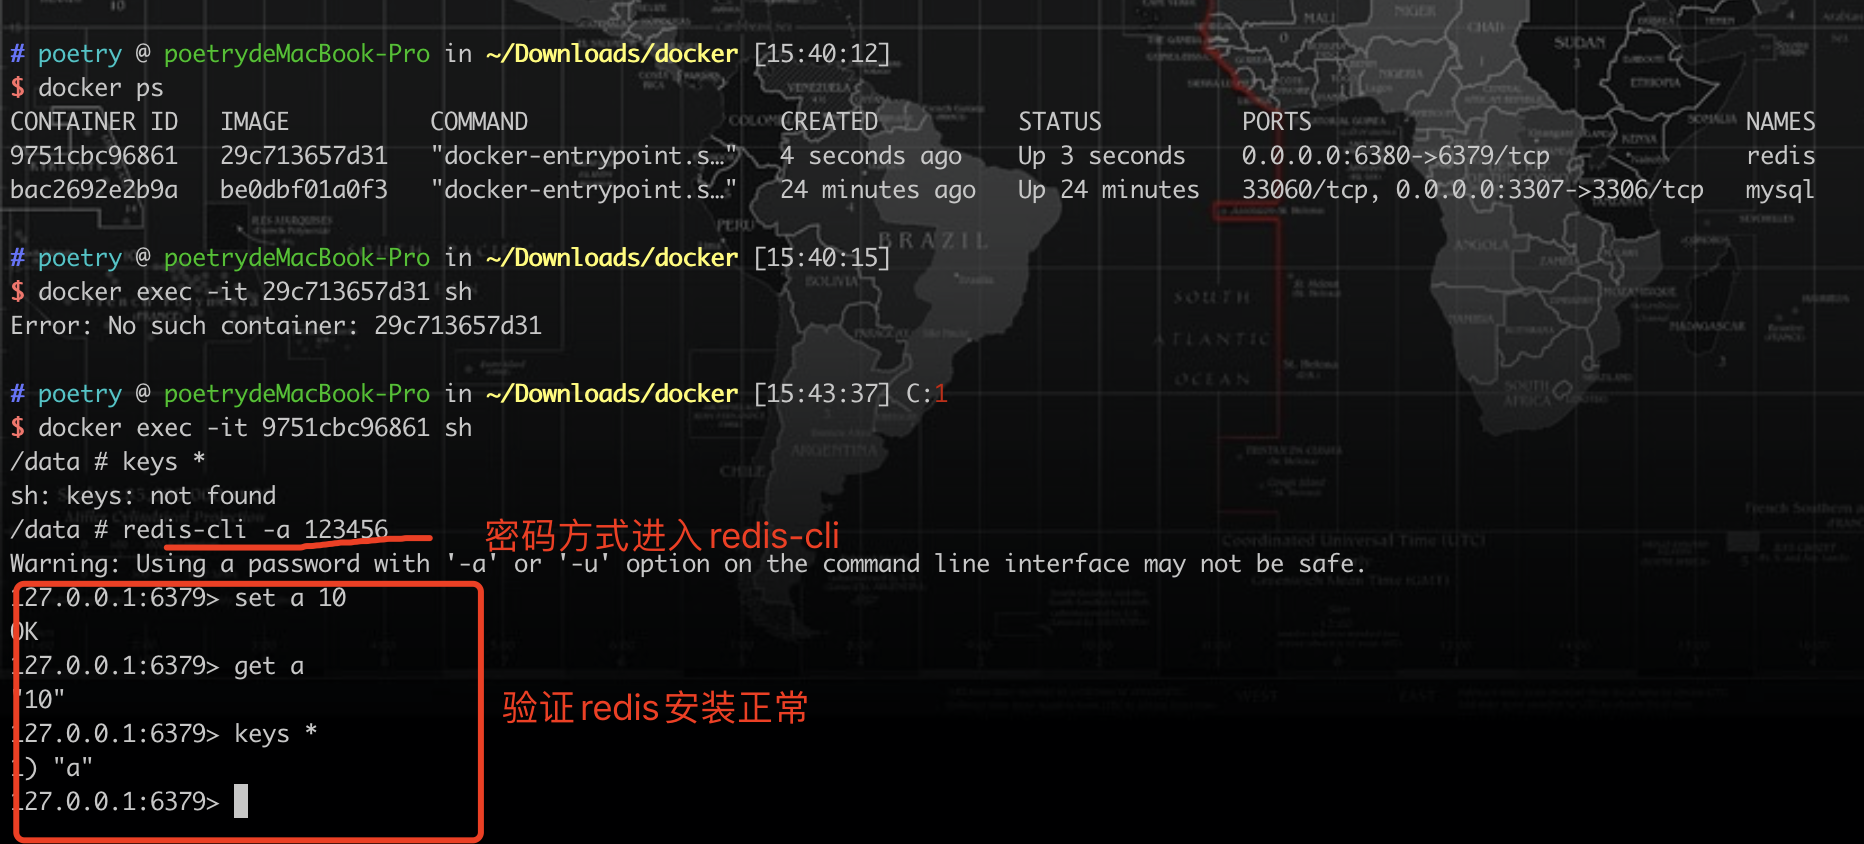
进入 redis 容器执行 redis-cli 验证读写

4、安装 Nginx 镜像

Nginx 在这套架构里承担两件事,托管前端打包出来的静态文件,以及把 /api 这类路径反向代理到 Egg 的 7001 端口。
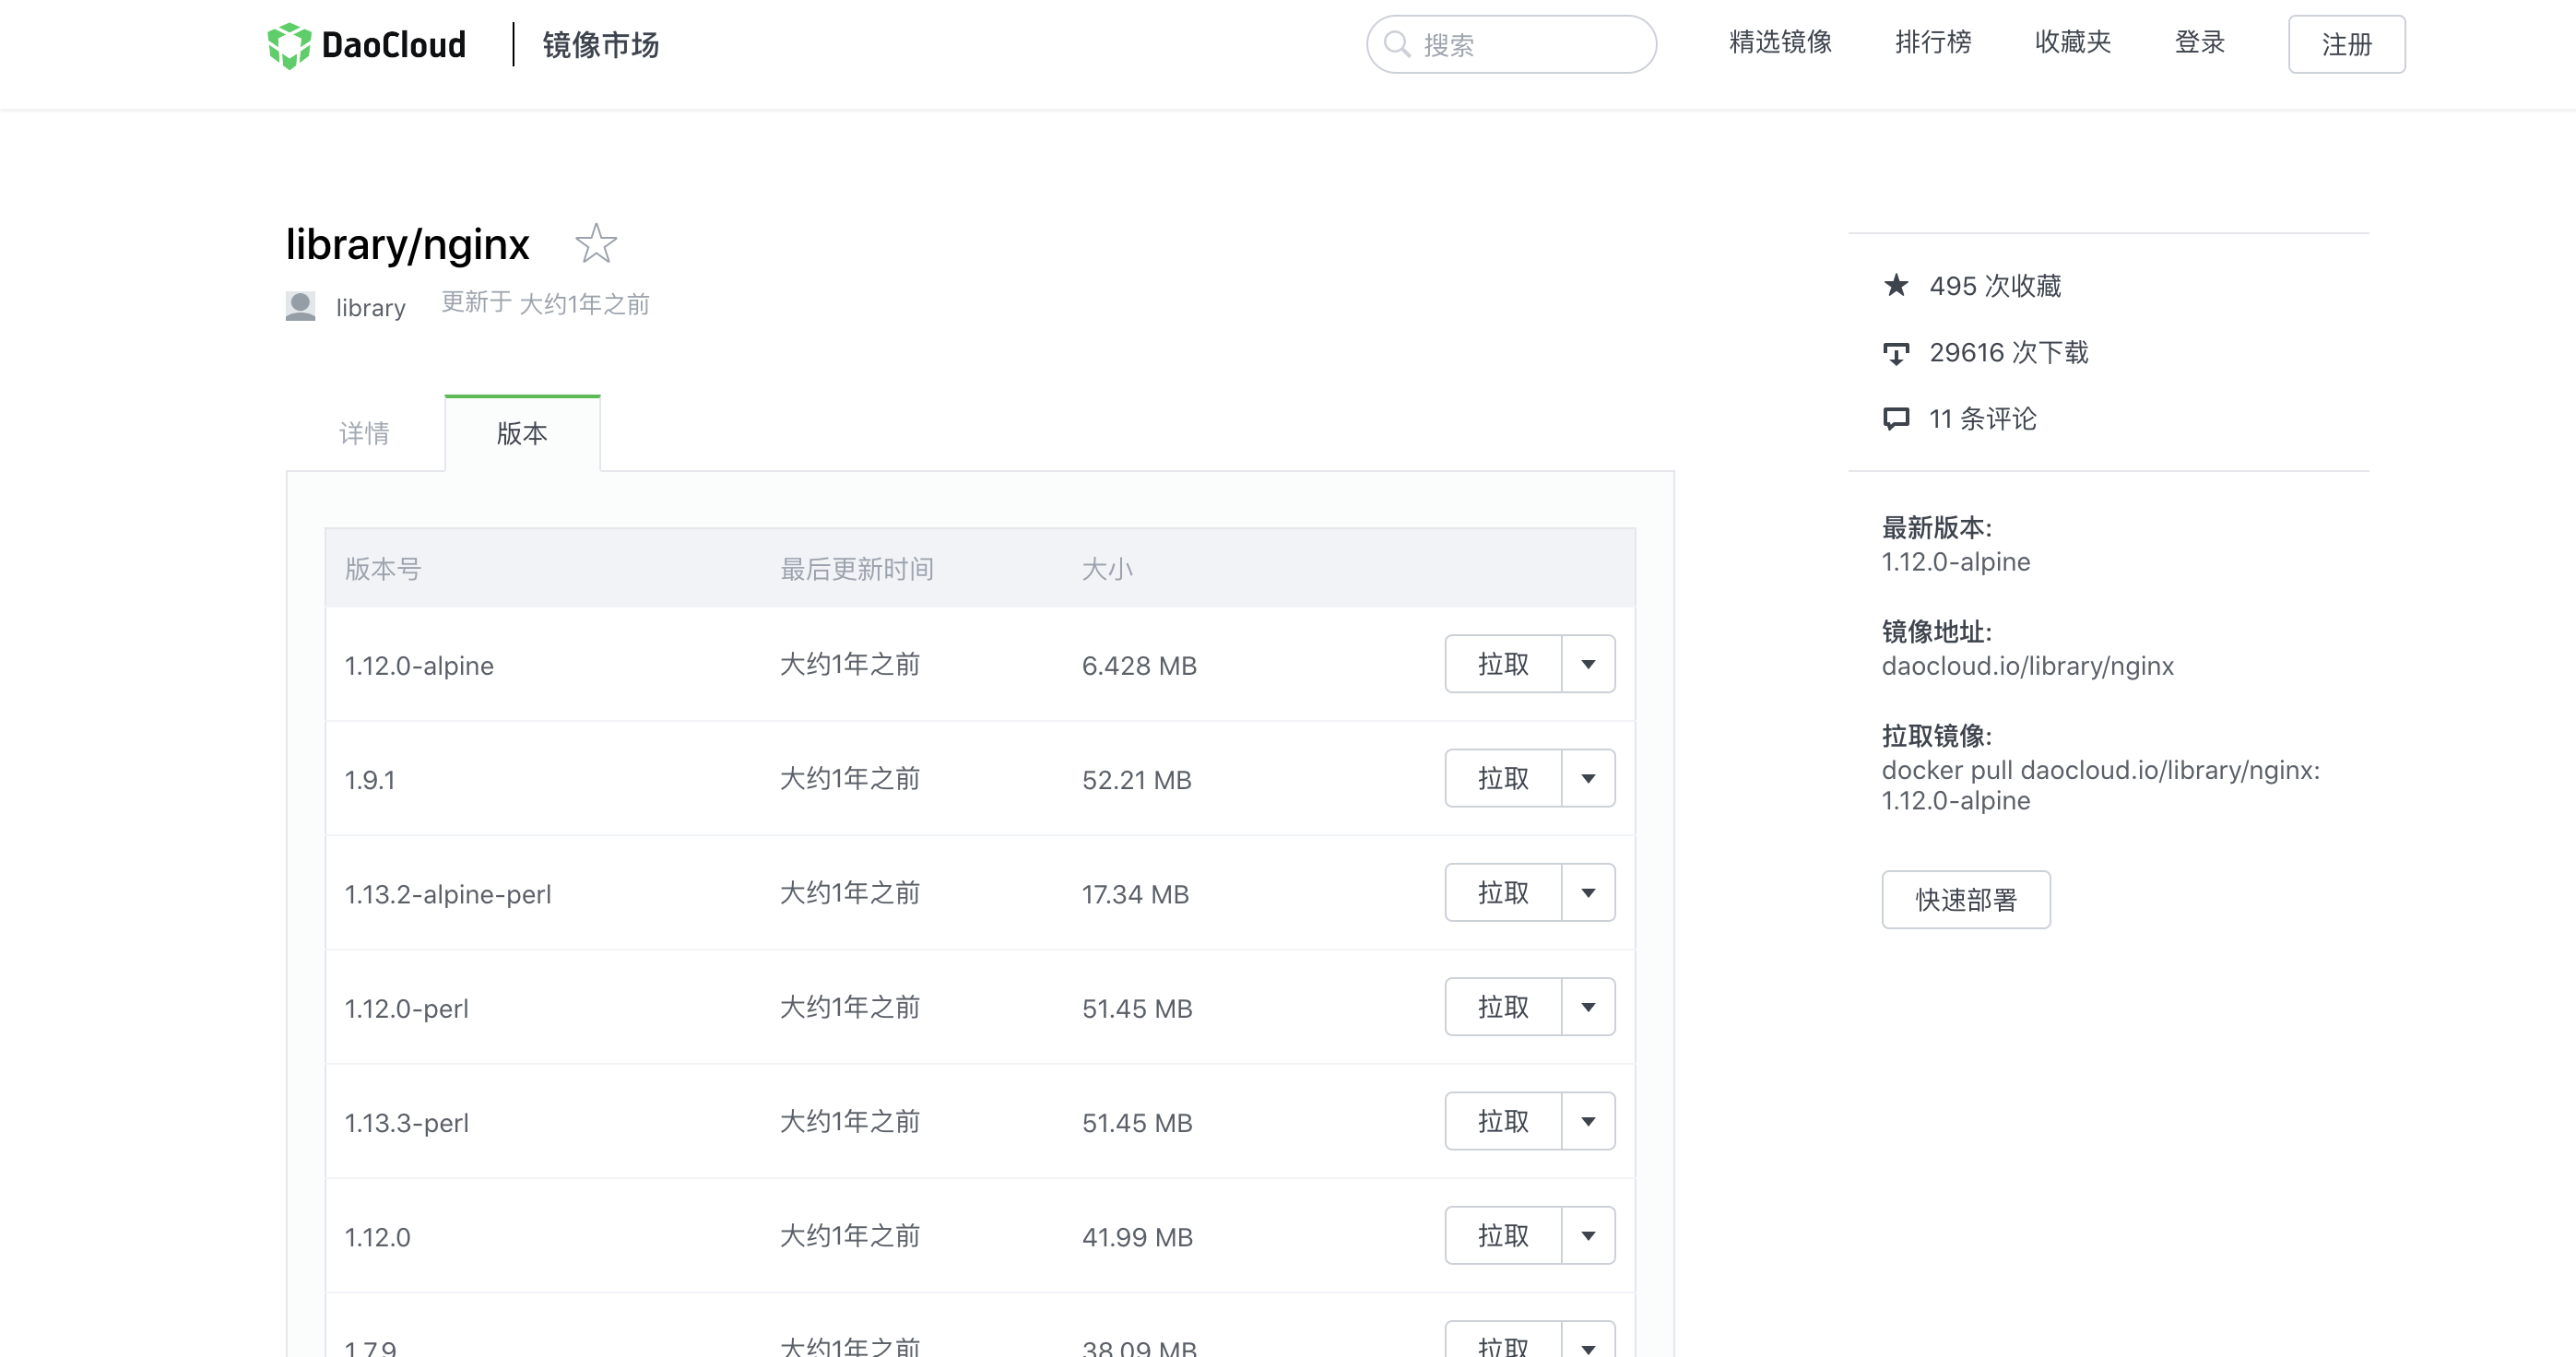
在镜像站选择 nginx 1.13.0-alpine 版本

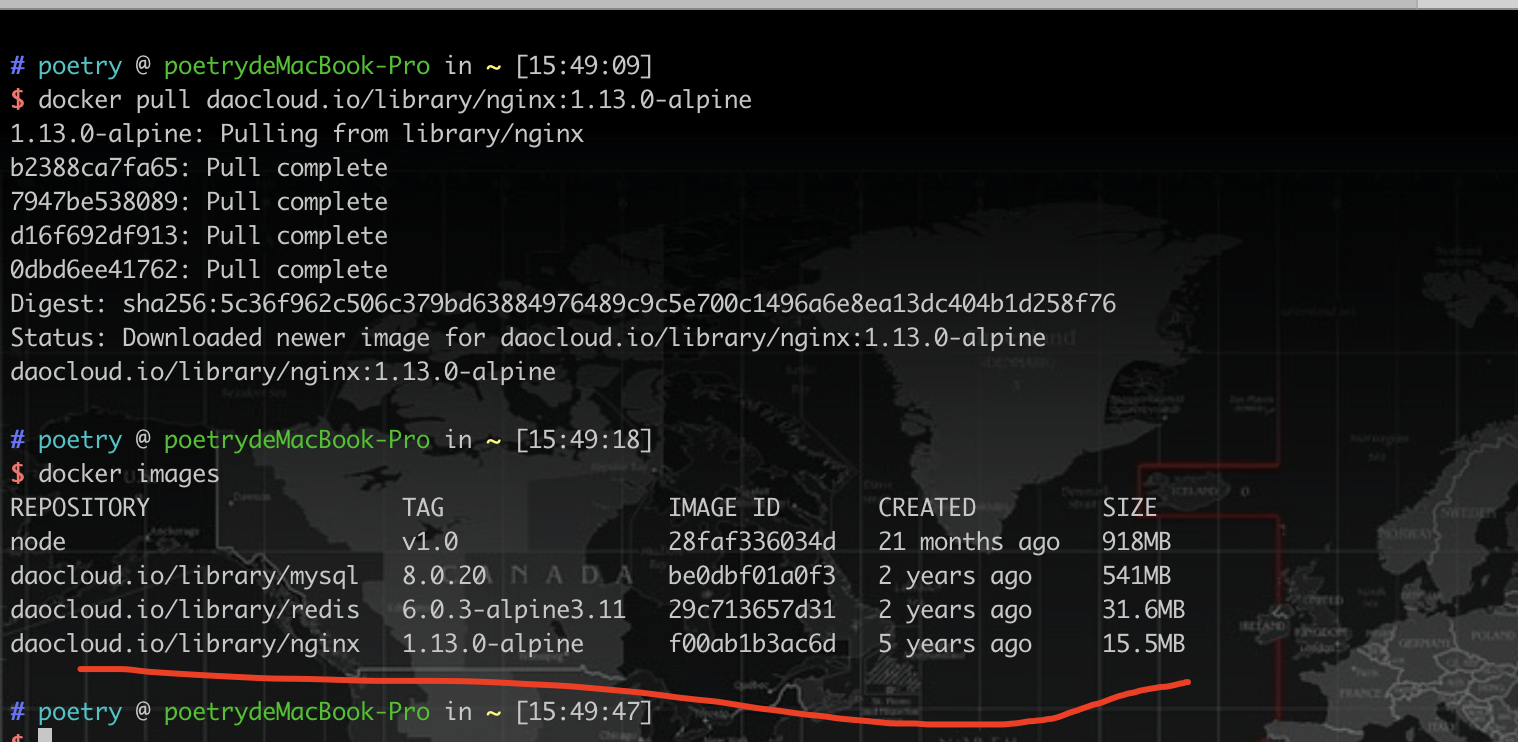
docker pull daocloud.io/library/nginx:1.13.0-alpine

nginx 镜像拉取完成

启动Nginx镜像

Nginx 这条 docker run 比前面几个都长,因为它挂了四个目录出来。这么做的理由很实际,容器是随时可以销毁重建的,配置和静态文件如果只存在容器里,容器一删全没了。挂载到宿主机之后,改配置、换前端产物都在宿主机上操作,容器本身保持干净。

服务器上启动

docker run --name nginx(起一个容器名称) -d(后台运行) -p 80:80(本机:容器) -v(映射Nginx容器的运行目录本机) /root/nginx/log:/var/log/nginx(本机目录:容器目录) -v /root/nginx/conf/nginx.conf:/etc/nginx/nginx.conf(本机目录:容器内nginx配置所在目录) -v /root/nginx/conf.d:/etc/nginx/conf.d -v /root/nginx/html:/usr/share/nginx/html f00ab1b3ac6d(nginx镜像ID)

本地电脑启动

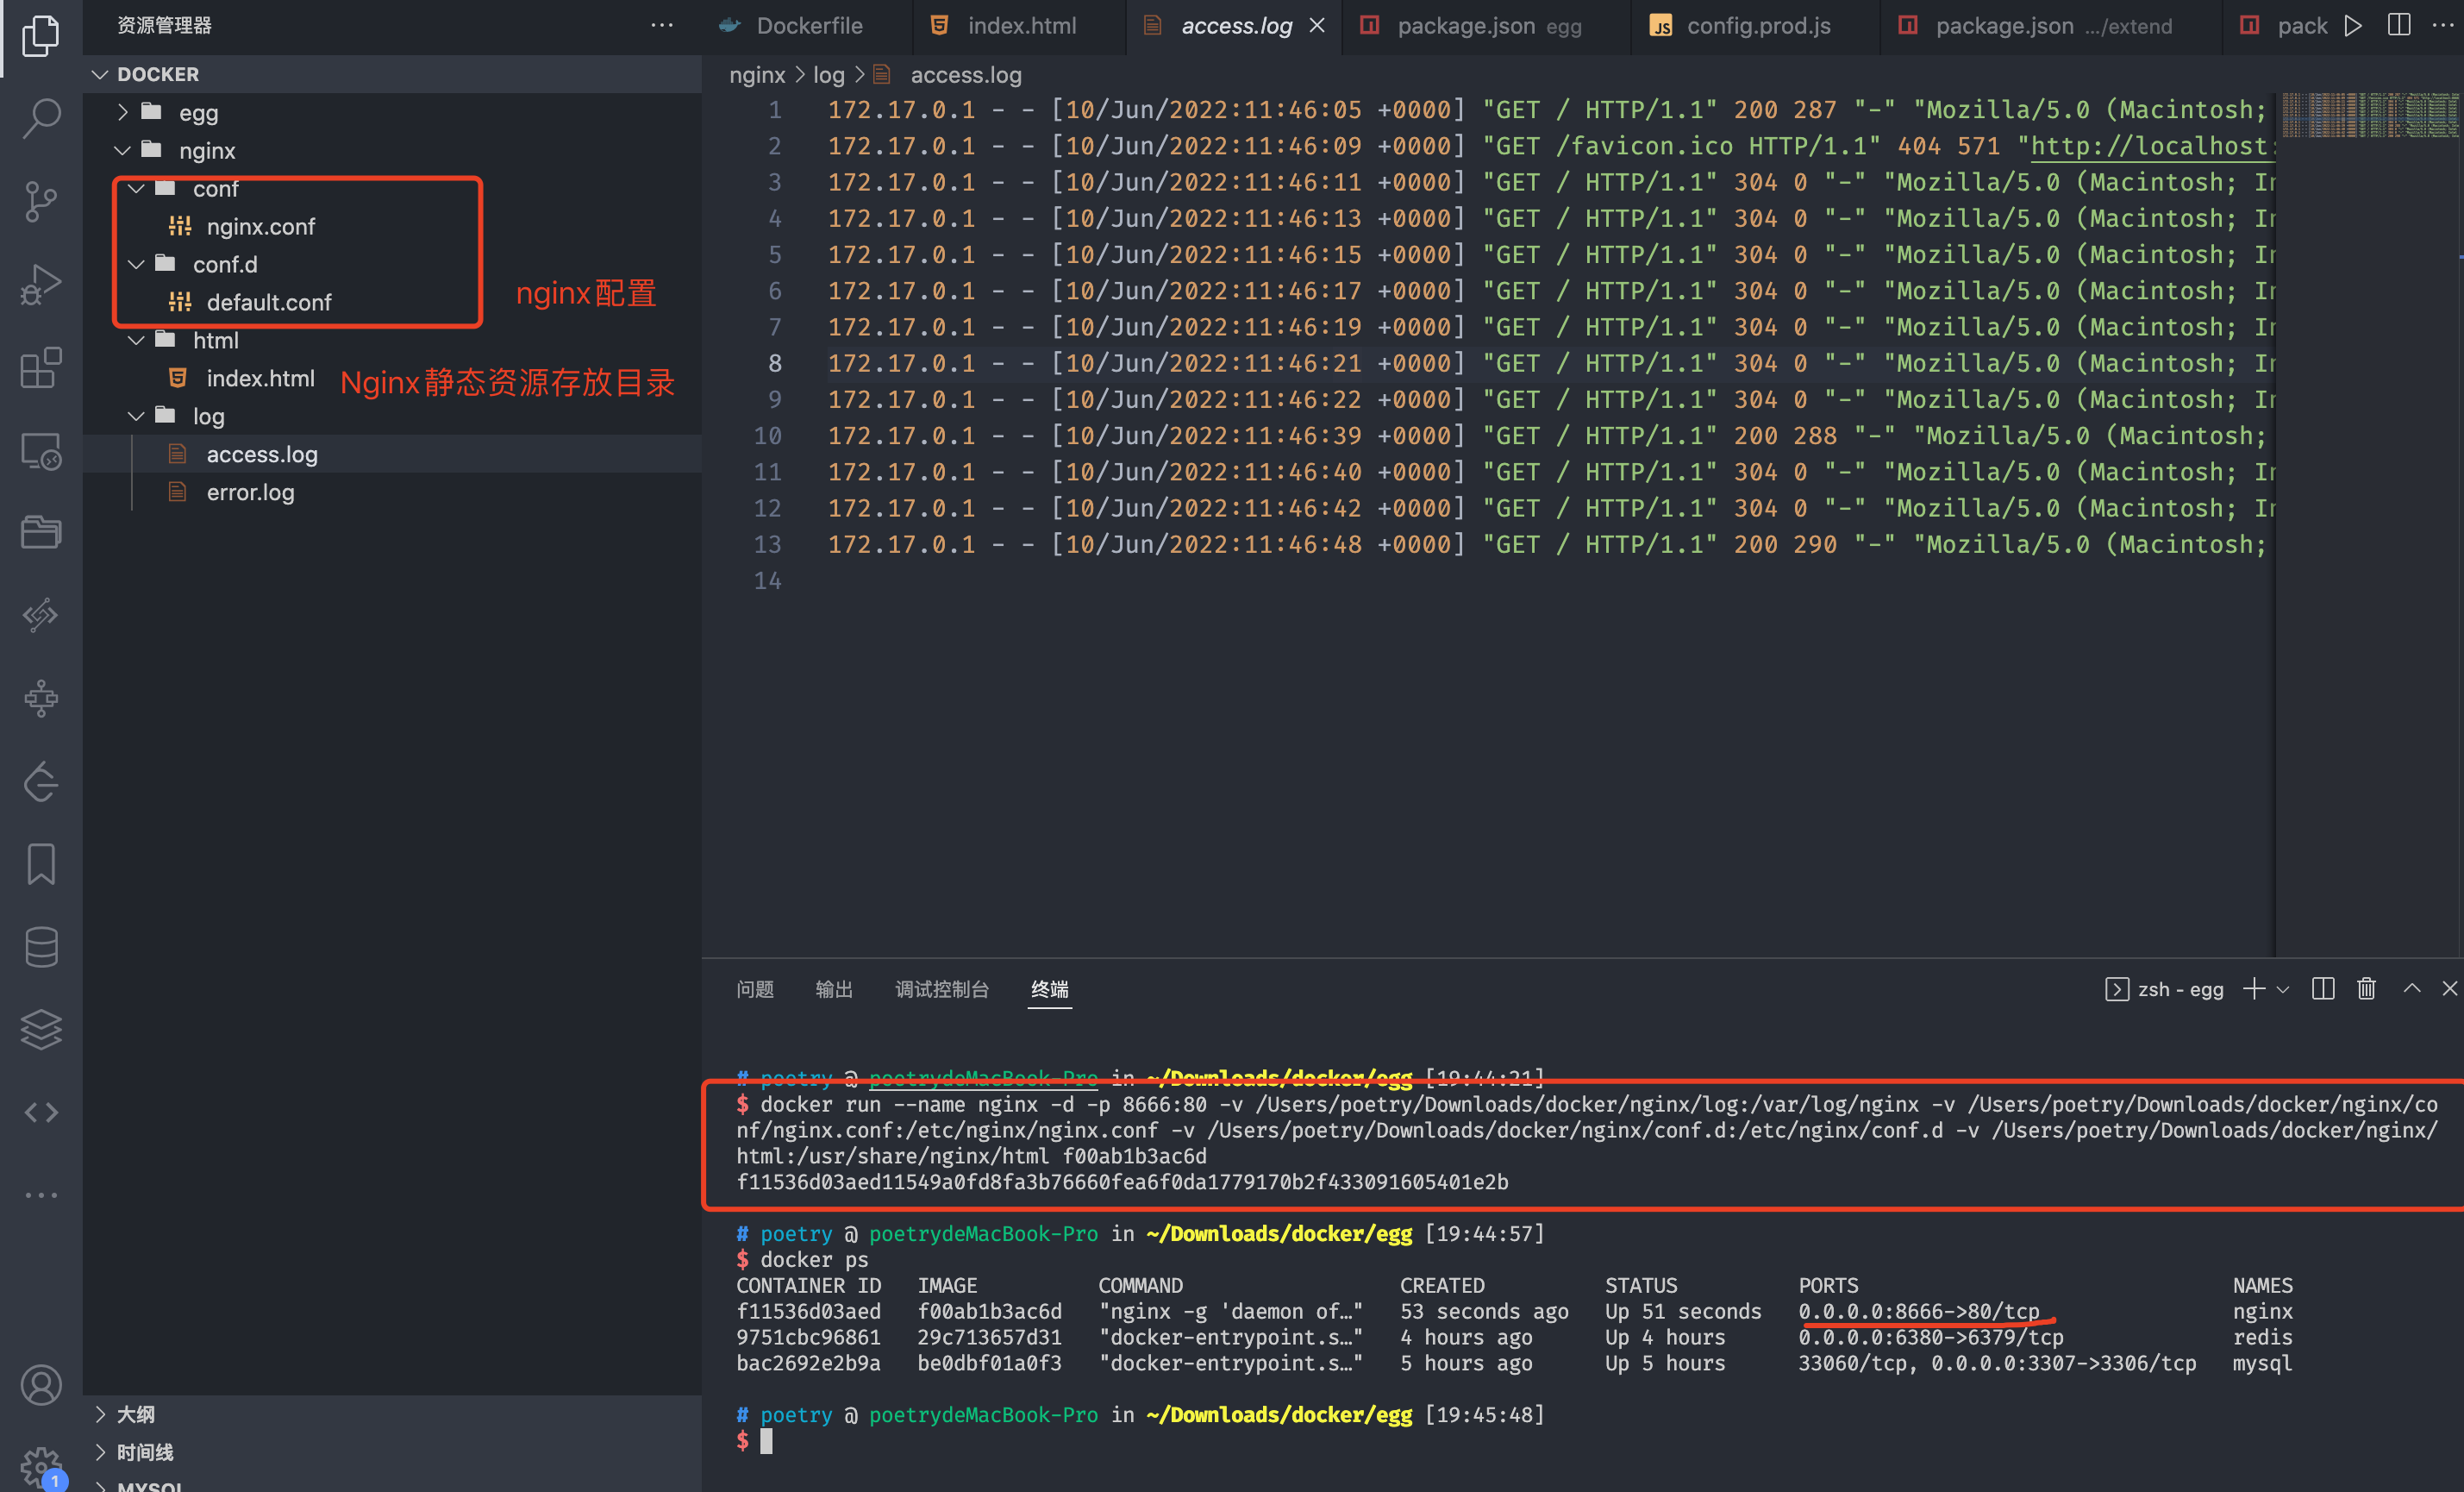
docker run --name nginx -d -p 8666:80 -v /Users/poetry/Downloads/docker/nginx/log:/var/log/nginx -v /Users/poetry/Downloads/docker/nginx/conf/nginx.conf:/etc/nginx/nginx.conf -v /Users/poetry/Downloads/docker/nginx/conf.d:/etc/nginx/conf.d -v /Users/poetry/Downloads/docker/nginx/html:/usr/share/nginx/html f00ab1b3ac6d

把docker容器中的Nginx服务配置映射本地方便管理

有一点得提前确认,-v 挂载的宿主机目录必须先存在,nginx.conf 这个文件也得先准备好。你要是挂一个不存在的路径,Docker 会当成目录给你新建一个空文件夹,Nginx 读到一个空的 nginx.conf 直接启动失败,日志里报 no "events" section in configuration

宿主机上映射出来的 nginx 目录结构

访问docker暴露的8666端口即可,浏览器打开 http://localhost:8666 应该能看到 Nginx 默认欢迎页。

浏览器访问 localhost:8666 看到 Nginx 欢迎页

当我们修改了html中的文件,无需重启容器即可看到效果。这就是挂载带来的好处,宿主机目录和容器目录指向的是同一份数据,改哪边都一样。
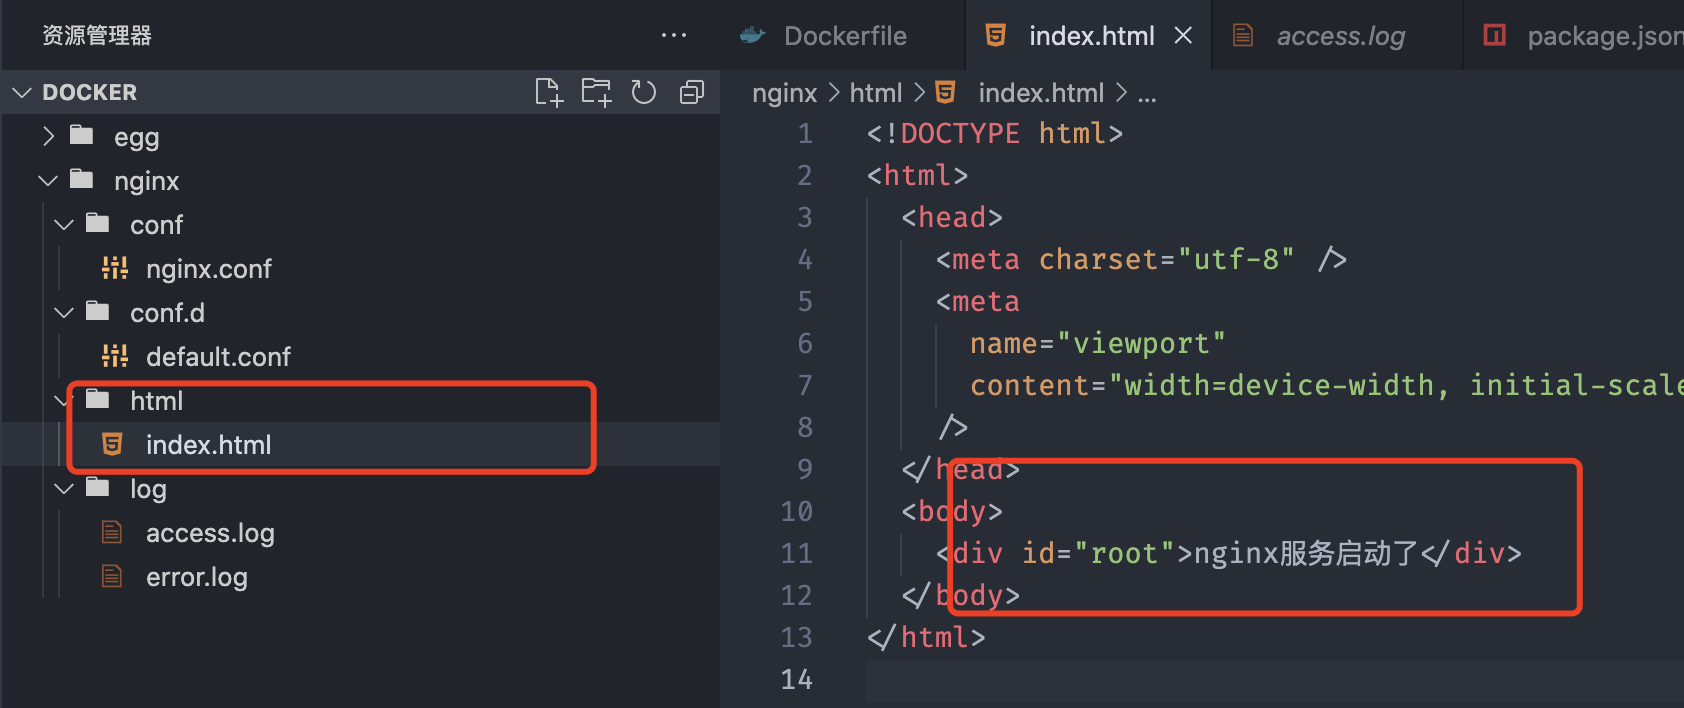
修改宿主机 html 目录下的文件
刷新浏览器立刻看到修改后的页面

要区分一下的是,静态文件改了刷新就行,nginx.conf 改了还是得让 Nginx 重新加载配置,docker exec -it nginx nginx -s reload 或者干脆 docker restart nginx

1.4 部署 egg 代码

四个基础环境都就位了,轮到主角。Egg 项目要变成一个能跑的容器,中间隔着一个 Dockerfile,它描述的是「从一个 node 镜像开始,怎么一步步把我的代码装进去」。

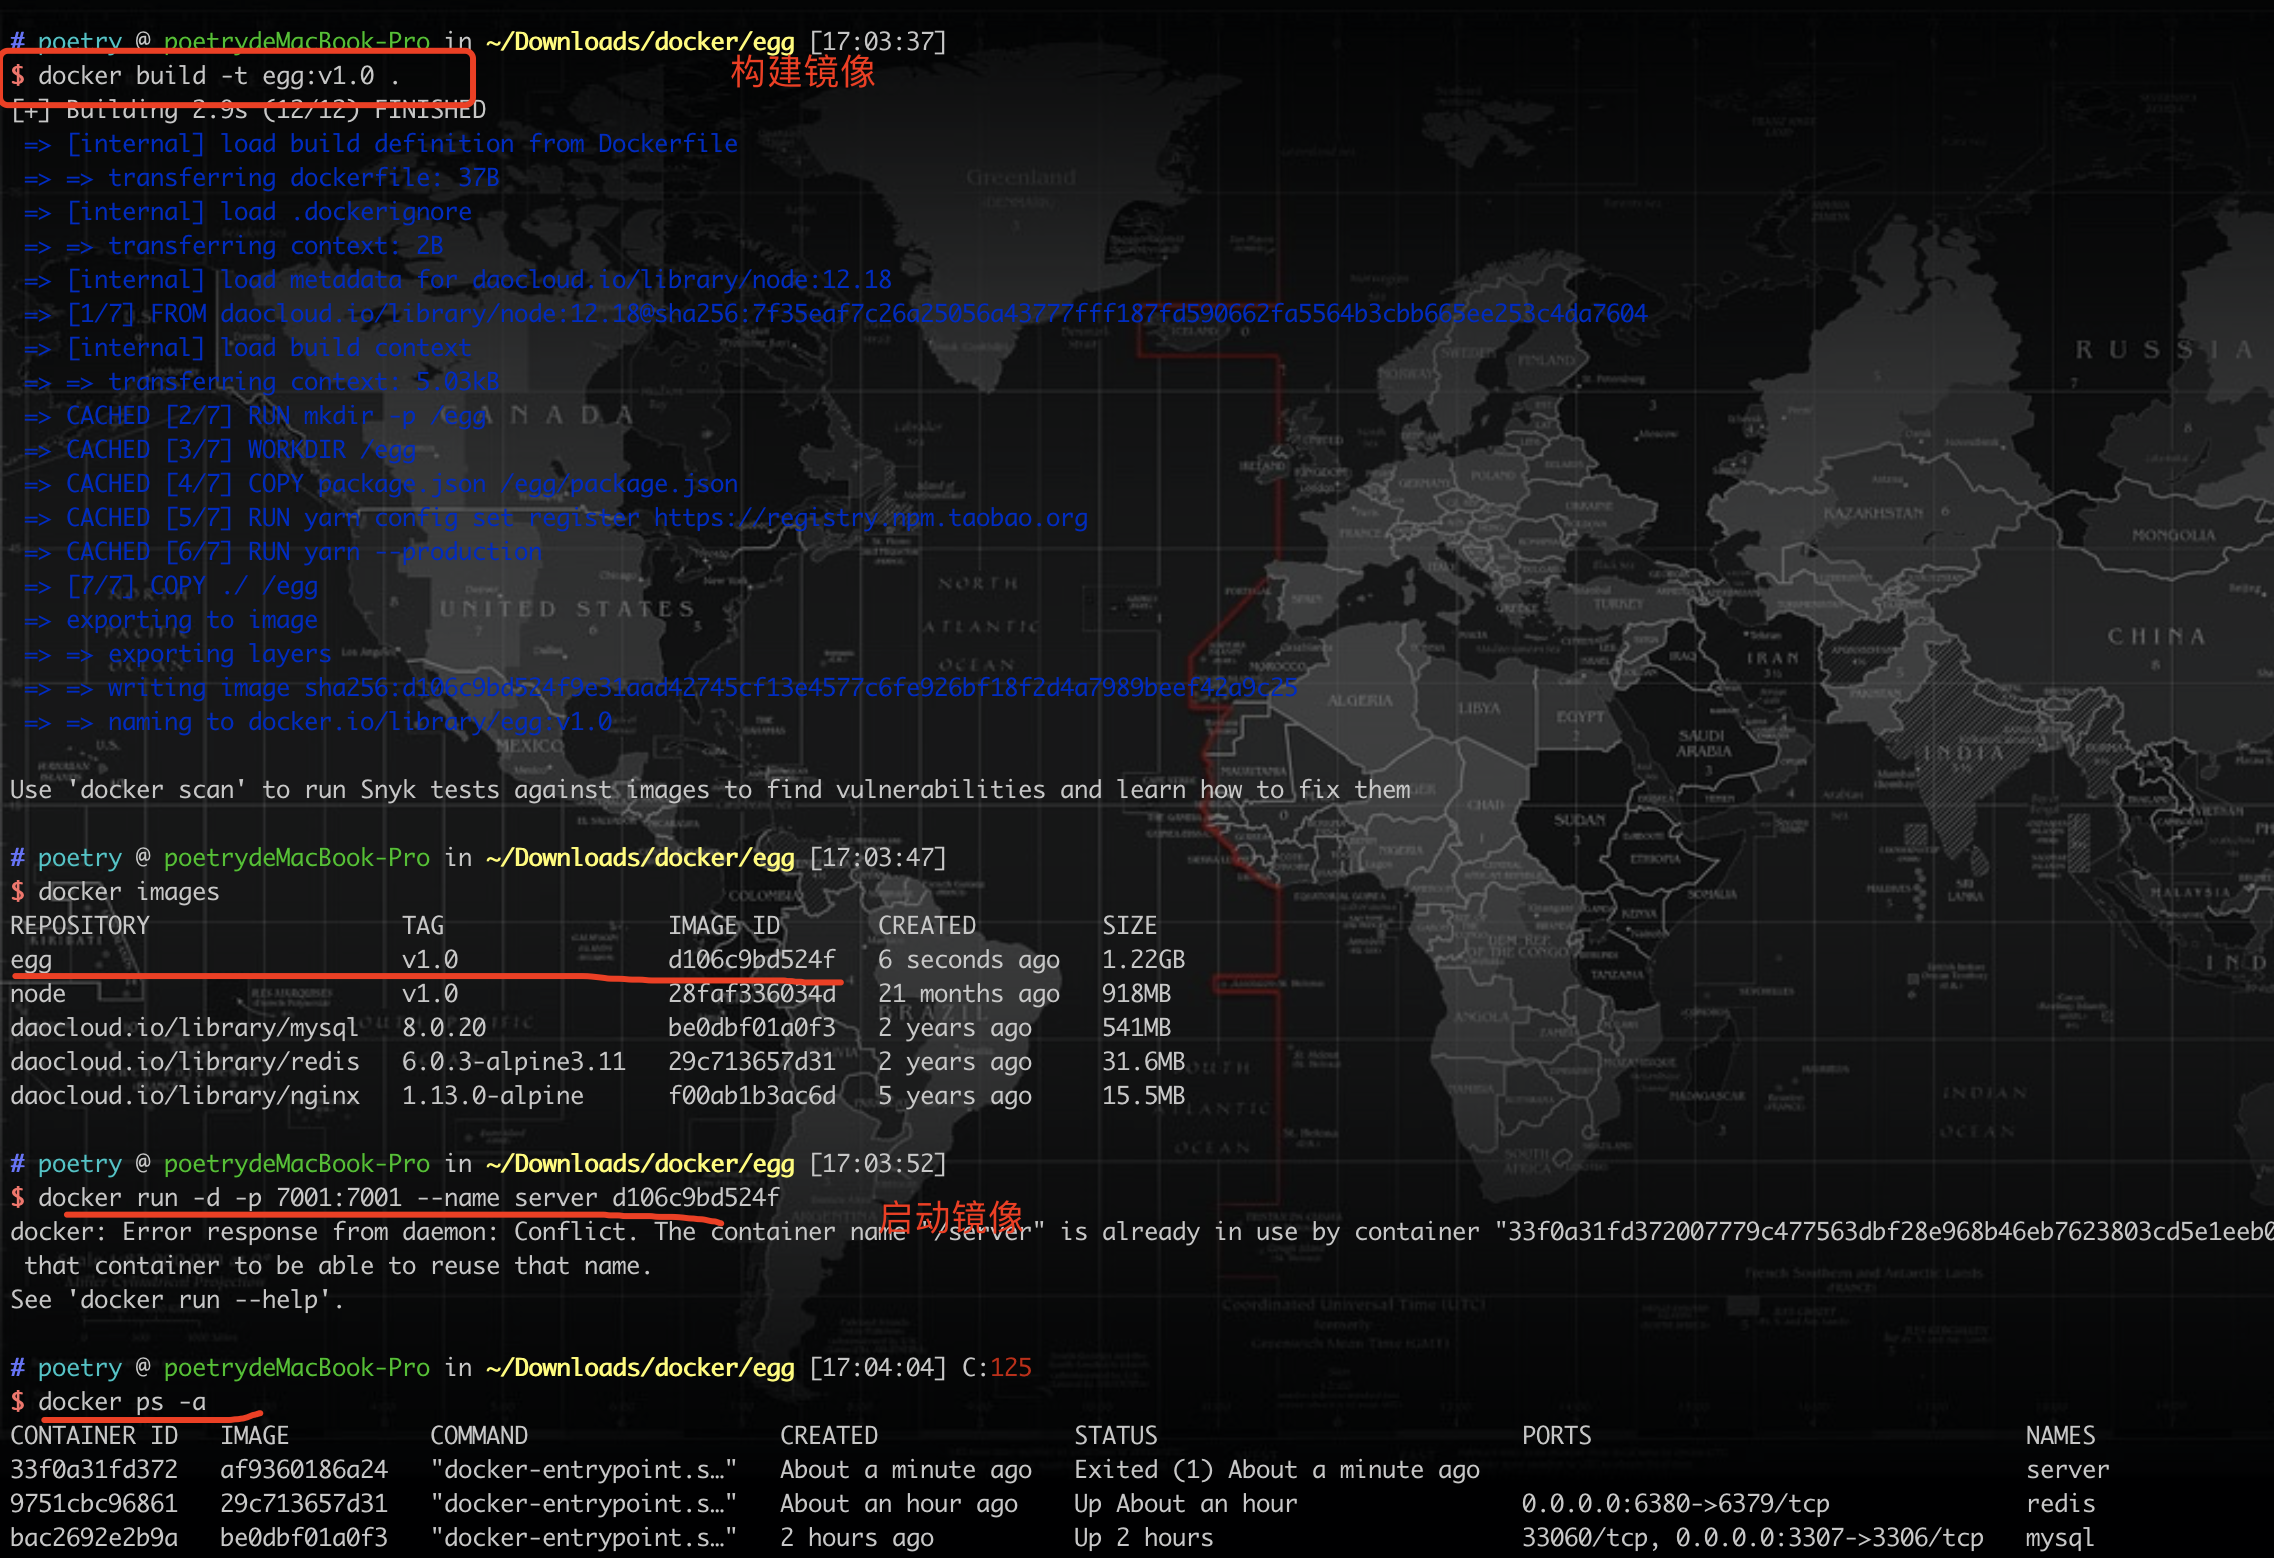
构建egg镜像,进入到egg目录

# 构建egg镜像,版本v1.0
docker build -t egg:v1.0 .

末尾那个点是构建上下文,指的是当前目录。Docker 会把这个目录整个打包发给守护进程,所以项目里一定要写 .dockerignorenode_modules.gitlogs 排掉,不然构建的第一步就要传几百兆,慢得莫名其妙。

Dockerfile文件如下

# 使用node镜像
FROM daocloud.io/library/node:12.18
# 在容器中新建目录文件夹 egg
RUN mkdir -p /egg
# 将 /egg 设置为默认工作目录
WORKDIR /egg
# 将 package.json 复制默认工作目录
COPY package.json /egg/package.json
# 安装依赖
RUN yarn config set registry https://registry.npmmirror.com
# 只安装dependencies的包
RUN yarn --production
# 再copy代码至容器
COPY ./ /egg
# 7001端口
EXPOSE 7001
# 等容器启动之后执行脚本
CMD yarn prod

这个 Dockerfile 里藏着一个很关键的顺序设计,值得单独讲。为什么先单独 COPY package.json、装完依赖再 COPY ./ /egg 整个项目?因为 Docker 的构建是分层缓存的,只要某一层的输入没变,这一层就直接复用缓存。业务代码天天改,package.json 一周未必动一次。把安装依赖放在拷贝代码之前,你改一行 controller 重新构建时,yarn --production 那一层是直接命中缓存的,构建时间能差出一个数量级。要是把 COPY ./ /egg 提到前面,每次改代码都要重装一遍依赖。

顺带说两个我修掉的地方。原来这行写的是 yarn config set registerregister 少了一个 y,yarn 的配置项叫 registry,写错了这条命令不会报错但也完全不生效,属于那种最难发现的静默失败。另外 registry.npm.taobao.org 这个域名已经迁到 registry.npmmirror.com 了,老域名的证书早就过期,继续用会在构建时卡住或者直接报 TLS 错误。

EXPOSE 7001 这行经常被误解,它只是声明容器会监听哪个端口,起到文档和 compose 自动组网的作用,并不会真的把端口开到宿主机。要从外面访问,还是得靠 docker run -p

启动 egg 镜像

docker run -d(后台启动) -p 7001:7001(本机:容器) --name server(容器名称) af9360186a24(镜像ID)

egg 容器启动成功并可以访问 7001 接口

到这一步,四个容器全是手动 docker run 起来的,各自为政。问题马上就来了,Egg 里怎么写 MySQL 的连接地址?填 127.0.0.1 是不行的,那指的是 Egg 容器自己。这就引出了下一节。

二、用 docker-compose 把服务编排起来

手动起容器最难受的两点,一是每次重启都要翻笔记找那一长串参数,二是容器之间的网络得自己想办法打通。docker-compose 解决的就是这两件事,一个 YAML 文件把所有服务的定义写死,再声明一个共享网桥,容器之间直接用服务名当主机名互相访问。

2.1 编写 docker-compose.yml 文件

下面这份是本地版本,四个服务加一个网桥,结构很清楚。

version: '3.0'

services:
redis: # 服务名称
container_name: redis # 容器名称
image: daocloud.io/library/redis:6.0.3-alpine3.11 # 使用官方镜像
ports:
- 6380:6379 # 本机端口:容器端口
restart: on-failure # 自动重启
networks:
- my-server

mysql:
container_name: mysql
image: daocloud.io/library/mysql:8.0.20 # 使用官方镜像
ports:
- 3307:3306 # 本机端口:容器端口
restart: on-failure
environment:
- MYSQL_ROOT_PASSWORD=123456 # root用户密码
volumes:
- ./deploy/mysql/db:/var/lib/mysql # 用来存放了数据库表文件
- ./deploy/mysql/conf/my.cnf:/etc/my.cnf # 存放自定义的配置文件
# 我们在启动MySQL容器时自动创建我们需要的数据库和表
# mysql官方镜像中提供了容器启动时自动docker-entrypoint-initdb.d下的脚本的功能
- ./deploy/mysql/init:/docker-entrypoint-initdb.d/ # 存放初始化的脚本
networks:
- my-server

server: # egg服务
container_name: server
build: # 根据Dockerfile构建镜像
context: .
dockerfile: Dockerfile
ports:
- 7001:7001
restart: on-failure # 设置自动重启,这一步必须设置,主要是存在mysql还没有启动完成就启动了node服务
networks:
- my-server
depends_on: # node服务依赖于mysql和redis
- redis
- mysql

nginx:
container_name: nginx
image: daocloud.io/library/nginx:1.13.0-alpine # 使用官方镜像
ports:
- 8900:80 # 本地端口:容器端口
restart: on-failure
volumes: # 映射本地目录到容器目录
- ./deploy/nginx/conf/nginx.conf:/etc/nginx/nginx.conf
- ./deploy/nginx/conf.d:/etc/nginx/conf.d
- ./deploy/nginx/html:/usr/share/nginx/html
- ./deploy/nginx/log:/var/log/nginx
networks:
- my-server
depends_on:
- redis
- mysql
- server

# 声明一下网桥 my-server。
# 重要:将所有服务都挂载在同一网桥即可通过容器名来互相通信了
# 如egg连接mysql和redis,可以通过容器名来互相通信
networks:
my-server:

这份配置里有三个点决定了它能不能跑通,挨个说。

networks 声明的自定义网桥是整套东西的地基。Compose 会给这个网桥内置一套 DNS,服务名就是主机名。所以 Egg 的配置里连 MySQL 写 host: 'mysql'、连 Redis 写 host: 'redis' 就能通,端口用的是容器内部端口 3306 和 6379,不是映射到宿主机的 3307 和 6380。这块最容易搞混,映射端口只服务于「从容器外面进来」,容器之间互访走的是内网,跟映射没关系。

depends_on 只保证启动顺序,不保证服务真的可用。MySQL 容器进程起来了,但初始化数据库还得几十秒,这段时间 Egg 连过去必然被拒。所以 restart: on-failure 这行不是可有可无的装饰,它才是真正兜底的那个,Egg 连不上崩了就自动重启,重试到 MySQL 就绪为止。生产环境更规范的做法是给依赖加健康检查,或者在应用层做连接重试,但对个人项目来说 on-failure 已经够用了。

MySQL 那三条 volumes 分别对应数据、配置和初始化脚本。最后一个 /docker-entrypoint-initdb.d/ 是官方镜像约定的目录,容器第一次初始化时会自动执行里面的 .sql.sh,建库建表的语句丢进去就不用手动导了。同样只在第一次生效,数据目录非空之后就不会再跑。

2.2 启动服务

修改egg服务代码

改的就是上面说的连接地址,把原来指向 127.0.0.1 的 host 换成容器名。
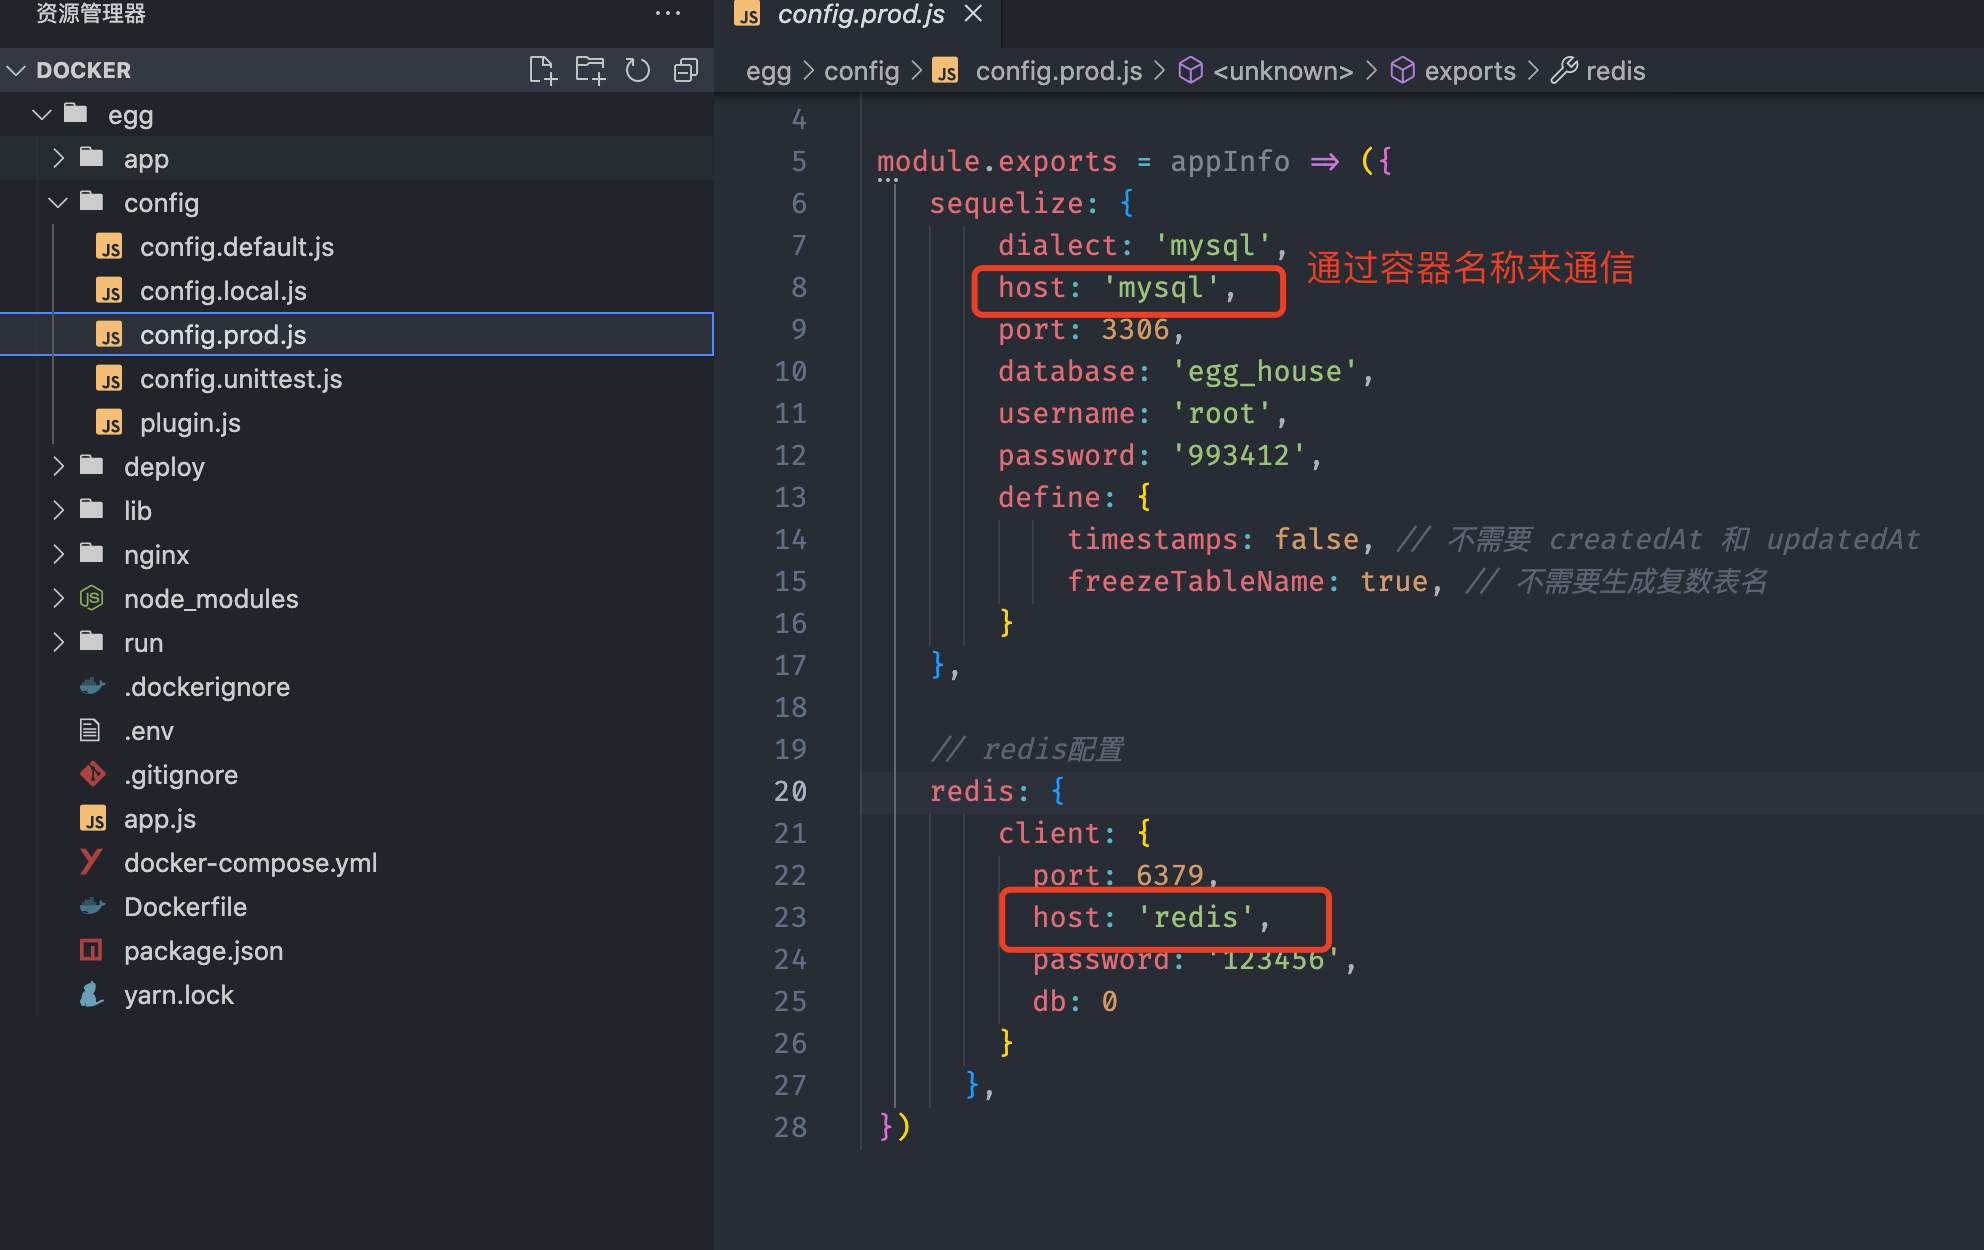
Egg 配置中把 MySQL 和 Redis 的 host 改成容器名

常用命令

docker-compose -h 查看命令

  • docker-compose up 启动服务,控制台可见日志
  • docker-compose up -d 后台启动服务
  • docker-compose build --no-cache 重新构建镜像不使用缓存(最后docker-compose up -d启动)
  • 停止服务 docker-compose down
  • 下载镜像过程 docker-compose pull
  • 重启服务 docker-compose restart

这几条里最需要拎出来讲的是 build --no-cache。前面提过 Docker 有分层缓存,平时它帮你省时间,但偶尔也会坑你。比如你改了 .dockerignore,或者镜像源地址变了,Docker 认为那一层输入没变继续吃缓存,结果构建出来的镜像还是老样子。这种时候就得 --no-cache 强制全量重来。第一次调试的时候我建议直接用 docker-compose up 不带 -d,日志全在前台滚,哪个服务起不来一眼就看到,跑通了再切后台。

后台启动服务 docker-compose up -d
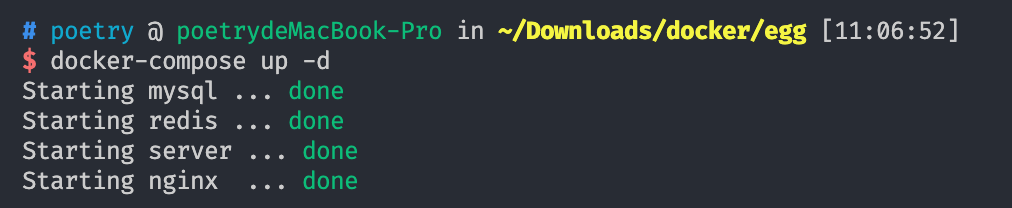
docker-compose up -d 依次创建网络和四个容器

查看应用状态 docker-compose ps

这一步要确认每个服务的 State 都是 Up。如果某个服务在 Restarting 之间反复横跳,多半就是它依赖的服务还没好,去 docker-compose logs 服务名 里看具体报错。

docker-compose ps 显示四个服务全部处于 Up 状态

停止服务 docker-compose down。它会把容器和网络一起删掉,挂载出去的数据目录还留在宿主机上,所以下次 up 起来数据是还在的。

三、Nginx 容器内部署前端

后端通了,前端也得有地方放。前面 Nginx 容器已经把 html 目录挂到宿主机了,所以这一步简单得有点反高潮,把前端打包的文件放到Nginx目录下访问就行。

前端项目 npm run build 之后产出一堆静态文件。
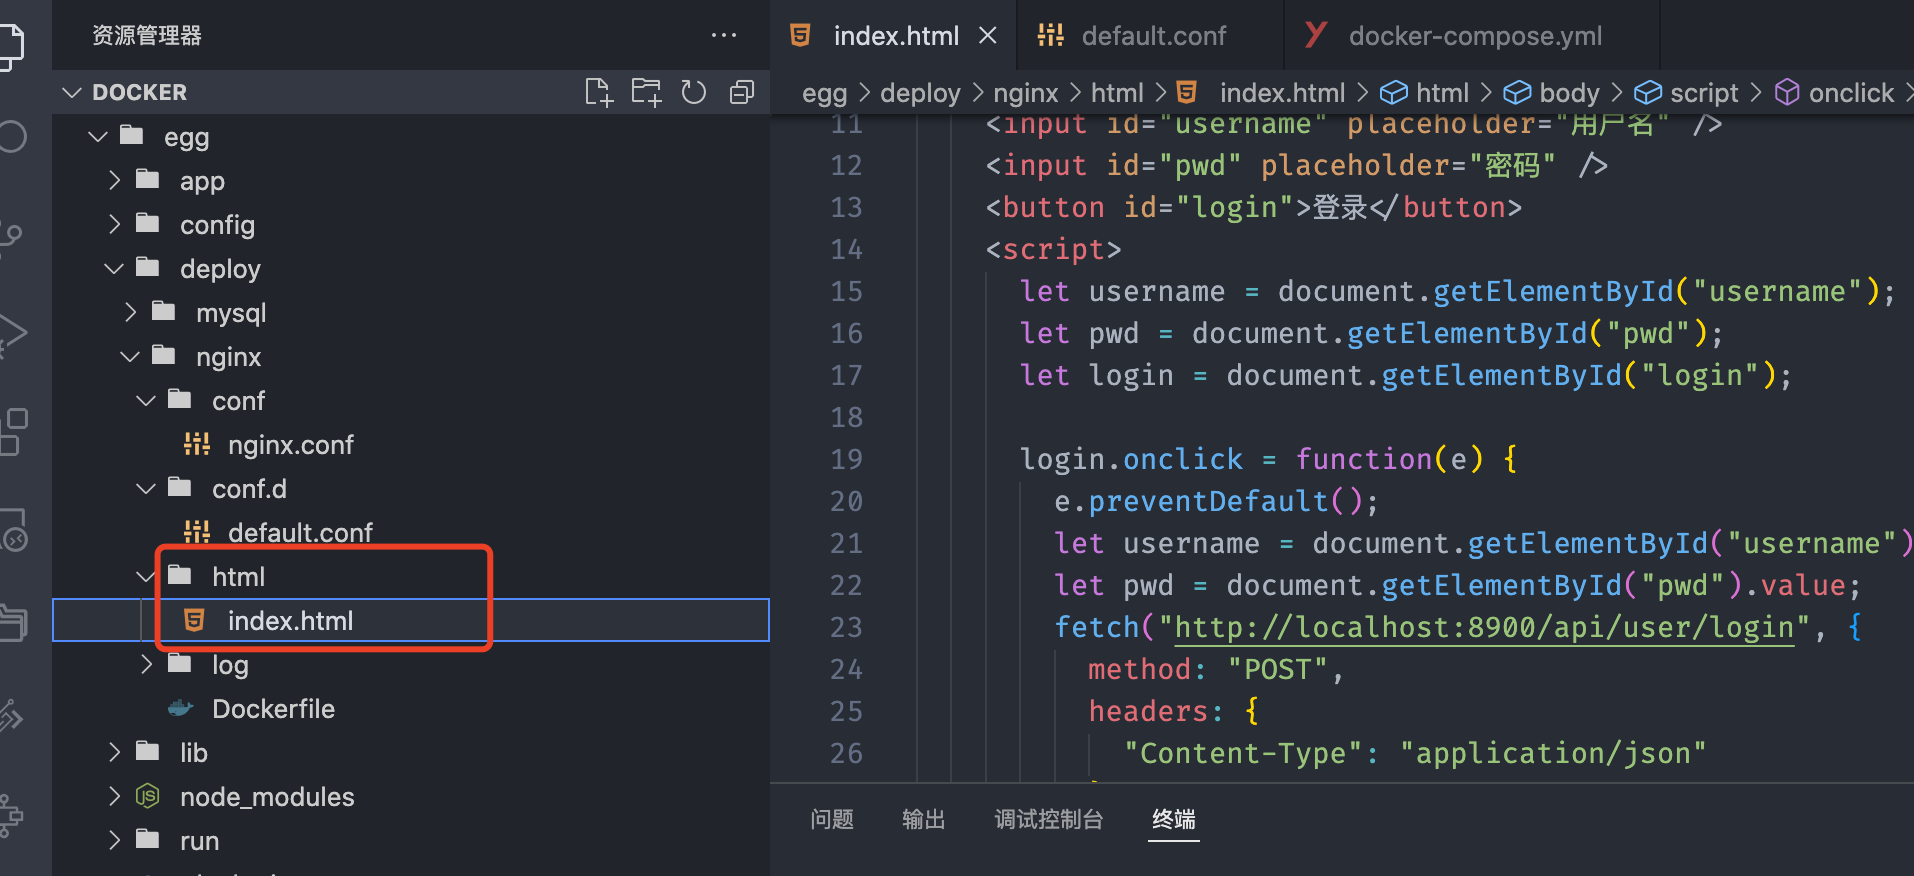
前端项目打包产出的 dist 目录

把它们整个丢进宿主机上映射出去的那个 html 目录。

把打包产物复制到 Nginx 挂载的 html 目录

浏览器访问 Nginx 映射出来的端口,页面就出来了,不需要重启容器。

浏览器访问 Nginx 端口正常渲染前端页面

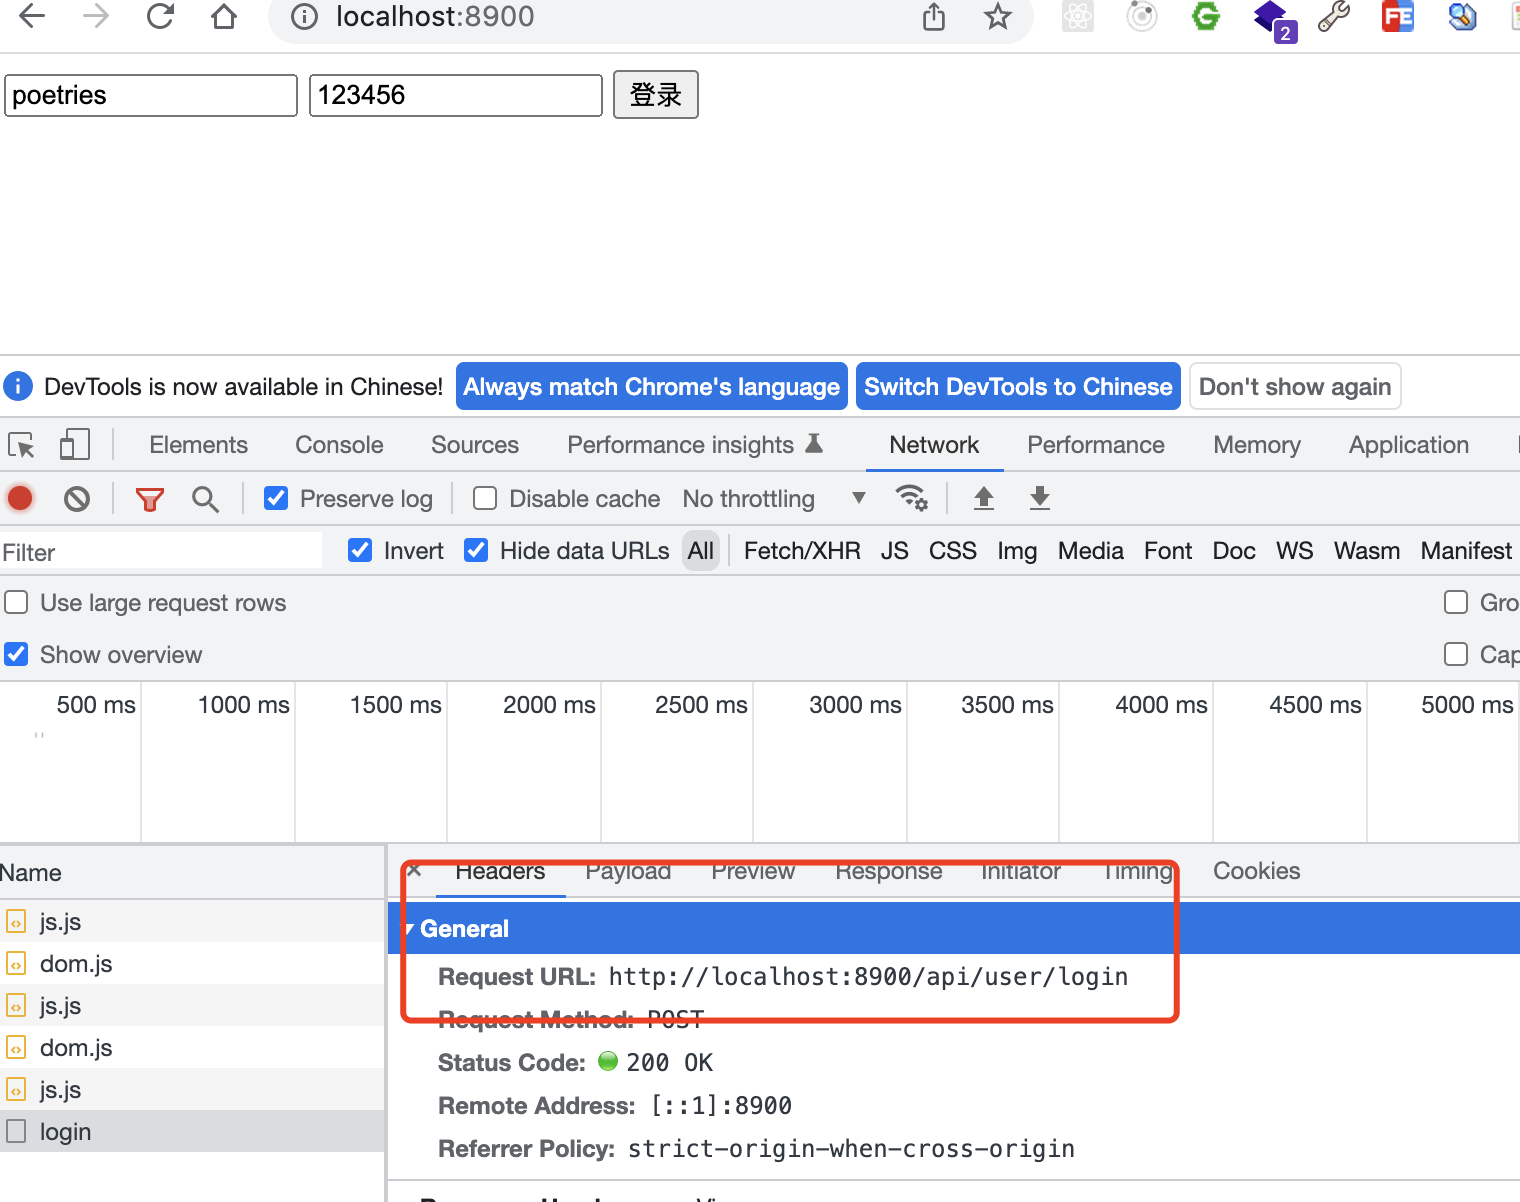
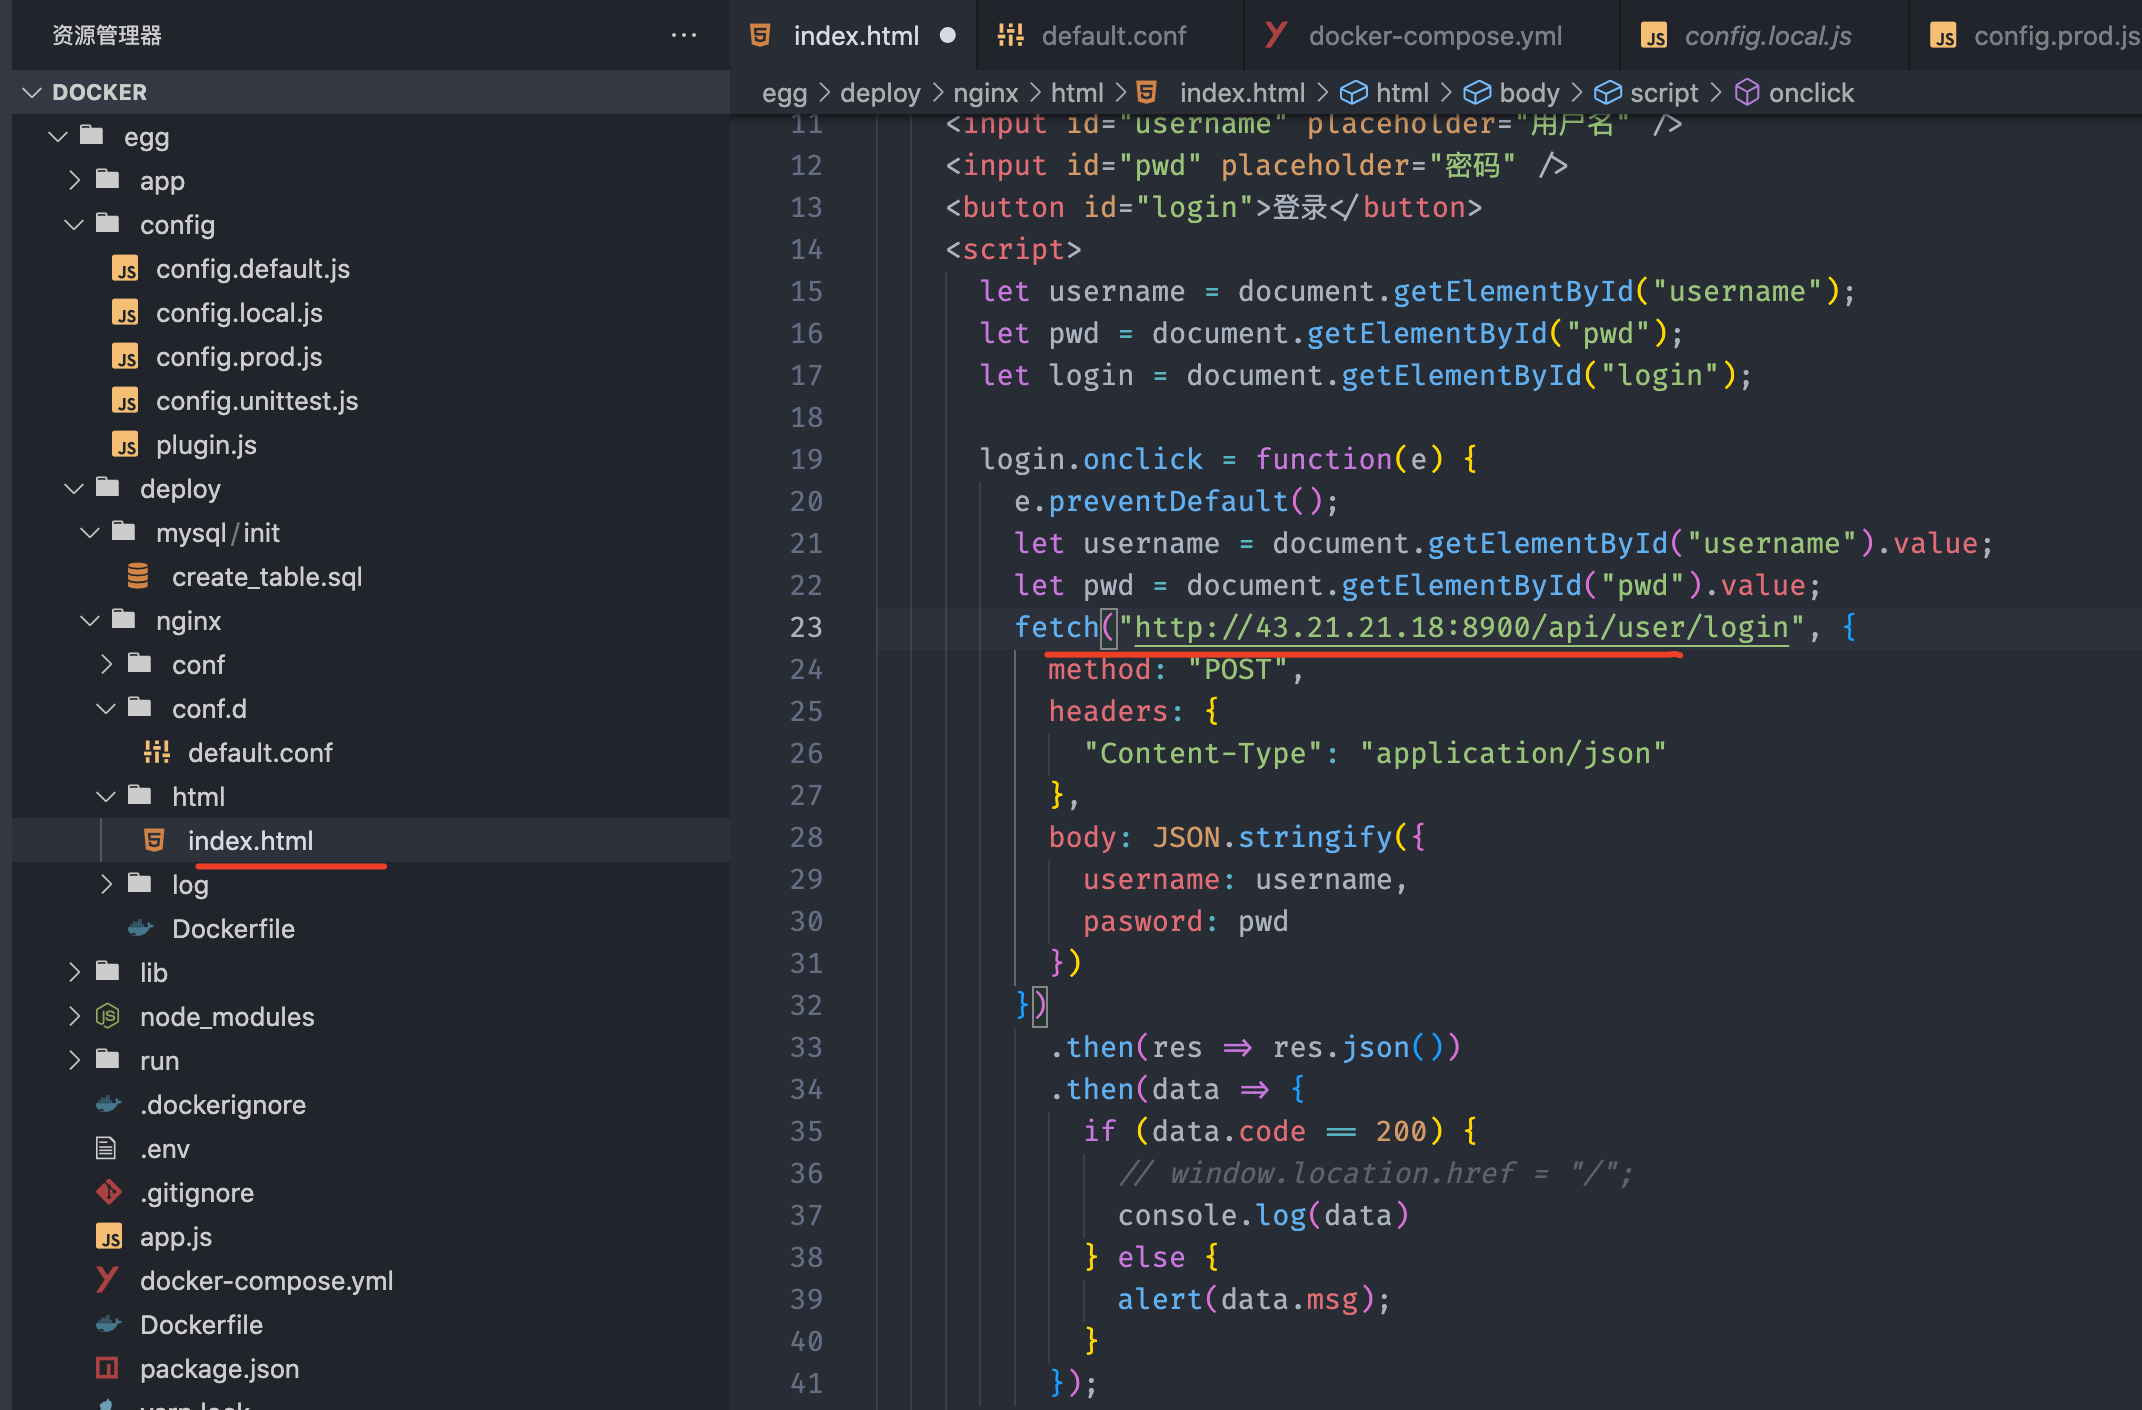
这里有两个坑值得提前打招呼。一个是单页应用的路由,Vue 和 React 用 history 模式的话,直接访问子路由会 404,得在 nginx.conf 里加 try_files $uri $uri/ /index.html; 兜底。另一个是接口跨域,前端直接请求 http://ip:7001 会被浏览器拦,正经做法是在 Nginx 里配一段 location /api { proxy_pass http://server:7001; },让前后端在同一个域下,server 就是 compose 里 Egg 的服务名。

四、把 Docker 部署到云服务器

本地跑通只是彩排,真正要交付还得搬到服务器上。好消息是 compose 文件基本不用改,需要重做的只有环境这一层。下面这套是在 CentOS 上操作的。

4.1 安装 docker 环境

安装工具包

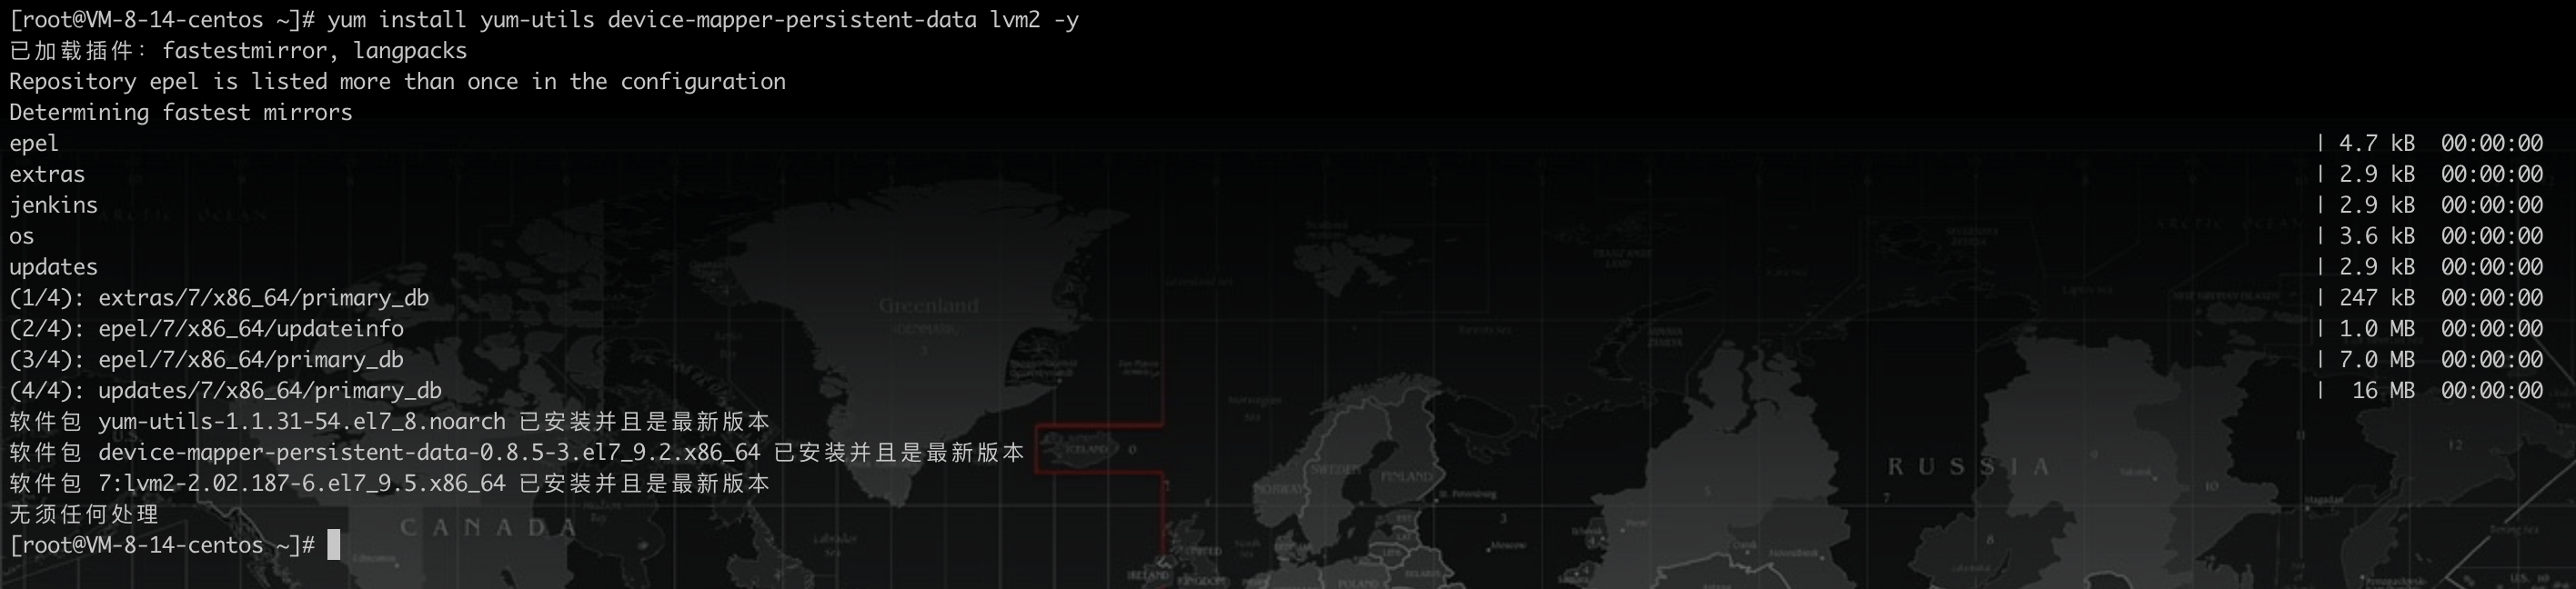
这三个包是 Docker 官方仓库的前置依赖,yum-utils 提供 yum-config-manager 命令,后面两个是存储驱动要用的。少了它们,下一步加仓库的命令会直接提示找不到。

yum install yum-utils device-mapper-persistent-data lvm2 -y

yum 安装 Docker 所需的工具包

设置阿里镜像源

Docker 官方的 yum 源在国内下载很慢,换成阿里的镜像能快不少。这一步换的是「装 Docker 这个软件」的源,和后面 daemon.json 里换「拉容器镜像」的源是两码事,别混在一起。

yum-config-manager --add-repo https://mirrors.aliyun.com/docker-ce/linux/centos/docker-ce.repo

添加阿里云 docker-ce 仓库成功

安装 docker

yum install docker-ce docker-ce-cli containerd.io -y

这三个包分别是守护进程、命令行客户端和底层容器运行时。装完敲 docker version 会看到 Client 有输出但 Server 报连接错误,那是正常的,服务还没启动。

启动 docker

systemctl start docker

# 设为开机启动
systemctl enable docker

enable 这行别漏。服务器难免要重启,忘了设开机自启,重启之后所有容器都不会回来,等你发现的时候站点已经挂了半天。

设置 docker 镜像源

vi /etc/docker/daemon.json
{
"registry-mirrors": ["https://registry.docker-cn.com/"]
}

这个文件默认是不存在的,直接新建就行。写的时候注意它是严格 JSON,多一个逗号 Docker 就起不来了,改完先 systemctl status docker 确认服务还活着。

后续拉取镜像直接从 https://hub.docker.com 网站拉取速度更快。

重启docker

systemctl restart docker

安装 mysql 镜像测试

环境装完先别急着上业务,拉个镜像跑一下确认整条链路是通的。这一步的价值是把「Docker 装没装好」和「我的项目配置对不对」两类问题隔开,省得后面出错分不清是谁的锅。

docker pull daocloud.io/library/mysql:8.0.20

服务器上拉取 mysql 镜像

运行mysql镜像

docker run -d -p 3307:3306 --name mysql -e MYSQL_ROOT_PASSWORD=123456(设置登录密码) be0dbf01a0f3(镜像ID)

mysql 容器在服务器上正常运行

进入mysql容器内部

能登进去,说明服务器上的 Docker 环境没问题了。
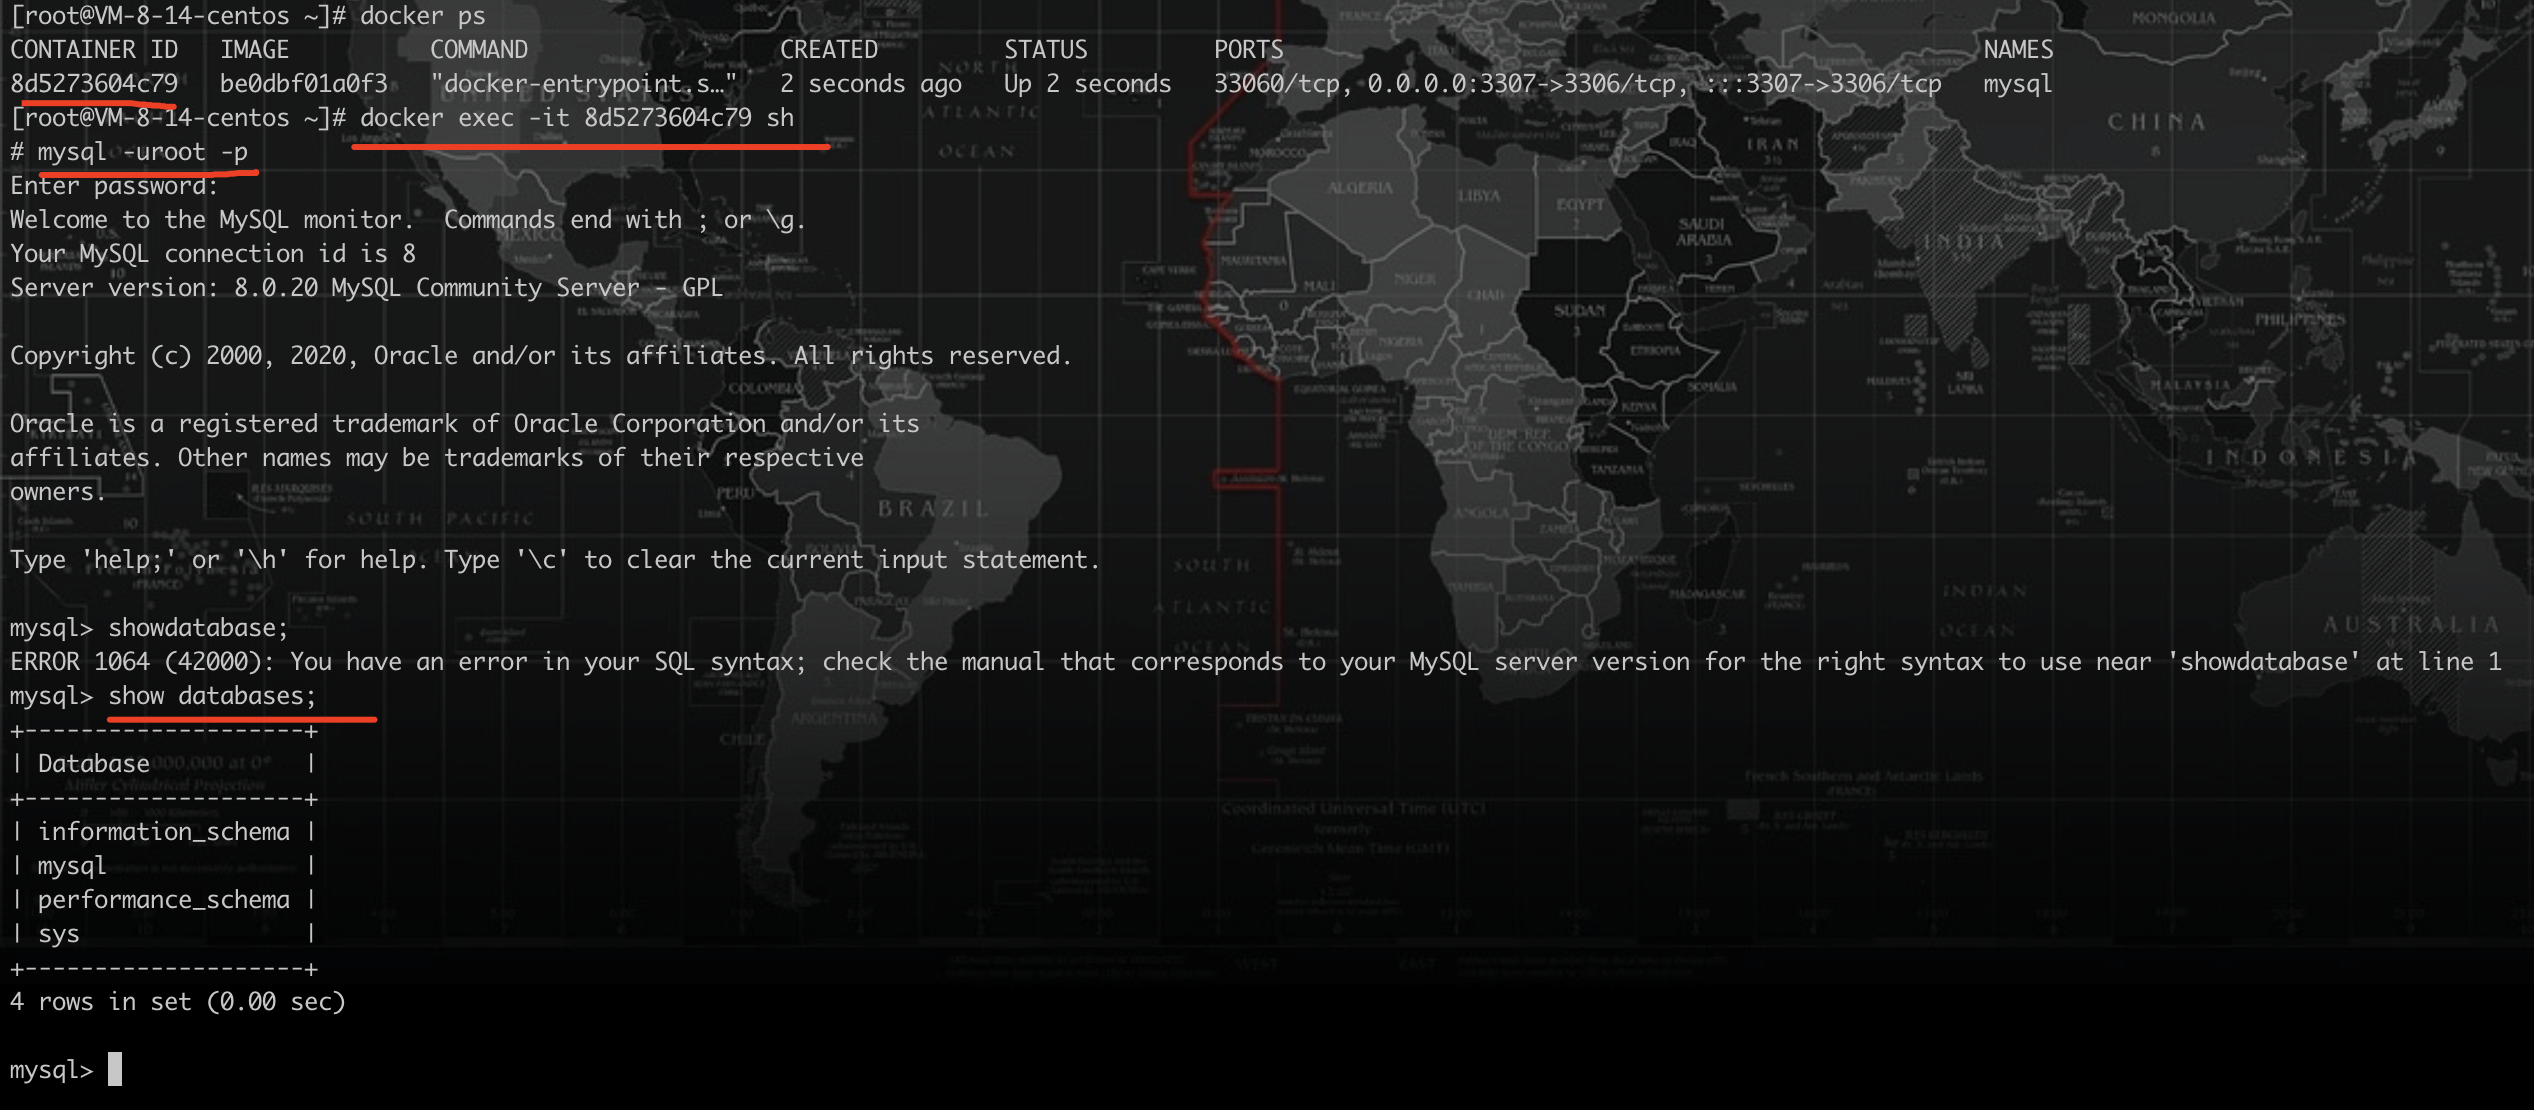
在服务器上进入 mysql 容器并登录数据库

顺便提醒一句,把数据库端口直接映射到公网、密码还用 123456,这在真实环境里是会被扫爆的。我这台是纯测试机才这么写,正经项目要么只在内网监听不做端口映射,要么至少把安全组限制到固定 IP。

至此mysql镜像搭建成功,下面我们使用docker-compose来管理docker容器,不在单独一个个安装MySQL、redis、nginx

4.2 安装 docker-compose

当年的 docker-compose 是个独立的 Python 程序,得单独下二进制文件放到 /usr/local/bin 下面。

# 使用国内源安装
curl -L https://get.daocloud.io/docker/compose/releases/download/1.22.0/docker-compose-`uname -s`-`uname -m` > /usr/local/bin/docker-compose

命令里那两段反引号是 shell 命令替换,uname -s 出系统名、uname -m 出 CPU 架构,拼起来正好是官方发布包的文件名,这样同一条命令在不同机器上都能拿到对的包。

设置docker-compose执行权限

下载下来的文件默认没有执行位,不加这一步敲命令会报 Permission denied

chmod +x /usr/local/bin/docker-compose

创建软链

有些系统的默认 PATH 里不含 /usr/local/bin,软链到 /usr/bin 是为了确保任何用户、任何 shell 下都能直接调用。

sudo ln -s /usr/local/bin/docker-compose /usr/bin/docker-compose

测试是否安装成功

$ docker-compose --version

docker-compose version 1.22.0, build f46880fe

这块的时效性变化比较大,得单独说一下。现在的 Docker 已经把 Compose 做成了 CLI 插件,装完 Docker 就自带,命令从带横杠的 docker-compose 变成了空格分隔的 docker compose,功能上是 Compose V2 这一代。用新版本的话,上面这一整节都可以跳过,直接敲 docker compose version 确认就行。另外 V2 已经不再需要文件开头的 version: '3.0',留着它会收到一条 obsolete 的告警,删掉即可,不影响运行。文中所有 docker-compose xxx 的命令,换成 docker compose xxx 都能对上。

4.3 开放服务器端口

登录服务器后台放行对应端口。这一步漏了,是新手部署最常见的翻车点,容器明明在跑、curl 127.0.0.1:7001 在服务器上也通,就是外网死活打不开。
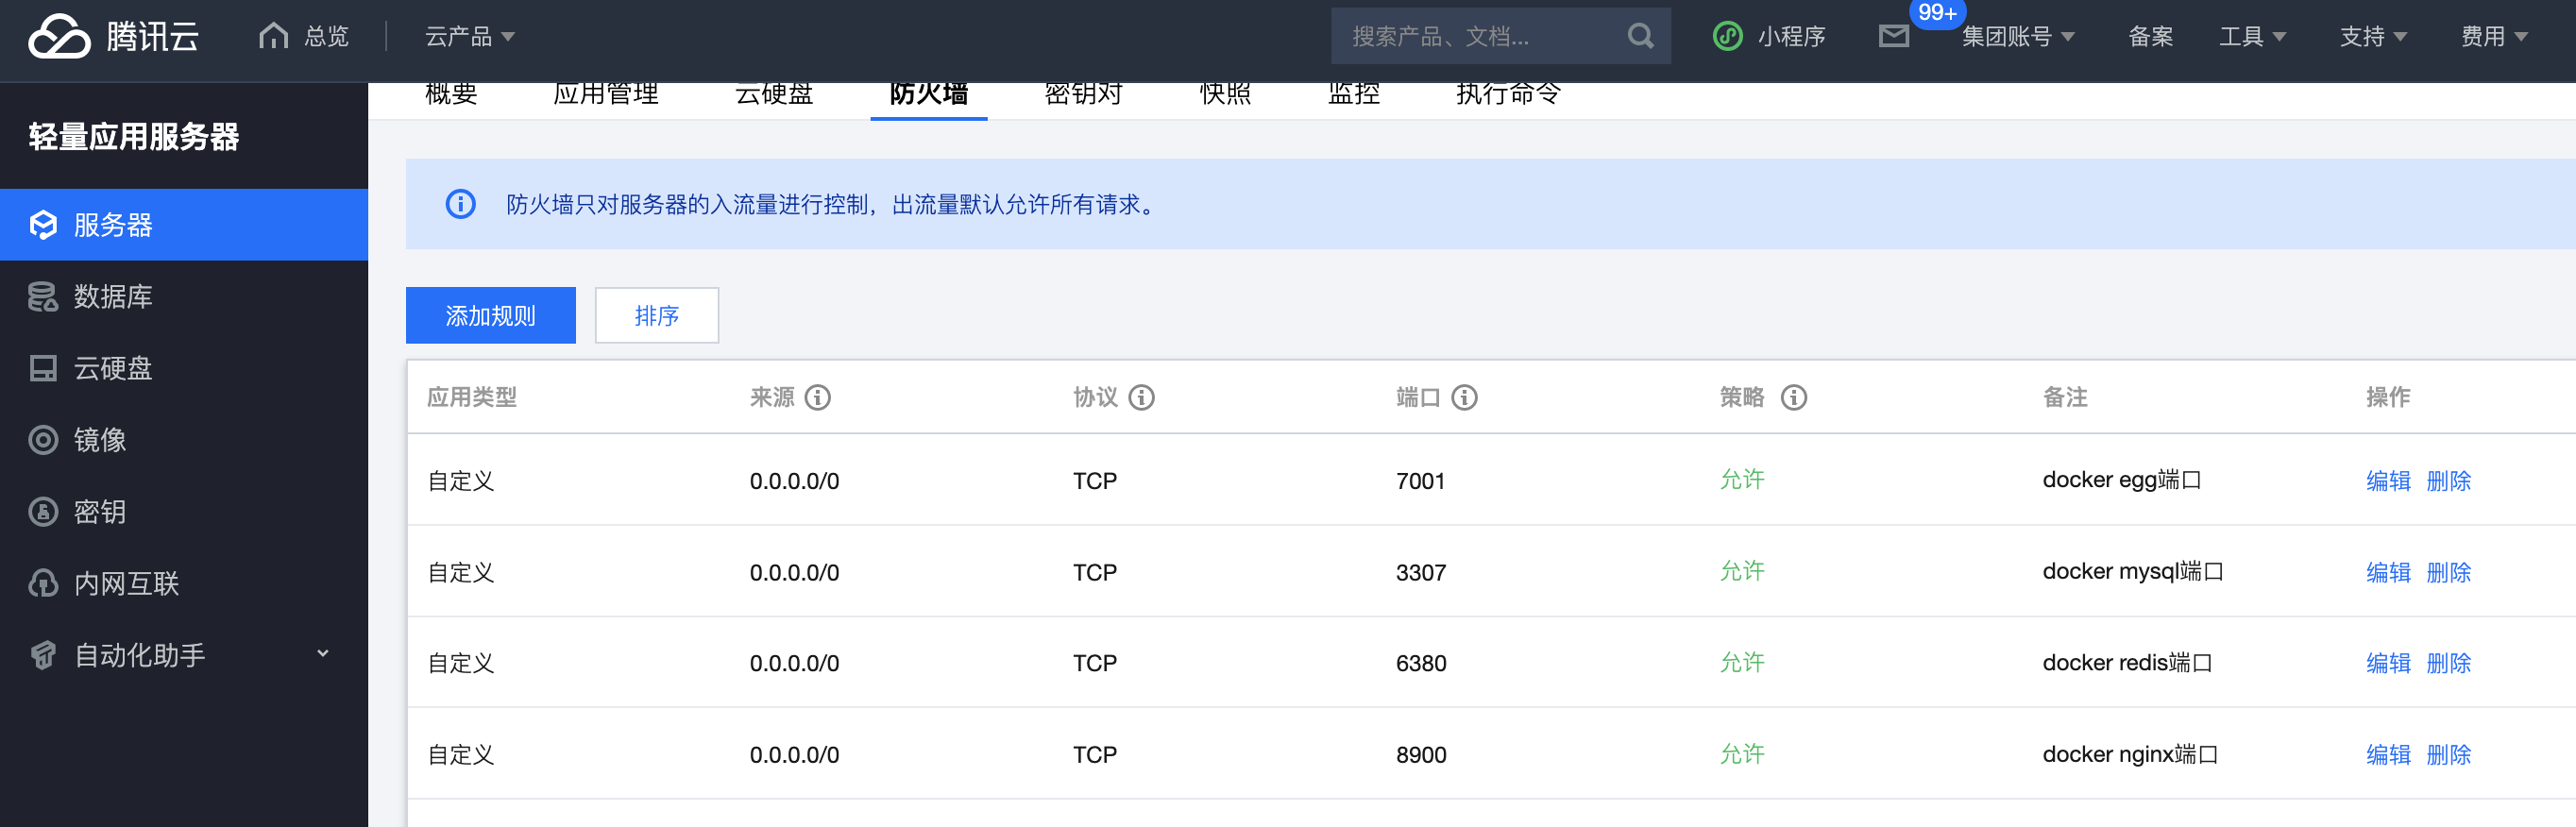
云服务器控制台安全组放行 7001 等端口

要注意的是可能有两道墙。云厂商控制台的安全组是一道,服务器系统里的 firewalldiptables 是另一道。CentOS 7 默认开着 firewalld,安全组放行了系统防火墙没放照样不通,用 firewall-cmd --list-ports 查一下当前放了哪些。

4.4 部署 egg 项目

修改代码和配置

搬到服务器上,有几处配置得跟着改。

修改Nginx配置

主要是把 server_name 换成服务器 IP 或者域名,再把接口的反向代理指向 Egg 的服务名。
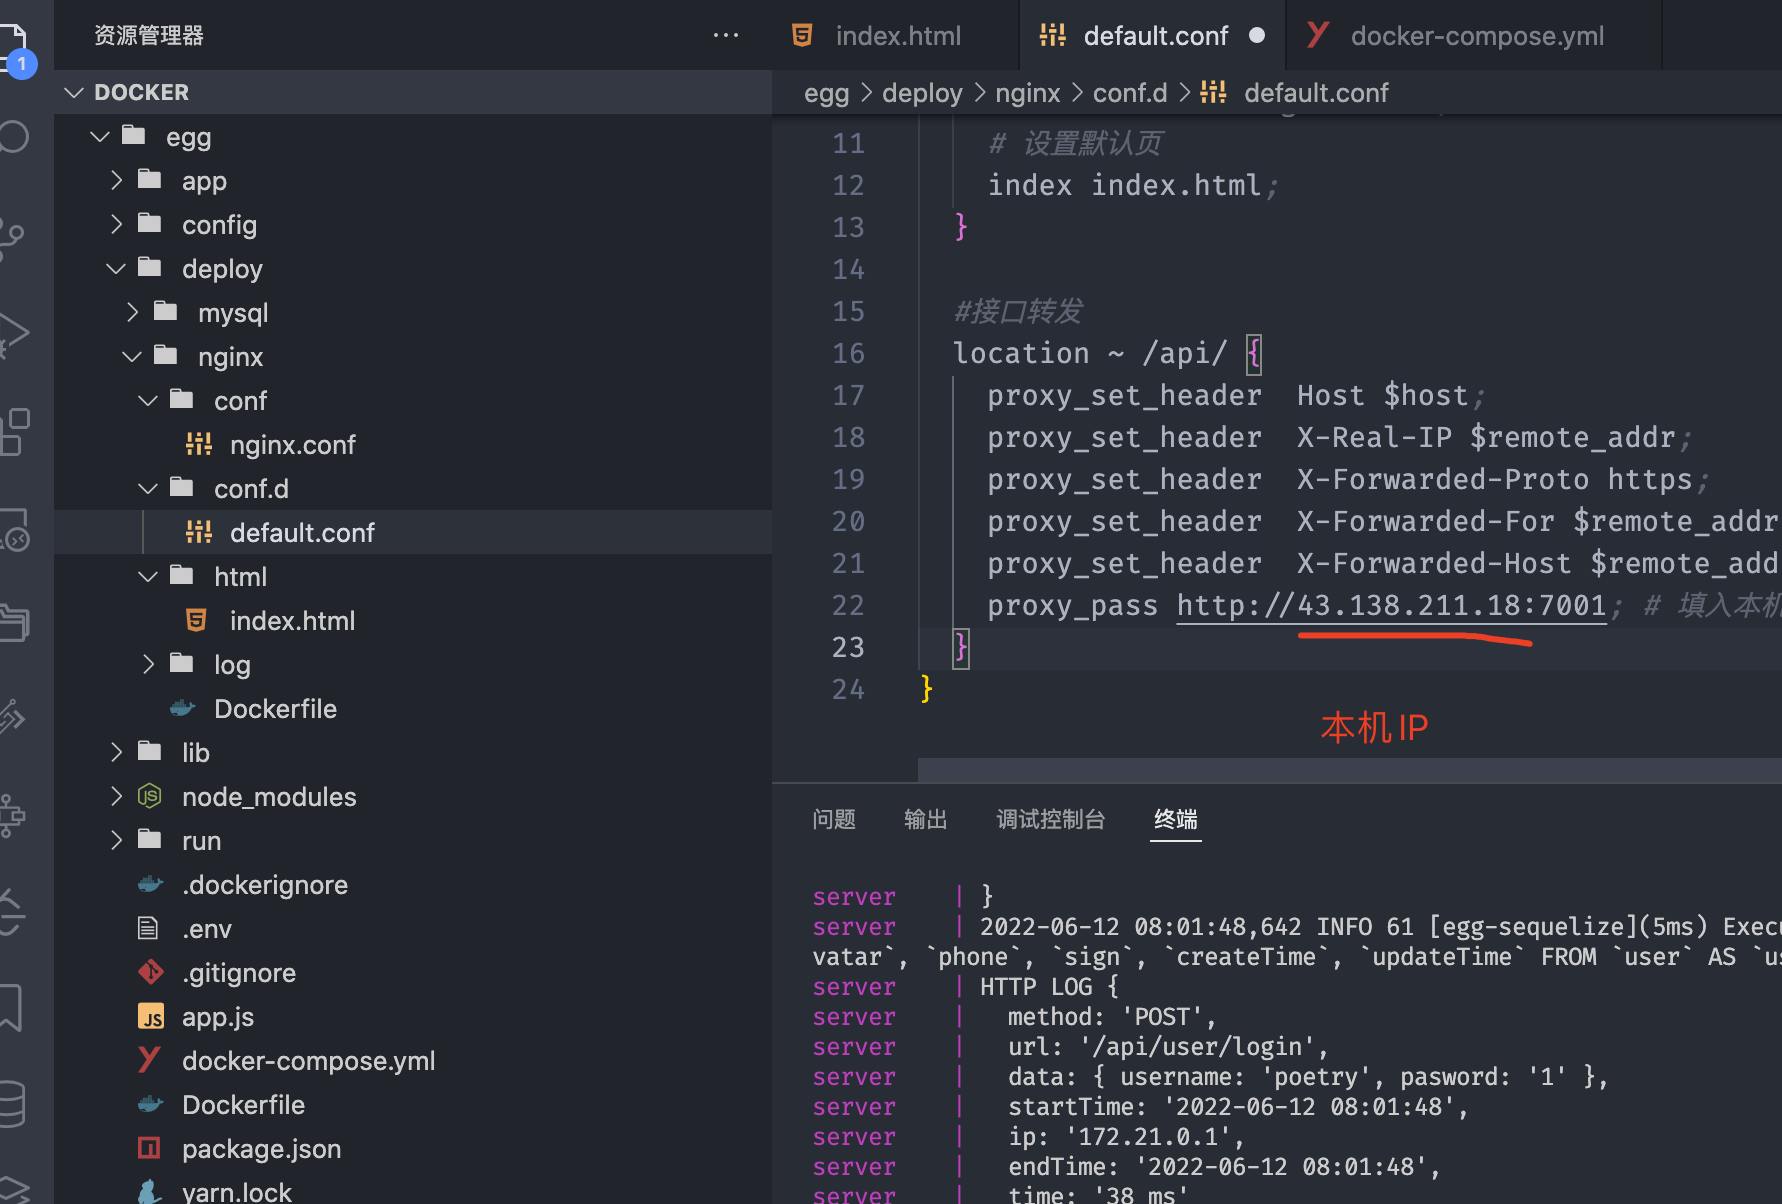
服务器上的 nginx.conf 配置
nginx 反向代理到 egg 服务的 location 配置

修改config/config.prod.js

Egg 按 EGG_SERVER_ENV 加载不同的配置文件,生产环境读的是 config.prod.js,数据库和 Redis 的连接信息在这里改成容器名。这也是为什么前面 Dockerfile 里 CMD yarn prod,那条 script 背后跑的就是带 prod 环境变量的启动命令。
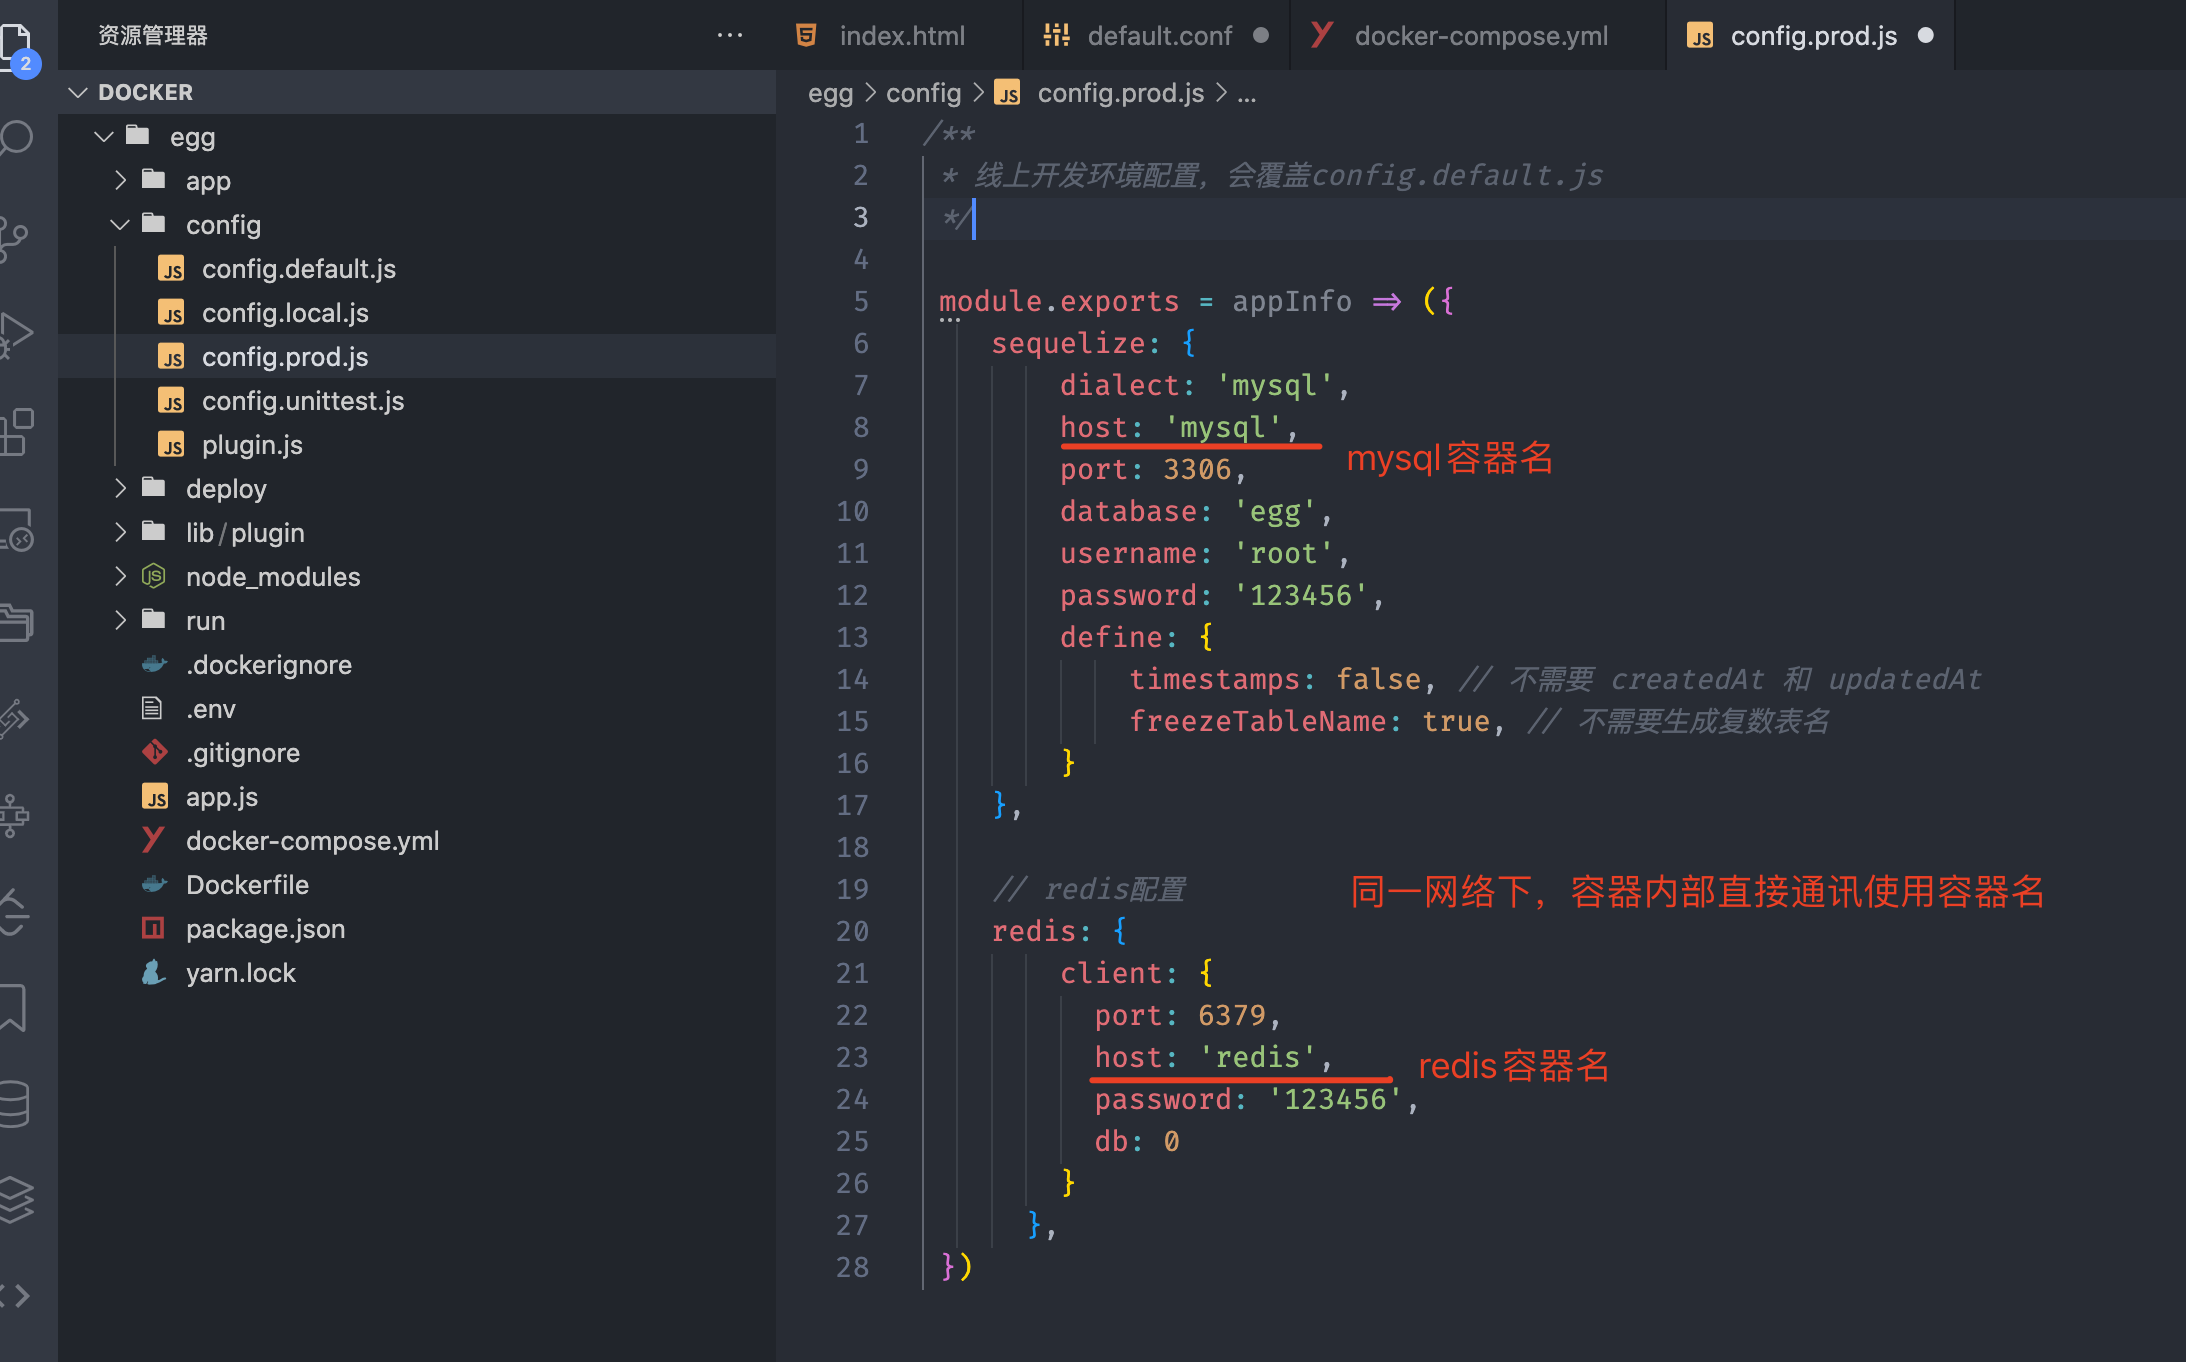
config.prod.js 中的数据库与 Redis 连接配置

docker-compose.yml

服务器版的 compose 文件比本地版多了 Redis 的持久化和配置挂载,其余结构一致。

version: '3.0'

services:
# docker容器启动的redis默认是没有redis.conf的配置文件,所以用docker启动redis之前,需要先去官网下载redis.conf的配置文件
redis: # 服务名称
container_name: redis # 容器名称
image: daocloud.io/library/redis:6.0.3-alpine3.11 # 使用官方镜像
command: redis-server /usr/local/etc/redis/redis.conf --requirepass 123456 --appendonly yes # 设置redis登录密码 123456、--appendonly yes:这个命令是用于开启redis数据持久化
# command: redis-server --requirepass 123456 --appendonly yes # 设置redis登录密码 123456
ports:
- 6380:6379 # 本机端口:容器端口
restart: on-failure # 自动重启
volumes:
- ./deploy/redis/db:/data # 把持久化数据挂载到宿主机
- ./deploy/redis/conf/redis.conf:/usr/local/etc/redis/redis.conf # 把redis的配置文件挂载到宿主机
- ./deploy/redis/logs:/logs # 用来存放日志
environment:
- TZ=Asia/Shanghai # 解决容器 时区的问题
networks:
- my-server

mysql:
container_name: mysql
image: daocloud.io/library/mysql:8.0.20 # 使用官方镜像
ports:
- 3307:3306 # 本机端口:容器端口
restart: on-failure
environment:
- MYSQL_ROOT_PASSWORD=123456 # root用户密码
volumes:
- ./deploy/mysql/db:/var/lib/mysql # 用来存放了数据库表文件
- ./deploy/mysql/conf/my.cnf:/etc/my.cnf # 存放自定义的配置文件
# 我们在启动MySQL容器时自动创建我们需要的数据库和表
# mysql官方镜像中提供了容器启动时自动docker-entrypoint-initdb.d下的脚本的功能
- ./deploy/mysql/init:/docker-entrypoint-initdb.d/ # 存放初始化的脚本
networks:
- my-server

server: # egg服务
container_name: server
build: # 根据Dockerfile构建镜像
context: .
dockerfile: Dockerfile
ports:
- 7001:7001
restart: on-failure # 设置自动重启,这一步必须设置,主要是存在mysql还没有启动完成就启动了node服务
networks:
- my-server
depends_on: # node服务依赖于mysql和redis
- redis
- mysql

nginx:
container_name: nginx
image: daocloud.io/library/nginx:1.13.0-alpine # 使用官方镜像
ports:
- 8900:80 # 本地端口:容器端口
restart: on-failure
volumes: # 映射本地目录到容器目录
- ./deploy/nginx/conf/nginx.conf:/etc/nginx/nginx.conf
- ./deploy/nginx/conf.d:/etc/nginx/conf.d
- ./deploy/nginx/html:/usr/share/nginx/html
- ./deploy/nginx/log:/var/log/nginx
networks:
- my-server
depends_on:
- redis
- mysql
- server

# 声明一下网桥 my-server。
# 重要:将所有服务都挂载在同一网桥即可通过容器名来互相通信了
# 如egg连接mysql和redis,可以通过容器名来互相通信
networks:
my-server:

和本地那份对比,Redis 这个服务改动最大。多出来的 command 指定了用挂载进去的 redis.conf 启动,--appendonly yes 打开 AOF 持久化,容器重建之后数据还在。TZ=Asia/Shanghai 这个环境变量看着不起眼,但很关键,容器默认是 UTC 时区,不设的话 Redis 的过期时间、日志时间戳全都和你预期差八小时,排查问题的时候能把人绕晕。

egg Dockerfile

服务器上用的 Dockerfile 和本地那份是同一份,不用改。这也是容器化最舒服的地方,构建产物在哪台机器上都一样。

# 使用node镜像
FROM daocloud.io/library/node:12.18
# 在容器中新建目录文件夹 egg
RUN mkdir -p /egg
# 将 /egg 设置为默认工作目录
WORKDIR /egg
# 将 package.json 复制默认工作目录
COPY package.json /egg/package.json
# 安装依赖
RUN yarn config set registry https://registry.npmmirror.com
# 只安装dependencies的包
RUN yarn --production
# 再copy代码至容器
COPY ./ /egg
# 7001端口
EXPOSE 7001
#等容器启动之后执行脚本
CMD yarn prod

./deploy/redis/conf/redis.conf

Redis 官方镜像里是不带 redis.conf 的,容器起来跑的是一份内置默认值。想改配置就得自己去 Redis 官网下一份对应版本的样例配置,挂载进容器,再用 command 指定它启动。这也是前面 compose 文件里 command: redis-server /usr/local/etc/redis/redis.conf 那行的由来。

版本要对上,不同大版本的配置项有增有减,拿 6.x 的容器读 7.x 的配置文件可能会因为不认识某个指令直接启动失败。

需要设置的地方就两处,日志级别和日志文件位置。

#指定日志级别,notice适用于生产环境
# 指定日志记录级别,Redis总共支持四个级别:debug、verbose、notice、warning,默认为verbose
# debug (很多信息, 对开发/测试比较有用)
# verbose (many rarely useful info, but not a mess like the debug level)
# notice (moderately verbose, what you want in production probably)
# warning (only very important / critical messages are logged)
loglevel verbose

#指定log日志位置
logfile /logs/redis.log

logfile 这个路径是容器内的路径,对应 compose 里挂出去的 ./deploy/redis/logs:/logs,所以最后日志会落到宿主机的 deploy/redis/logs/redis.log。注意这里如果 logfile 填了空字符串,Redis 会把日志打到标准输出,那样 docker logs 能看到但文件里就没有了,两种方式各有各的用法,别以为配置没生效。

还有一处在 compose 里已经处理了,就是 bindprotected-mode。样例配置默认 bind 127.0.0.1,那样容器只监听回环地址,别的容器根本连不上,容器化场景下要么注释掉 bind,要么改成 0.0.0.0 并且务必配上 requirepass

下面是完整的样例配置,内容很长,主要留作对照查阅,平时改的就是上面那几行。

展开查看完整的 redis.conf 样例配置
# Redis configuration file example.
#
# Note that in order to read the configuration file, Redis must be
# started with the file path as first argument:
#
# ./redis-server /path/to/redis.conf

# Note on units: when memory size is needed, it is possible to specify
# it in the usual form of 1k 5GB 4M and so forth:
#
# 1k => 1000 bytes
# 1kb => 1024 bytes
# 1m => 1000000 bytes
# 1mb => 1024*1024 bytes
# 1g => 1000000000 bytes
# 1gb => 1024*1024*1024 bytes
#
# units are case insensitive so 1GB 1Gb 1gB are all the same.

################################## INCLUDES ###################################

# Include one or more other config files here. This is useful if you
# have a standard template that goes to all Redis servers but also need
# to customize a few per-server settings. Include files can include
# other files, so use this wisely.
#
# Notice option "include" won't be rewritten by command "CONFIG REWRITE"
# from admin or Redis Sentinel. Since Redis always uses the last processed
# line as value of a configuration directive, you'd better put includes
# at the beginning of this file to avoid overwriting config change at runtime.
#
# If instead you are interested in using includes to override configuration
# options, it is better to use include as the last line.
#
# include /path/to/local.conf
# include /path/to/other.conf

################################## MODULES #####################################

# Load modules at startup. If the server is not able to load modules
# it will abort. It is possible to use multiple loadmodule directives.
#
# loadmodule /path/to/my_module.so
# loadmodule /path/to/other_module.so

################################## NETWORK #####################################

# By default, if no "bind" configuration directive is specified, Redis listens
# for connections from all the network interfaces available on the server.
# It is possible to listen to just one or multiple selected interfaces using
# the "bind" configuration directive, followed by one or more IP addresses.
#
# Examples:
#
# bind 192.168.1.100 10.0.0.1
# bind 127.0.0.1 ::1
#
# ~~~ WARNING ~~~ If the computer running Redis is directly exposed to the
# internet, binding to all the interfaces is dangerous and will expose the
# instance to everybody on the internet. So by default we uncomment the
# following bind directive, that will force Redis to listen only into
# the IPv4 loopback interface address (this means Redis will be able to
# accept connections only from clients running into the same computer it
# is running).
#
# IF YOU ARE SURE YOU WANT YOUR INSTANCE TO LISTEN TO ALL THE INTERFACES
# JUST COMMENT THE FOLLOWING LINE.
# ~~~~~~~~~~~~~~~~~~~~~~~~~~~~~~~~~~~~~~~~~~~~~~~~~~~~~~~~~~~~~~~~~~~~~~~~
# redis绑定的ip或者主机名,注意如果此处绑定设置为127.0.0.1,将会出现其他服务器上的服务连接至此台redis失败的情况
# 绑定的主机地址
# 你可以绑定单一接口,如果没有绑定,所有接口都会监听到来的连接
# bind 127.0.0.1

# Protected mode is a layer of security protection, in order to avoid that
# Redis instances left open on the internet are accessed and exploited.
#
# When protected mode is on and if:
#
# 1) The server is not binding explicitly to a set of addresses using the
# "bind" directive.
# 2) No password is configured.
#
# The server only accepts connections from clients connecting from the
# IPv4 and IPv6 loopback addresses 127.0.0.1 and ::1, and from Unix domain
# sockets.
#
# By default protected mode is enabled. You should disable it only if
# you are sure you want clients from other hosts to connect to Redis
# even if no authentication is configured, nor a specific set of interfaces
# are explicitly listed using the "bind" directive.
protected-mode yes

# Accept connections on the specified port, default is 6379 (IANA #815344).
# If port 0 is specified Redis will not listen on a TCP socket.
# 指定redis启动占用的端口
port 6379

# TCP listen() backlog.
#
# In high requests-per-second environments you need an high backlog in order
# to avoid slow clients connections issues. Note that the Linux kernel
# will silently truncate it to the value of /proc/sys/net/core/somaxconn so
# make sure to raise both the value of somaxconn and tcp_max_syn_backlog
# in order to get the desired effect.
#此项配置内容属于redis优化内容
tcp-backlog 511

# Unix socket.
#
# Specify the path for the Unix socket that will be used to listen for
# incoming connections. There is no default, so Redis will not listen
# on a unix socket when not specified.
#
# unixsocket /tmp/redis.sock
# unixsocketperm 700

# Close the connection after a client is idle for N seconds (0 to disable)
# 指定socket连接空闲时间(秒),如果连接空闲超时将会关闭连接,设置为0表示用不超时
timeout 0

# TCP keepalive.
#
# If non-zero, use SO_KEEPALIVE to send TCP ACKs to clients in absence
# of communication. This is useful for two reasons:
#
# 1) Detect dead peers.
# 2) Take the connection alive from the point of view of network
# equipment in the middle.
#
# On Linux, the specified value (in seconds) is the period used to send ACKs.
# Note that to close the connection the double of the time is needed.
# On other kernels the period depends on the kernel configuration.
#
# A reasonable value for this option is 300 seconds, which is the new
# Redis default starting with Redis 3.2.1.
#指定tcp连接是否为长连接,长连接将会额外增加server端的开支,默认为0表示禁用
tcp-keepalive 300

################################# TLS/SSL #####################################

# By default, TLS/SSL is disabled. To enable it, the "tls-port" configuration
# directive can be used to define TLS-listening ports. To enable TLS on the
# default port, use:
#
# port 0
# tls-port 6379

# Configure a X.509 certificate and private key to use for authenticating the
# server to connected clients, masters or cluster peers. These files should be
# PEM formatted.
#
# tls-cert-file redis.crt
# tls-key-file redis.key

# Configure a DH parameters file to enable Diffie-Hellman (DH) key exchange:
#
# tls-dh-params-file redis.dh

# Configure a CA certificate(s) bundle or directory to authenticate TLS/SSL
# clients and peers. Redis requires an explicit configuration of at least one
# of these, and will not implicitly use the system wide configuration.
#
# tls-ca-cert-file ca.crt
# tls-ca-cert-dir /etc/ssl/certs

# By default, clients (including replica servers) on a TLS port are required
# to authenticate using valid client side certificates.
#
# It is possible to disable authentication using this directive.
#
# tls-auth-clients no

# By default, a Redis replica does not attempt to establish a TLS connection
# with its master.
#
# Use the following directive to enable TLS on replication links.
#
# tls-replication yes

# By default, the Redis Cluster bus uses a plain TCP connection. To enable
# TLS for the bus protocol, use the following directive:
#
# tls-cluster yes

# Explicitly specify TLS versions to support. Allowed values are case insensitive
# and include "TLSv1", "TLSv1.1", "TLSv1.2", "TLSv1.3" (OpenSSL >= 1.1.1) or
# any combination. To enable only TLSv1.2 and TLSv1.3, use:
#
# tls-protocols "TLSv1.2 TLSv1.3"

# Configure allowed ciphers. See the ciphers(1ssl) manpage for more information
# about the syntax of this string.
#
# Note: this configuration applies only to <= TLSv1.2.
#
# tls-ciphers DEFAULT:!MEDIUM

# Configure allowed TLSv1.3 ciphersuites. See the ciphers(1ssl) manpage for more
# information about the syntax of this string, and specifically for TLSv1.3
# ciphersuites.
#
# tls-ciphersuites TLS_CHACHA20_POLY1305_SHA256

# When choosing a cipher, use the server's preference instead of the client
# preference. By default, the server follows the client's preference.
#
# tls-prefer-server-ciphers yes

################################# GENERAL #####################################

# By default Redis does not run as a daemon. Use 'yes' if you need it.
# Note that Redis will write a pid file in /var/run/redis.pid when daemonized.
# 默认以后台方式运行 yes 则以后台方式运行
daemonize no

# If you run Redis from upstart or systemd, Redis can interact with your
# supervision tree. Options:
# supervised no - no supervision interaction
# supervised upstart - signal upstart by putting Redis into SIGSTOP mode
# supervised systemd - signal systemd by writing READY=1 to $NOTIFY_SOCKET
# supervised auto - detect upstart or systemd method based on
# UPSTART_JOB or NOTIFY_SOCKET environment variables
# Note: these supervision methods only signal "process is ready."
# They do not enable continuous liveness pings back to your supervisor.
supervised no

# If a pid file is specified, Redis writes it where specified at startup
# and removes it at exit.
#
# When the server runs non daemonized, no pid file is created if none is
# specified in the configuration. When the server is daemonized, the pid file
# is used even if not specified, defaulting to "/var/run/redis.pid".
#
# Creating a pid file is best effort: if Redis is not able to create it
# nothing bad happens, the server will start and run normally.
# 指定redis pid文件
pidfile /var/run/redis_6379.pid

# Specify the server verbosity level.
# This can be one of:
# debug (a lot of information, useful for development/testing)
# verbose (many rarely useful info, but not a mess like the debug level)
# notice (moderately verbose, what you want in production probably)
# warning (only very important / critical messages are logged)
#指定日志级别,notice适用于生产环境
# 指定日志记录级别,Redis总共支持四个级别:debug、verbose、notice、warning,默认为verbose
# debug (很多信息, 对开发/测试比较有用)
# verbose (many rarely useful info, but not a mess like the debug level)
# notice (moderately verbose, what you want in production probably)
# warning (only very important / critical messages are logged)
loglevel verbose

# Specify the log file name. Also the empty string can be used to force
# Redis to log on the standard output. Note that if you use standard
# output for logging but daemonize, logs will be sent to /dev/null
#指定log日志位置
logfile /logs/redis.log

# To enable logging to the system logger, just set 'syslog-enabled' to yes,
# and optionally update the other syslog parameters to suit your needs.
#是否将日志输出到系统日志,默认为no
syslog-enabled yes

# Specify the syslog identity.
#指定syslog的标示符,如果'syslog-enabled'是no,则这个选项无效
syslog-ident redis

# Specify the syslog facility. Must be USER or between LOCAL0-LOCAL7.
# syslog-facility local0

# Set the number of databases. The default database is DB 0, you can select
# a different one on a per-connection basis using SELECT <dbid> where
# dbid is a number between 0 and 'databases'-1
# 设定redis所允许的最大"db簇"的个数,默认为16个簇
databases 16

# By default Redis shows an ASCII art logo only when started to log to the
# standard output and if the standard output is a TTY. Basically this means
# that normally a logo is displayed only in interactive sessions.
#
# However it is possible to force the pre-4.0 behavior and always show a
# ASCII art logo in startup logs by setting the following option to yes.
always-show-logo yes

################################ SNAPSHOTTING ################################
#
# Save the DB on disk:
#
# save <seconds> <changes>
#
# Will save the DB if both the given number of seconds and the given
# number of write operations against the DB occurred.
#
# In the example below the behaviour will be to save:
# after 900 sec (15 min) if at least 1 key changed
# after 300 sec (5 min) if at least 10 keys changed
# after 60 sec if at least 10000 keys changed
#
# Note: you can disable saving completely by commenting out all "save" lines.
#
# It is also possible to remove all the previously configured save
# points by adding a save directive with a single empty string argument
# like in the following example:
#
# save ""

save 900 1
save 300 10
save 60 10000

# By default Redis will stop accepting writes if RDB snapshots are enabled
# (at least one save point) and the latest background save failed.
# This will make the user aware (in a hard way) that data is not persisting
# on disk properly, otherwise chances are that no one will notice and some
# disaster will happen.
#
# If the background saving process will start working again Redis will
# automatically allow writes again.
#
# However if you have setup your proper monitoring of the Redis server
# and persistence, you may want to disable this feature so that Redis will
# continue to work as usual even if there are problems with disk,
# permissions, and so forth.
#如果snapshot过程中出现错误,即数据持久化失败,是否终止所有的客户端write请求
stop-writes-on-bgsave-error yes

# Compress string objects using LZF when dump .rdb databases?
# For default that's set to 'yes' as it's almost always a win.
# If you want to save some CPU in the saving child set it to 'no' but
# the dataset will likely be bigger if you have compressible values or keys.
#是否启用rdb文件压缩手段,默认为yes
rdbcompression yes

# Since version 5 of RDB a CRC64 checksum is placed at the end of the file.
# This makes the format more resistant to corruption but there is a performance
# hit to pay (around 10%) when saving and loading RDB files, so you can disable it
# for maximum performances.
#
# RDB files created with checksum disabled have a checksum of zero that will
# tell the loading code to skip the check.
# 是否对rdb文件使用CRC64校验和,默认为"yes",那么每个rdb文件内容的末尾都会追加CRC校验和
rdbchecksum yes

# The filename where to dump the DB
#指定rdb文件的名称
dbfilename dump.rdb

# Remove RDB files used by replication in instances without persistence
# enabled. By default this option is disabled, however there are environments
# where for regulations or other security concerns, RDB files persisted on
# disk by masters in order to feed replicas, or stored on disk by replicas
# in order to load them for the initial synchronization, should be deleted
# ASAP. Note that this option ONLY WORKS in instances that have both AOF
# and RDB persistence disabled, otherwise is completely ignored.
#
# An alternative (and sometimes better) way to obtain the same effect is
# to use diskless replication on both master and replicas instances. However
# in the case of replicas, diskless is not always an option.
rdb-del-sync-files no

# The working directory.
#
# The DB will be written inside this directory, with the filename specified
# above using the 'dbfilename' configuration directive.
#
# The Append Only File will also be created inside this directory.
#
# Note that you must specify a directory here, not a file name.
#指定rdb/AOF文件的目录位置
dir ./

################################# REPLICATION #################################

# Master-Replica replication. Use replicaof to make a Redis instance a copy of
# another Redis server. A few things to understand ASAP about Redis replication.
#
# +------------------+ +---------------+
# | Master | ---> | Replica |
# | (receive writes) | | (exact copy) |
# +------------------+ +---------------+
#
# 1) Redis replication is asynchronous, but you can configure a master to
# stop accepting writes if it appears to be not connected with at least
# a given number of replicas.
# 2) Redis replicas are able to perform a partial resynchronization with the
# master if the replication link is lost for a relatively small amount of
# time. You may want to configure the replication backlog size (see the next
# sections of this file) with a sensible value depending on your needs.
# 3) Replication is automatic and does not need user intervention. After a
# network partition replicas automatically try to reconnect to masters
# and resynchronize with them.
#
# replicaof <masterip> <masterport>

# If the master is password protected (using the "requirepass" configuration
# directive below) it is possible to tell the replica to authenticate before
# starting the replication synchronization process, otherwise the master will
# refuse the replica request.
#
# masterauth <master-password>
#
# However this is not enough if you are using Redis ACLs (for Redis version
# 6 or greater), and the default user is not capable of running the PSYNC
# command and/or other commands needed for replication. In this case it's
# better to configure a special user to use with replication, and specify the
# masteruser configuration as such:
#
# masteruser <username>
#
# When masteruser is specified, the replica will authenticate against its
# master using the new AUTH form: AUTH <username> <password>.

# When a replica loses its connection with the master, or when the replication
# is still in progress, the replica can act in two different ways:
#
# 1) if replica-serve-stale-data is set to 'yes' (the default) the replica will
# still reply to client requests, possibly with out of date data, or the
# data set may just be empty if this is the first synchronization.
#
# 2) if replica-serve-stale-data is set to 'no' the replica will reply with
# an error "SYNC with master in progress" to all the kind of commands
# but to INFO, replicaOF, AUTH, PING, SHUTDOWN, REPLCONF, ROLE, CONFIG,
# SUBSCRIBE, UNSUBSCRIBE, PSUBSCRIBE, PUNSUBSCRIBE, PUBLISH, PUBSUB,
# COMMAND, POST, HOST: and LATENCY.
#
replica-serve-stale-data yes

# You can configure a replica instance to accept writes or not. Writing against
# a replica instance may be useful to store some ephemeral data (because data
# written on a replica will be easily deleted after resync with the master) but
# may also cause problems if clients are writing to it because of a
# misconfiguration.
#
# Since Redis 2.6 by default replicas are read-only.
#
# Note: read only replicas are not designed to be exposed to untrusted clients
# on the internet. It's just a protection layer against misuse of the instance.
# Still a read only replica exports by default all the administrative commands
# such as CONFIG, DEBUG, and so forth. To a limited extent you can improve
# security of read only replicas using 'rename-command' to shadow all the
# administrative / dangerous commands.
replica-read-only yes

# Replication SYNC strategy: disk or socket.
#
# New replicas and reconnecting replicas that are not able to continue the
# replication process just receiving differences, need to do what is called a
# "full synchronization". An RDB file is transmitted from the master to the
# replicas.
#
# The transmission can happen in two different ways:
#
# 1) Disk-backed: The Redis master creates a new process that writes the RDB
# file on disk. Later the file is transferred by the parent
# process to the replicas incrementally.
# 2) Diskless: The Redis master creates a new process that directly writes the
# RDB file to replica sockets, without touching the disk at all.
#
# With disk-backed replication, while the RDB file is generated, more replicas
# can be queued and served with the RDB file as soon as the current child
# producing the RDB file finishes its work. With diskless replication instead
# once the transfer starts, new replicas arriving will be queued and a new
# transfer will start when the current one terminates.
#
# When diskless replication is used, the master waits a configurable amount of
# time (in seconds) before starting the transfer in the hope that multiple
# replicas will arrive and the transfer can be parallelized.
#
# With slow disks and fast (large bandwidth) networks, diskless replication
# works better.
repl-diskless-sync no

# When diskless replication is enabled, it is possible to configure the delay
# the server waits in order to spawn the child that transfers the RDB via socket
# to the replicas.
#
# This is important since once the transfer starts, it is not possible to serve
# new replicas arriving, that will be queued for the next RDB transfer, so the
# server waits a delay in order to let more replicas arrive.
#
# The delay is specified in seconds, and by default is 5 seconds. To disable
# it entirely just set it to 0 seconds and the transfer will start ASAP.
repl-diskless-sync-delay 5

# -----------------------------------------------------------------------------
# WARNING: RDB diskless load is experimental. Since in this setup the replica
# does not immediately store an RDB on disk, it may cause data loss during
# failovers. RDB diskless load + Redis modules not handling I/O reads may also
# cause Redis to abort in case of I/O errors during the initial synchronization
# stage with the master. Use only if your do what you are doing.
# -----------------------------------------------------------------------------
#
# Replica can load the RDB it reads from the replication link directly from the
# socket, or store the RDB to a file and read that file after it was completely
# recived from the master.
#
# In many cases the disk is slower than the network, and storing and loading
# the RDB file may increase replication time (and even increase the master's
# Copy on Write memory and salve buffers).
# However, parsing the RDB file directly from the socket may mean that we have
# to flush the contents of the current database before the full rdb was
# received. For this reason we have the following options:
#
# "disabled" - Don't use diskless load (store the rdb file to the disk first)
# "on-empty-db" - Use diskless load only when it is completely safe.
# "swapdb" - Keep a copy of the current db contents in RAM while parsing
# the data directly from the socket. note that this requires
# sufficient memory, if you don't have it, you risk an OOM kill.
repl-diskless-load disabled

# Replicas send PINGs to server in a predefined interval. It's possible to
# change this interval with the repl_ping_replica_period option. The default
# value is 10 seconds.
#
# repl-ping-replica-period 10

# The following option sets the replication timeout for:
#
# 1) Bulk transfer I/O during SYNC, from the point of view of replica.
# 2) Master timeout from the point of view of replicas (data, pings).
# 3) Replica timeout from the point of view of masters (REPLCONF ACK pings).
#
# It is important to make sure that this value is greater than the value
# specified for repl-ping-replica-period otherwise a timeout will be detected
# every time there is low traffic between the master and the replica.
#
# repl-timeout 60

# Disable TCP_NODELAY on the replica socket after SYNC?
#
# If you select "yes" Redis will use a smaller number of TCP packets and
# less bandwidth to send data to replicas. But this can add a delay for
# the data to appear on the replica side, up to 40 milliseconds with
# Linux kernels using a default configuration.
#
# If you select "no" the delay for data to appear on the replica side will
# be reduced but more bandwidth will be used for replication.
#
# By default we optimize for low latency, but in very high traffic conditions
# or when the master and replicas are many hops away, turning this to "yes" may
# be a good idea.
repl-disable-tcp-nodelay no

# Set the replication backlog size. The backlog is a buffer that accumulates
# replica data when replicas are disconnected for some time, so that when a
# replica wants to reconnect again, often a full resync is not needed, but a
# partial resync is enough, just passing the portion of data the replica
# missed while disconnected.
#
# The bigger the replication backlog, the longer the time the replica can be
# disconnected and later be able to perform a partial resynchronization.
#
# The backlog is only allocated once there is at least a replica connected.
#
# repl-backlog-size 1mb

# After a master has no longer connected replicas for some time, the backlog
# will be freed. The following option configures the amount of seconds that
# need to elapse, starting from the time the last replica disconnected, for
# the backlog buffer to be freed.
#
# Note that replicas never free the backlog for timeout, since they may be
# promoted to masters later, and should be able to correctly "partially
# resynchronize" with the replicas: hence they should always accumulate backlog.
#
# A value of 0 means to never release the backlog.
#
# repl-backlog-ttl 3600

# The replica priority is an integer number published by Redis in the INFO
# output. It is used by Redis Sentinel in order to select a replica to promote
# into a master if the master is no longer working correctly.
#
# A replica with a low priority number is considered better for promotion, so
# for instance if there are three replicas with priority 10, 100, 25 Sentinel
# will pick the one with priority 10, that is the lowest.
#
# However a special priority of 0 marks the replica as not able to perform the
# role of master, so a replica with priority of 0 will never be selected by
# Redis Sentinel for promotion.
#
# By default the priority is 100.
replica-priority 100

# It is possible for a master to stop accepting writes if there are less than
# N replicas connected, having a lag less or equal than M seconds.
#
# The N replicas need to be in "online" state.
#
# The lag in seconds, that must be <= the specified value, is calculated from
# the last ping received from the replica, that is usually sent every second.
#
# This option does not GUARANTEE that N replicas will accept the write, but
# will limit the window of exposure for lost writes in case not enough replicas
# are available, to the specified number of seconds.
#
# For example to require at least 3 replicas with a lag <= 10 seconds use:
#
# min-replicas-to-write 3
# min-replicas-max-lag 10
#
# Setting one or the other to 0 disables the feature.
#
# By default min-replicas-to-write is set to 0 (feature disabled) and
# min-replicas-max-lag is set to 10.

# A Redis master is able to list the address and port of the attached
# replicas in different ways. For example the "INFO replication" section
# offers this information, which is used, among other tools, by
# Redis Sentinel in order to discover replica instances.
# Another place where this info is available is in the output of the
# "ROLE" command of a master.
#
# The listed IP and address normally reported by a replica is obtained
# in the following way:
#
# IP: The address is auto detected by checking the peer address
# of the socket used by the replica to connect with the master.
#
# Port: The port is communicated by the replica during the replication
# handshake, and is normally the port that the replica is using to
# listen for connections.
#
# However when port forwarding or Network Address Translation (NAT) is
# used, the replica may be actually reachable via different IP and port
# pairs. The following two options can be used by a replica in order to
# report to its master a specific set of IP and port, so that both INFO
# and ROLE will report those values.
#
# There is no need to use both the options if you need to override just
# the port or the IP address.
#
# replica-announce-ip 5.5.5.5
# replica-announce-port 1234

############################### KEYS TRACKING #################################

# Redis implements server assisted support for client side caching of values.
# This is implemented using an invalidation table that remembers, using
# 16 millions of slots, what clients may have certain subsets of keys. In turn
# this is used in order to send invalidation messages to clients. Please
# to understand more about the feature check this page:
#
# https://redis.io/topics/client-side-caching
#
# When tracking is enabled for a client, all the read only queries are assumed
# to be cached: this will force Redis to store information in the invalidation
# table. When keys are modified, such information is flushed away, and
# invalidation messages are sent to the clients. However if the workload is
# heavily dominated by reads, Redis could use more and more memory in order
# to track the keys fetched by many clients.
#
# For this reason it is possible to configure a maximum fill value for the
# invalidation table. By default it is set to 1M of keys, and once this limit
# is reached, Redis will start to evict keys in the invalidation table
# even if they were not modified, just to reclaim memory: this will in turn
# force the clients to invalidate the cached values. Basically the table
# maximum size is a trade off between the memory you want to spend server
# side to track information about who cached what, and the ability of clients
# to retain cached objects in memory.
#
# If you set the value to 0, it means there are no limits, and Redis will
# retain as many keys as needed in the invalidation table.
# In the "stats" INFO section, you can find information about the number of
# keys in the invalidation table at every given moment.
#
# Note: when key tracking is used in broadcasting mode, no memory is used
# in the server side so this setting is useless.
#
# tracking-table-max-keys 1000000

################################## SECURITY ###################################

# Warning: since Redis is pretty fast an outside user can try up to
# 1 million passwords per second against a modern box. This means that you
# should use very strong passwords, otherwise they will be very easy to break.
# Note that because the password is really a shared secret between the client
# and the server, and should not be memorized by any human, the password
# can be easily a long string from /dev/urandom or whatever, so by using a
# long and unguessable password no brute force attack will be possible.

# Redis ACL users are defined in the following format:
#
# user <username> ... acl rules ...
#
# For example:
#
# user worker +@list +@connection ~jobs:* on >ffa9203c493aa99
#
# The special username "default" is used for new connections. If this user
# has the "nopass" rule, then new connections will be immediately authenticated
# as the "default" user without the need of any password provided via the
# AUTH command. Otherwise if the "default" user is not flagged with "nopass"
# the connections will start in not authenticated state, and will require
# AUTH (or the HELLO command AUTH option) in order to be authenticated and
# start to work.
#
# The ACL rules that describe what an user can do are the following:
#
# on Enable the user: it is possible to authenticate as this user.
# off Disable the user: it's no longer possible to authenticate
# with this user, however the already authenticated connections
# will still work.
# +<command> Allow the execution of that command
# -<command> Disallow the execution of that command
# +@<category> Allow the execution of all the commands in such category
# with valid categories are like @admin, @set, @sortedset, ...
# and so forth, see the full list in the server.c file where
# the Redis command table is described and defined.
# The special category @all means all the commands, but currently
# present in the server, and that will be loaded in the future
# via modules.
# +<command>|subcommand Allow a specific subcommand of an otherwise
# disabled command. Note that this form is not
# allowed as negative like -DEBUG|SEGFAULT, but
# only additive starting with "+".
# allcommands Alias for +@all. Note that it implies the ability to execute
# all the future commands loaded via the modules system.
# nocommands Alias for -@all.
# ~<pattern> Add a pattern of keys that can be mentioned as part of
# commands. For instance ~* allows all the keys. The pattern
# is a glob-style pattern like the one of KEYS.
# It is possible to specify multiple patterns.
# allkeys Alias for ~*
# resetkeys Flush the list of allowed keys patterns.
# ><password> Add this passowrd to the list of valid password for the user.
# For example >mypass will add "mypass" to the list.
# This directive clears the "nopass" flag (see later).
# <<password> Remove this password from the list of valid passwords.
# nopass All the set passwords of the user are removed, and the user
# is flagged as requiring no password: it means that every
# password will work against this user. If this directive is
# used for the default user, every new connection will be
# immediately authenticated with the default user without
# any explicit AUTH command required. Note that the "resetpass"
# directive will clear this condition.
# resetpass Flush the list of allowed passwords. Moreover removes the
# "nopass" status. After "resetpass" the user has no associated
# passwords and there is no way to authenticate without adding
# some password (or setting it as "nopass" later).
# reset Performs the following actions: resetpass, resetkeys, off,
# -@all. The user returns to the same state it has immediately
# after its creation.
#
# ACL rules can be specified in any order: for instance you can start with
# passwords, then flags, or key patterns. However note that the additive
# and subtractive rules will CHANGE MEANING depending on the ordering.
# For instance see the following example:
#
# user alice on +@all -DEBUG ~* >somepassword
#
# This will allow "alice" to use all the commands with the exception of the
# DEBUG command, since +@all added all the commands to the set of the commands
# alice can use, and later DEBUG was removed. However if we invert the order
# of two ACL rules the result will be different:
#
# user alice on -DEBUG +@all ~* >somepassword
#
# Now DEBUG was removed when alice had yet no commands in the set of allowed
# commands, later all the commands are added, so the user will be able to
# execute everything.
#
# Basically ACL rules are processed left-to-right.
#
# For more information about ACL configuration please refer to
# the Redis web site at https://redis.io/topics/acl

# ACL LOG
#
# The ACL Log tracks failed commands and authentication events associated
# with ACLs. The ACL Log is useful to troubleshoot failed commands blocked
# by ACLs. The ACL Log is stored in and consumes memory. There is no limit
# to its length.You can reclaim memory with ACL LOG RESET or set a maximum
# length below.
acllog-max-len 128

# Using an external ACL file
#
# Instead of configuring users here in this file, it is possible to use
# a stand-alone file just listing users. The two methods cannot be mixed:
# if you configure users here and at the same time you activate the exteranl
# ACL file, the server will refuse to start.
#
# The format of the external ACL user file is exactly the same as the
# format that is used inside redis.conf to describe users.
#
# aclfile /etc/redis/users.acl

# IMPORTANT NOTE: starting with Redis 6 "requirepass" is just a compatiblity
# layer on top of the new ACL system. The option effect will be just setting
# the password for the default user. Clients will still authenticate using
# AUTH <password> as usually, or more explicitly with AUTH default <password>
# if they follow the new protocol: both will work.
# 设置Redis连接密码,如果配置了连接密码,客户端在连接Redis时需要通过auth <password>命令提供密码,默认关闭
# requirepass 123456

# Command renaming (DEPRECATED).
#
# ------------------------------------------------------------------------
# WARNING: avoid using this option if possible. Instead use ACLs to remove
# commands from the default user, and put them only in some admin user you
# create for administrative purposes.
# ------------------------------------------------------------------------
#
# It is possible to change the name of dangerous commands in a shared
# environment. For instance the CONFIG command may be renamed into something
# hard to guess so that it will still be available for internal-use tools
# but not available for general clients.
#
# Example:
#
# rename-command CONFIG b840fc02d524045429941cc15f59e41cb7be6c52
#
# It is also possible to completely kill a command by renaming it into
# an empty string:
#
# rename-command CONFIG ""
#
# Please note that changing the name of commands that are logged into the
# AOF file or transmitted to replicas may cause problems.

################################### CLIENTS ####################################

# Set the max number of connected clients at the same time. By default
# this limit is set to 10000 clients, however if the Redis server is not
# able to configure the process file limit to allow for the specified limit
# the max number of allowed clients is set to the current file limit
# minus 32 (as Redis reserves a few file descriptors for internal uses).
#
# Once the limit is reached Redis will close all the new connections sending
# an error 'max number of clients reached'.
#
# maxclients 10000

############################## MEMORY MANAGEMENT ################################

# Set a memory usage limit to the specified amount of bytes.
# When the memory limit is reached Redis will try to remove keys
# according to the eviction policy selected (see maxmemory-policy).
#
# If Redis can't remove keys according to the policy, or if the policy is
# set to 'noeviction', Redis will start to reply with errors to commands
# that would use more memory, like SET, LPUSH, and so on, and will continue
# to reply to read-only commands like GET.
#
# This option is usually useful when using Redis as an LRU or LFU cache, or to
# set a hard memory limit for an instance (using the 'noeviction' policy).
#
# WARNING: If you have replicas attached to an instance with maxmemory on,
# the size of the output buffers needed to feed the replicas are subtracted
# from the used memory count, so that network problems / resyncs will
# not trigger a loop where keys are evicted, and in turn the output
# buffer of replicas is full with DELs of keys evicted triggering the deletion
# of more keys, and so forth until the database is completely emptied.
#
# In short... if you have replicas attached it is suggested that you set a lower
# limit for maxmemory so that there is some free RAM on the system for replica
# output buffers (but this is not needed if the policy is 'noeviction').
#
#设置redis占用最大内存数,如果超过redis会试图删除即将过期的key,而保护具有较长生命周期的key
maxmemory 5gb
# maxmemory <bytes>

# MAXMEMORY POLICY: how Redis will select what to remove when maxmemory
# is reached. You can select one from the following behaviors:
#
# volatile-lru -> Evict using approximated LRU, only keys with an expire set.
# allkeys-lru -> Evict any key using approximated LRU.
# volatile-lfu -> Evict using approximated LFU, only keys with an expire set.
# allkeys-lfu -> Evict any key using approximated LFU.
# volatile-random -> Remove a random key having an expire set.
# allkeys-random -> Remove a random key, any key.
# volatile-ttl -> Remove the key with the nearest expire time (minor TTL)
# noeviction -> Don't evict anything, just return an error on write operations.
#
# LRU means Least Recently Used
# LFU means Least Frequently Used
#
# Both LRU, LFU and volatile-ttl are implemented using approximated
# randomized algorithms.
#
# Note: with any of the above policies, Redis will return an error on write
# operations, when there are no suitable keys for eviction.
#
# At the date of writing these commands are: set setnx setex append
# incr decr rpush lpush rpushx lpushx linsert lset rpoplpush sadd
# sinter sinterstore sunion sunionstore sdiff sdiffstore zadd zincrby
# zunionstore zinterstore hset hsetnx hmset hincrby incrby decrby
# getset mset msetnx exec sort
#
# The default is:
#
#当内存占用超过maxmemory限定时,触发主动清理策略
#清理策略方式如下:
#volatile-lru:只对设置了过期时间的key进行LRU(默认值)
#allkeys-lru : 删除lru算法的key
#volatile-random:随机删除即将过期key
#allkeys-random:随机删除
#volatile-ttl : 删除即将过期的
#noeviction : 永不过期,返回错误
maxmemory-policy allkeys-lru

# LRU, LFU and minimal TTL algorithms are not precise algorithms but approximated
# algorithms (in order to save memory), so you can tune it for speed or
# accuracy. For default Redis will check five keys and pick the one that was
# used less recently, you can change the sample size using the following
# configuration directive.
#
# The default of 5 produces good enough results. 10 Approximates very closely
# true LRU but costs more CPU. 3 is faster but not very accurate.
#
# maxmemory-samples 5

# Starting from Redis 5, by default a replica will ignore its maxmemory setting
# (unless it is promoted to master after a failover or manually). It means
# that the eviction of keys will be just handled by the master, sending the
# DEL commands to the replica as keys evict in the master side.
#
# This behavior ensures that masters and replicas stay consistent, and is usually
# what you want, however if your replica is writable, or you want the replica
# to have a different memory setting, and you are sure all the writes performed
# to the replica are idempotent, then you may change this default (but be sure
# to understand what you are doing).
#
# Note that since the replica by default does not evict, it may end using more
# memory than the one set via maxmemory (there are certain buffers that may
# be larger on the replica, or data structures may sometimes take more memory
# and so forth). So make sure you monitor your replicas and make sure they
# have enough memory to never hit a real out-of-memory condition before the
# master hits the configured maxmemory setting.
#
# replica-ignore-maxmemory yes

# Redis reclaims expired keys in two ways: upon access when those keys are
# found to be expired, and also in background, in what is called the
# "active expire key". The key space is slowly and interactively scanned
# looking for expired keys to reclaim, so that it is possible to free memory
# of keys that are expired and will never be accessed again in a short time.
#
# The default effort of the expire cycle will try to avoid having more than
# ten percent of expired keys still in memory, and will try to avoid consuming
# more than 25% of total memory and to add latency to the system. However
# it is possible to increase the expire "effort" that is normally set to
# "1", to a greater value, up to the value "10". At its maximum value the
# system will use more CPU, longer cycles (and technically may introduce
# more latency), and will tollerate less already expired keys still present
# in the system. It's a tradeoff betweeen memory, CPU and latecy.
#
# active-expire-effort 1

############################# LAZY FREEING ####################################

# Redis has two primitives to delete keys. One is called DEL and is a blocking
# deletion of the object. It means that the server stops processing new commands
# in order to reclaim all the memory associated with an object in a synchronous
# way. If the key deleted is associated with a small object, the time needed
# in order to execute the DEL command is very small and comparable to most other
# O(1) or O(log_N) commands in Redis. However if the key is associated with an
# aggregated value containing millions of elements, the server can block for
# a long time (even seconds) in order to complete the operation.
#
# For the above reasons Redis also offers non blocking deletion primitives
# such as UNLINK (non blocking DEL) and the ASYNC option of FLUSHALL and
# FLUSHDB commands, in order to reclaim memory in background. Those commands
# are executed in constant time. Another thread will incrementally free the
# object in the background as fast as possible.
#
# DEL, UNLINK and ASYNC option of FLUSHALL and FLUSHDB are user-controlled.
# It's up to the design of the application to understand when it is a good
# idea to use one or the other. However the Redis server sometimes has to
# delete keys or flush the whole database as a side effect of other operations.
# Specifically Redis deletes objects independently of a user call in the
# following scenarios:
#
# 1) On eviction, because of the maxmemory and maxmemory policy configurations,
# in order to make room for new data, without going over the specified
# memory limit.
# 2) Because of expire: when a key with an associated time to live (see the
# EXPIRE command) must be deleted from memory.
# 3) Because of a side effect of a command that stores data on a key that may
# already exist. For example the RENAME command may delete the old key
# content when it is replaced with another one. Similarly SUNIONSTORE
# or SORT with STORE option may delete existing keys. The SET command
# itself removes any old content of the specified key in order to replace
# it with the specified string.
# 4) During replication, when a replica performs a full resynchronization with
# its master, the content of the whole database is removed in order to
# load the RDB file just transferred.
#
# In all the above cases the default is to delete objects in a blocking way,
# like if DEL was called. However you can configure each case specifically
# in order to instead release memory in a non-blocking way like if UNLINK
# was called, using the following configuration directives.

lazyfree-lazy-eviction no
lazyfree-lazy-expire no
lazyfree-lazy-server-del no
replica-lazy-flush no

# It is also possible, for the case when to replace the user code DEL calls
# with UNLINK calls is not easy, to modify the default behavior of the DEL
# command to act exactly like UNLINK, using the following configuration
# directive:

lazyfree-lazy-user-del no

################################ THREADED I/O #################################

# Redis is mostly single threaded, however there are certain threaded
# operations such as UNLINK, slow I/O accesses and other things that are
# performed on side threads.
#
# Now it is also possible to handle Redis clients socket reads and writes
# in different I/O threads. Since especially writing is so slow, normally
# Redis users use pipelining in order to speedup the Redis performances per
# core, and spawn multiple instances in order to scale more. Using I/O
# threads it is possible to easily speedup two times Redis without resorting
# to pipelining nor sharding of the instance.
#
# By default threading is disabled, we suggest enabling it only in machines
# that have at least 4 or more cores, leaving at least one spare core.
# Using more than 8 threads is unlikely to help much. We also recommend using
# threaded I/O only if you actually have performance problems, with Redis
# instances being able to use a quite big percentage of CPU time, otherwise
# there is no point in using this feature.
#
# So for instance if you have a four cores boxes, try to use 2 or 3 I/O
# threads, if you have a 8 cores, try to use 6 threads. In order to
# enable I/O threads use the following configuration directive:
#
# io-threads 4
#
# Setting io-threads to 1 will just use the main thread as usually.
# When I/O threads are enabled, we only use threads for writes, that is
# to thread the write(2) syscall and transfer the client buffers to the
# socket. However it is also possible to enable threading of reads and
# protocol parsing using the following configuration directive, by setting
# it to yes:
#
# io-threads-do-reads no
#
# Usually threading reads doesn't help much.
#
# NOTE 1: This configuration directive cannot be changed at runtime via
# CONFIG SET. Aso this feature currently does not work when SSL is
# enabled.
#
# NOTE 2: If you want to test the Redis speedup using redis-benchmark, make
# sure you also run the benchmark itself in threaded mode, using the
# --threads option to match the number of Redis theads, otherwise you'll not
# be able to notice the improvements.

############################## APPEND ONLY MODE ###############################

# By default Redis asynchronously dumps the dataset on disk. This mode is
# good enough in many applications, but an issue with the Redis process or
# a power outage may result into a few minutes of writes lost (depending on
# the configured save points).
#
# The Append Only File is an alternative persistence mode that provides
# much better durability. For instance using the default data fsync policy
# (see later in the config file) Redis can lose just one second of writes in a
# dramatic event like a server power outage, or a single write if something
# wrong with the Redis process itself happens, but the operating system is
# still running correctly.
#
# AOF and RDB persistence can be enabled at the same time without problems.
# If the AOF is enabled on startup Redis will load the AOF, that is the file
# with the better durability guarantees.
#
# Please check http://redis.io/topics/persistence for more information.

#是否开启aof功能,"yes"表示开启,在开启情况下,aof文件同步功能才生效,默认为"no",对master机器,建议使用AOF,对于slave,建议关闭
appendonly yes

# The name of the append only file (default: "appendonly.aof")

appendfilename "appendonly.aof"

# The fsync() call tells the Operating System to actually write data on disk
# instead of waiting for more data in the output buffer. Some OS will really flush
# data on disk, some other OS will just try to do it ASAP.
#
# Redis supports three different modes:
#
# no: don't fsync, just let the OS flush the data when it wants. Faster.
# always: fsync after every write to the append only log. Slow, Safest.
# everysec: fsync only one time every second. Compromise.
#
# The default is "everysec", as that's usually the right compromise between
# speed and data safety. It's up to you to understand if you can relax this to
# "no" that will let the operating system flush the output buffer when
# it wants, for better performances (but if you can live with the idea of
# some data loss consider the default persistence mode that's snapshotting),
# or on the contrary, use "always" that's very slow but a bit safer than
# everysec.
#
# More details please check the following article:
# http://antirez.com/post/redis-persistence-demystified.html
#
# If unsure, use "everysec".

# appendfsync always
#任何一个aof记录都立即进行文件同步(磁盘写入),安全性最高;如果write请求比较密集,将会造成较高的磁盘IO开支和响应延迟,everysec每秒同步一次
appendfsync everysec
# appendfsync no

# When the AOF fsync policy is set to always or everysec, and a background
# saving process (a background save or AOF log background rewriting) is
# performing a lot of I/O against the disk, in some Linux configurations
# Redis may block too long on the fsync() call. Note that there is no fix for
# this currently, as even performing fsync in a different thread will block
# our synchronous write(2) call.
#
# In order to mitigate this problem it's possible to use the following option
# that will prevent fsync() from being called in the main process while a
# BGSAVE or BGREWRITEAOF is in progress.
#
# This means that while another child is saving, the durability of Redis is
# the same as "appendfsync none". In practical terms, this means that it is
# possible to lose up to 30 seconds of log in the worst scenario (with the
# default Linux settings).
#
# If you have latency problems turn this to "yes". Otherwise leave it as
# "no" that is the safest pick from the point of view of durability.

#在aof rewrite期间,是否对aof新记录的append暂缓使用文件同步策略,主要考虑磁盘IO开支和请求阻塞时间,默认为no,表示"不暂缓",新的aof记录仍然会被立即同步
no-appendfsync-on-rewrite no

# Automatic rewrite of the append only file.
# Redis is able to automatically rewrite the log file implicitly calling
# BGREWRITEAOF when the AOF log size grows by the specified percentage.
#
# This is how it works: Redis remembers the size of the AOF file after the
# latest rewrite (if no rewrite has happened since the restart, the size of
# the AOF at startup is used).
#
# This base size is compared to the current size. If the current size is
# bigger than the specified percentage, the rewrite is triggered. Also
# you need to specify a minimal size for the AOF file to be rewritten, this
# is useful to avoid rewriting the AOF file even if the percentage increase
# is reached but it is still pretty small.
#
# Specify a percentage of zero in order to disable the automatic AOF
# rewrite feature.
#aof每次rewrite之后,都会记住当前aof文件的大小,当文件增长到一定比例后,继续进行aof rewrite
auto-aof-rewrite-percentage 100
#aof rewrite触发时机,最小文件尺寸
auto-aof-rewrite-min-size 64mb

# An AOF file may be found to be truncated at the end during the Redis
# startup process, when the AOF data gets loaded back into memory.
# This may happen when the system where Redis is running
# crashes, especially when an ext4 filesystem is mounted without the
# data=ordered option (however this can't happen when Redis itself
# crashes or aborts but the operating system still works correctly).
#
# Redis can either exit with an error when this happens, or load as much
# data as possible (the default now) and start if the AOF file is found
# to be truncated at the end. The following option controls this behavior.
#
# If aof-load-truncated is set to yes, a truncated AOF file is loaded and
# the Redis server starts emitting a log to inform the user of the event.
# Otherwise if the option is set to no, the server aborts with an error
# and refuses to start. When the option is set to no, the user requires
# to fix the AOF file using the "redis-check-aof" utility before to restart
# the server.
#
# Note that if the AOF file will be found to be corrupted in the middle
# the server will still exit with an error. This option only applies when
# Redis will try to read more data from the AOF file but not enough bytes
# will be found.
aof-load-truncated yes

# When rewriting the AOF file, Redis is able to use an RDB preamble in the
# AOF file for faster rewrites and recoveries. When this option is turned
# on the rewritten AOF file is composed of two different stanzas:
#
# [RDB file][AOF tail]
#
# When loading Redis recognizes that the AOF file starts with the "REDIS"
# string and loads the prefixed RDB file, and continues loading the AOF
# tail.
aof-use-rdb-preamble yes

################################ LUA SCRIPTING ###############################

# Max execution time of a Lua script in milliseconds.
#
# If the maximum execution time is reached Redis will log that a script is
# still in execution after the maximum allowed time and will start to
# reply to queries with an error.
#
# When a long running script exceeds the maximum execution time only the
# SCRIPT KILL and SHUTDOWN NOSAVE commands are available. The first can be
# used to stop a script that did not yet called write commands. The second
# is the only way to shut down the server in the case a write command was
# already issued by the script but the user doesn't want to wait for the natural
# termination of the script.
#
# Set it to 0 or a negative value for unlimited execution without warnings.
#lua脚本运行的最大时间
lua-time-limit 5000

################################ REDIS CLUSTER ###############################

# Normal Redis instances can't be part of a Redis Cluster; only nodes that are
# started as cluster nodes can. In order to start a Redis instance as a
# cluster node enable the cluster support uncommenting the following:
#
# cluster-enabled yes

# Every cluster node has a cluster configuration file. This file is not
# intended to be edited by hand. It is created and updated by Redis nodes.
# Every Redis Cluster node requires a different cluster configuration file.
# Make sure that instances running in the same system do not have
# overlapping cluster configuration file names.
#
# cluster-config-file nodes-6379.conf

# Cluster node timeout is the amount of milliseconds a node must be unreachable
# for it to be considered in failure state.
# Most other internal time limits are multiple of the node timeout.
#
# cluster-node-timeout 15000

# A replica of a failing master will avoid to start a failover if its data
# looks too old.
#
# There is no simple way for a replica to actually have an exact measure of
# its "data age", so the following two checks are performed:
#
# 1) If there are multiple replicas able to failover, they exchange messages
# in order to try to give an advantage to the replica with the best
# replication offset (more data from the master processed).
# Replicas will try to get their rank by offset, and apply to the start
# of the failover a delay proportional to their rank.
#
# 2) Every single replica computes the time of the last interaction with
# its master. This can be the last ping or command received (if the master
# is still in the "connected" state), or the time that elapsed since the
# disconnection with the master (if the replication link is currently down).
# If the last interaction is too old, the replica will not try to failover
# at all.
#
# The point "2" can be tuned by user. Specifically a replica will not perform
# the failover if, since the last interaction with the master, the time
# elapsed is greater than:
#
# (node-timeout * replica-validity-factor) + repl-ping-replica-period
#
# So for example if node-timeout is 30 seconds, and the replica-validity-factor
# is 10, and assuming a default repl-ping-replica-period of 10 seconds, the
# replica will not try to failover if it was not able to talk with the master
# for longer than 310 seconds.
#
# A large replica-validity-factor may allow replicas with too old data to failover
# a master, while a too small value may prevent the cluster from being able to
# elect a replica at all.
#
# For maximum availability, it is possible to set the replica-validity-factor
# to a value of 0, which means, that replicas will always try to failover the
# master regardless of the last time they interacted with the master.
# (However they'll always try to apply a delay proportional to their
# offset rank).
#
# Zero is the only value able to guarantee that when all the partitions heal
# the cluster will always be able to continue.
#
# cluster-replica-validity-factor 10

# Cluster replicas are able to migrate to orphaned masters, that are masters
# that are left without working replicas. This improves the cluster ability
# to resist to failures as otherwise an orphaned master can't be failed over
# in case of failure if it has no working replicas.
#
# Replicas migrate to orphaned masters only if there are still at least a
# given number of other working replicas for their old master. This number
# is the "migration barrier". A migration barrier of 1 means that a replica
# will migrate only if there is at least 1 other working replica for its master
# and so forth. It usually reflects the number of replicas you want for every
# master in your cluster.
#
# Default is 1 (replicas migrate only if their masters remain with at least
# one replica). To disable migration just set it to a very large value.
# A value of 0 can be set but is useful only for debugging and dangerous
# in production.
#
# cluster-migration-barrier 1

# By default Redis Cluster nodes stop accepting queries if they detect there
# is at least an hash slot uncovered (no available node is serving it).
# This way if the cluster is partially down (for example a range of hash slots
# are no longer covered) all the cluster becomes, eventually, unavailable.
# It automatically returns available as soon as all the slots are covered again.
#
# However sometimes you want the subset of the cluster which is working,
# to continue to accept queries for the part of the key space that is still
# covered. In order to do so, just set the cluster-require-full-coverage
# option to no.
#
# cluster-require-full-coverage yes

# This option, when set to yes, prevents replicas from trying to failover its
# master during master failures. However the master can still perform a
# manual failover, if forced to do so.
#
# This is useful in different scenarios, especially in the case of multiple
# data center operations, where we want one side to never be promoted if not
# in the case of a total DC failure.
#
# cluster-replica-no-failover no

# This option, when set to yes, allows nodes to serve read traffic while the
# the cluster is in a down state, as long as it believes it owns the slots.
#
# This is useful for two cases. The first case is for when an application
# doesn't require consistency of data during node failures or network partitions.
# One example of this is a cache, where as long as the node has the data it
# should be able to serve it.
#
# The second use case is for configurations that don't meet the recommended
# three shards but want to enable cluster mode and scale later. A
# master outage in a 1 or 2 shard configuration causes a read/write outage to the
# entire cluster without this option set, with it set there is only a write outage.
# Without a quorum of masters, slot ownership will not change automatically.
#
# cluster-allow-reads-when-down no

# In order to setup your cluster make sure to read the documentation
# available at http://redis.io web site.

########################## CLUSTER DOCKER/NAT support ########################

# In certain deployments, Redis Cluster nodes address discovery fails, because
# addresses are NAT-ted or because ports are forwarded (the typical case is
# Docker and other containers).
#
# In order to make Redis Cluster working in such environments, a static
# configuration where each node knows its public address is needed. The
# following two options are used for this scope, and are:
#
# * cluster-announce-ip
# * cluster-announce-port
# * cluster-announce-bus-port
#
# Each instruct the node about its address, client port, and cluster message
# bus port. The information is then published in the header of the bus packets
# so that other nodes will be able to correctly map the address of the node
# publishing the information.
#
# If the above options are not used, the normal Redis Cluster auto-detection
# will be used instead.
#
# Note that when remapped, the bus port may not be at the fixed offset of
# clients port + 10000, so you can specify any port and bus-port depending
# on how they get remapped. If the bus-port is not set, a fixed offset of
# 10000 will be used as usually.
#
# Example:
#
# cluster-announce-ip 10.1.1.5
# cluster-announce-port 6379
# cluster-announce-bus-port 6380

################################## SLOW LOG ###################################

# The Redis Slow Log is a system to log queries that exceeded a specified
# execution time. The execution time does not include the I/O operations
# like talking with the client, sending the reply and so forth,
# but just the time needed to actually execute the command (this is the only
# stage of command execution where the thread is blocked and can not serve
# other requests in the meantime).
#
# You can configure the slow log with two parameters: one tells Redis
# what is the execution time, in microseconds, to exceed in order for the
# command to get logged, and the other parameter is the length of the
# slow log. When a new command is logged the oldest one is removed from the
# queue of logged commands.

# The following time is expressed in microseconds, so 1000000 is equivalent
# to one second. Note that a negative number disables the slow log, while
# a value of zero forces the logging of every command.
#慢操作日志记录
slowlog-log-slower-than 10000

# There is no limit to this length. Just be aware that it will consume memory.
# You can reclaim memory used by the slow log with SLOWLOG RESET.
#慢操作日志保留的最大条数
slowlog-max-len 128

################################ LATENCY MONITOR ##############################

# The Redis latency monitoring subsystem samples different operations
# at runtime in order to collect data related to possible sources of
# latency of a Redis instance.
#
# Via the LATENCY command this information is available to the user that can
# print graphs and obtain reports.
#
# The system only logs operations that were performed in a time equal or
# greater than the amount of milliseconds specified via the
# latency-monitor-threshold configuration directive. When its value is set
# to zero, the latency monitor is turned off.
#
# By default latency monitoring is disabled since it is mostly not needed
# if you don't have latency issues, and collecting data has a performance
# impact, that while very small, can be measured under big load. Latency
# monitoring can easily be enabled at runtime using the command
# "CONFIG SET latency-monitor-threshold <milliseconds>" if needed.
latency-monitor-threshold 0

############################# EVENT NOTIFICATION ##############################

# Redis can notify Pub/Sub clients about events happening in the key space.
# This feature is documented at http://redis.io/topics/notifications
#
# For instance if keyspace events notification is enabled, and a client
# performs a DEL operation on key "foo" stored in the Database 0, two
# messages will be published via Pub/Sub:
#
# PUBLISH __keyspace@0__:foo del
# PUBLISH __keyevent@0__:del foo
#
# It is possible to select the events that Redis will notify among a set
# of classes. Every class is identified by a single character:
#
# K Keyspace events, published with __keyspace@<db>__ prefix.
# E Keyevent events, published with __keyevent@<db>__ prefix.
# g Generic commands (non-type specific) like DEL, EXPIRE, RENAME, ...
# $ String commands
# l List commands
# s Set commands
# h Hash commands
# z Sorted set commands
# x Expired events (events generated every time a key expires)
# e Evicted events (events generated when a key is evicted for maxmemory)
# t Stream commands
# m Key-miss events (Note: It is not included in the 'A' class)
# A Alias for g$lshzxet, so that the "AKE" string means all the events
# (Except key-miss events which are excluded from 'A' due to their
# unique nature).
#
# The "notify-keyspace-events" takes as argument a string that is composed
# of zero or multiple characters. The empty string means that notifications
# are disabled.
#
# Example: to enable list and generic events, from the point of view of the
# event name, use:
#
# notify-keyspace-events Elg
#
# Example 2: to get the stream of the expired keys subscribing to channel
# name __keyevent@0__:expired use:
#
# notify-keyspace-events Ex
#
# By default all notifications are disabled because most users don't need
# this feature and the feature has some overhead. Note that if you don't
# specify at least one of K or E, no events will be delivered.
#键空间通知,""表示关闭
notify-keyspace-events ""

############################### GOPHER SERVER #################################

# Redis contains an implementation of the Gopher protocol, as specified in
# the RFC 1436 (https://www.ietf.org/rfc/rfc1436.txt).
#
# The Gopher protocol was very popular in the late '90s. It is an alternative
# to the web, and the implementation both server and client side is so simple
# that the Redis server has just 100 lines of code in order to implement this
# support.
#
# What do you do with Gopher nowadays? Well Gopher never *really* died, and
# lately there is a movement in order for the Gopher more hierarchical content
# composed of just plain text documents to be resurrected. Some want a simpler
# internet, others believe that the mainstream internet became too much
# controlled, and it's cool to create an alternative space for people that
# want a bit of fresh air.
#
# Anyway for the 10nth birthday of the Redis, we gave it the Gopher protocol
# as a gift.
#
# --- HOW IT WORKS? ---
#
# The Redis Gopher support uses the inline protocol of Redis, and specifically
# two kind of inline requests that were anyway illegal: an empty request
# or any request that starts with "/" (there are no Redis commands starting
# with such a slash). Normal RESP2/RESP3 requests are completely out of the
# path of the Gopher protocol implementation and are served as usually as well.
#
# If you open a connection to Redis when Gopher is enabled and send it
# a string like "/foo", if there is a key named "/foo" it is served via the
# Gopher protocol.
#
# In order to create a real Gopher "hole" (the name of a Gopher site in Gopher
# talking), you likely need a script like the following:
#
# https://github.com/antirez/gopher2redis
#
# --- SECURITY WARNING ---
#
# If you plan to put Redis on the internet in a publicly accessible address
# to server Gopher pages MAKE SURE TO SET A PASSWORD to the instance.
# Once a password is set:
#
# 1. The Gopher server (when enabled, not by default) will still serve
# content via Gopher.
# 2. However other commands cannot be called before the client will
# authenticate.
#
# So use the 'requirepass' option to protect your instance.
#
# To enable Gopher support uncomment the following line and set
# the option from no (the default) to yes.
#
# gopher-enabled no

############################### ADVANCED CONFIG ###############################

# Hashes are encoded using a memory efficient data structure when they have a
# small number of entries, and the biggest entry does not exceed a given
# threshold. These thresholds can be configured using the following directives.
##ziplist中允许存储的最大条目个数
hash-max-ziplist-entries 512
#ziplist中允许条目value值最大字节数
hash-max-ziplist-value 64

# Lists are also encoded in a special way to save a lot of space.
# The number of entries allowed per internal list node can be specified
# as a fixed maximum size or a maximum number of elements.
# For a fixed maximum size, use -5 through -1, meaning:
# -5: max size: 64 Kb <-- not recommended for normal workloads
# -4: max size: 32 Kb <-- not recommended
# -3: max size: 16 Kb <-- probably not recommended
# -2: max size: 8 Kb <-- good
# -1: max size: 4 Kb <-- good
# Positive numbers mean store up to _exactly_ that number of elements
# per list node.
# The highest performing option is usually -2 (8 Kb size) or -1 (4 Kb size),
# but if your use case is unique, adjust the settings as necessary.
list-max-ziplist-size -2

# Lists may also be compressed.
# Compress depth is the number of quicklist ziplist nodes from *each* side of
# the list to *exclude* from compression. The head and tail of the list
# are always uncompressed for fast push/pop operations. Settings are:
# 0: disable all list compression
# 1: depth 1 means "don't start compressing until after 1 node into the list,
# going from either the head or tail"
# So: [head]->node->node->...->node->[tail]
# [head], [tail] will always be uncompressed; inner nodes will compress.
# 2: [head]->[next]->node->node->...->node->[prev]->[tail]
# 2 here means: don't compress head or head->next or tail->prev or tail,
# but compress all nodes between them.
# 3: [head]->[next]->[next]->node->node->...->node->[prev]->[prev]->[tail]
# etc.
list-compress-depth 0

# Sets have a special encoding in just one case: when a set is composed
# of just strings that happen to be integers in radix 10 in the range
# of 64 bit signed integers.
# The following configuration setting sets the limit in the size of the
# set in order to use this special memory saving encoding.
#intset中允许保存的最大条目个数,如果达到阀值,intset将会被重构为hashtable
set-max-intset-entries 512

# Similarly to hashes and lists, sorted sets are also specially encoded in
# order to save a lot of space. This encoding is only used when the length and
# elements of a sorted set are below the following limits:
#设置同上
zset-max-ziplist-entries 128
zset-max-ziplist-value 64

# HyperLogLog sparse representation bytes limit. The limit includes the
# 16 bytes header. When an HyperLogLog using the sparse representation crosses
# this limit, it is converted into the dense representation.
#
# A value greater than 16000 is totally useless, since at that point the
# dense representation is more memory efficient.
#
# The suggested value is ~ 3000 in order to have the benefits of
# the space efficient encoding without slowing down too much PFADD,
# which is O(N) with the sparse encoding. The value can be raised to
# ~ 10000 when CPU is not a concern, but space is, and the data set is
# composed of many HyperLogLogs with cardinality in the 0 - 15000 range.
hll-sparse-max-bytes 3000

# Streams macro node max size / items. The stream data structure is a radix
# tree of big nodes that encode multiple items inside. Using this configuration
# it is possible to configure how big a single node can be in bytes, and the
# maximum number of items it may contain before switching to a new node when
# appending new stream entries. If any of the following settings are set to
# zero, the limit is ignored, so for instance it is possible to set just a
# max entires limit by setting max-bytes to 0 and max-entries to the desired
# value.
stream-node-max-bytes 4096
stream-node-max-entries 100

# Active rehashing uses 1 millisecond every 100 milliseconds of CPU time in
# order to help rehashing the main Redis hash table (the one mapping top-level
# keys to values). The hash table implementation Redis uses (see dict.c)
# performs a lazy rehashing: the more operation you run into a hash table
# that is rehashing, the more rehashing "steps" are performed, so if the
# server is idle the rehashing is never complete and some more memory is used
# by the hash table.
#
# The default is to use this millisecond 10 times every second in order to
# actively rehash the main dictionaries, freeing memory when possible.
#
# If unsure:
# use "activerehashing no" if you have hard latency requirements and it is
# not a good thing in your environment that Redis can reply from time to time
# to queries with 2 milliseconds delay.
#
# use "activerehashing yes" if you don't have such hard requirements but
# want to free memory asap when possible.
#是否开启顶层数据结构的rehash功能,如果内存允许,请开启
activerehashing yes

# The client output buffer limits can be used to force disconnection of clients
# that are not reading data from the server fast enough for some reason (a
# common reason is that a Pub/Sub client can't consume messages as fast as the
# publisher can produce them).
#
# The limit can be set differently for the three different classes of clients:
#
# normal -> normal clients including MONITOR clients
# replica -> replica clients
# pubsub -> clients subscribed to at least one pubsub channel or pattern
#
# The syntax of every client-output-buffer-limit directive is the following:
#
# client-output-buffer-limit <class> <hard limit> <soft limit> <soft seconds>
#
# A client is immediately disconnected once the hard limit is reached, or if
# the soft limit is reached and remains reached for the specified number of
# seconds (continuously).
# So for instance if the hard limit is 32 megabytes and the soft limit is
# 16 megabytes / 10 seconds, the client will get disconnected immediately
# if the size of the output buffers reach 32 megabytes, but will also get
# disconnected if the client reaches 16 megabytes and continuously overcomes
# the limit for 10 seconds.
#
# By default normal clients are not limited because they don't receive data
# without asking (in a push way), but just after a request, so only
# asynchronous clients may create a scenario where data is requested faster
# than it can read.
#
# Instead there is a default limit for pubsub and replica clients, since
# subscribers and replicas receive data in a push fashion.
#
# Both the hard or the soft limit can be disabled by setting them to zero.
#客户端buffer控制
client-output-buffer-limit normal 0 0 0
client-output-buffer-limit replica 256mb 64mb 60
client-output-buffer-limit pubsub 32mb 8mb 60

# Client query buffers accumulate new commands. They are limited to a fixed
# amount by default in order to avoid that a protocol desynchronization (for
# instance due to a bug in the client) will lead to unbound memory usage in
# the query buffer. However you can configure it here if you have very special
# needs, such us huge multi/exec requests or alike.
#
# client-query-buffer-limit 1gb

# In the Redis protocol, bulk requests, that are, elements representing single
# strings, are normally limited ot 512 mb. However you can change this limit
# here.
#
# proto-max-bulk-len 512mb

# Redis calls an internal function to perform many background tasks, like
# closing connections of clients in timeout, purging expired keys that are
# never requested, and so forth.
#
# Not all tasks are performed with the same frequency, but Redis checks for
# tasks to perform according to the specified "hz" value.
#
# By default "hz" is set to 10. Raising the value will use more CPU when
# Redis is idle, but at the same time will make Redis more responsive when
# there are many keys expiring at the same time, and timeouts may be
# handled with more precision.
#
# The range is between 1 and 500, however a value over 100 is usually not
# a good idea. Most users should use the default of 10 and raise this up to
# 100 only in environments where very low latency is required.
#Redis server执行后台任务的频率,默认为10,此值越大表示redis对"间歇性task"的执行次数越频繁
hz 10

# Normally it is useful to have an HZ value which is proportional to the
# number of clients connected. This is useful in order, for instance, to
# avoid too many clients are processed for each background task invocation
# in order to avoid latency spikes.
#
# Since the default HZ value by default is conservatively set to 10, Redis
# offers, and enables by default, the ability to use an adaptive HZ value
# which will temporary raise when there are many connected clients.
#
# When dynamic HZ is enabled, the actual configured HZ will be used
# as a baseline, but multiples of the configured HZ value will be actually
# used as needed once more clients are connected. In this way an idle
# instance will use very little CPU time while a busy instance will be
# more responsive.
dynamic-hz yes

# When a child rewrites the AOF file, if the following option is enabled
# the file will be fsync-ed every 32 MB of data generated. This is useful
# in order to commit the file to the disk more incrementally and avoid
# big latency spikes.
#aof rewrite过程中,是否采取增量"文件同步"策略,默认为"yes",而且必须为yes
aof-rewrite-incremental-fsync yes

# When redis saves RDB file, if the following option is enabled
# the file will be fsync-ed every 32 MB of data generated. This is useful
# in order to commit the file to the disk more incrementally and avoid
# big latency spikes.
rdb-save-incremental-fsync yes

# Redis LFU eviction (see maxmemory setting) can be tuned. However it is a good
# idea to start with the default settings and only change them after investigating
# how to improve the performances and how the keys LFU change over time, which
# is possible to inspect via the OBJECT FREQ command.
#
# There are two tunable parameters in the Redis LFU implementation: the
# counter logarithm factor and the counter decay time. It is important to
# understand what the two parameters mean before changing them.
#
# The LFU counter is just 8 bits per key, it's maximum value is 255, so Redis
# uses a probabilistic increment with logarithmic behavior. Given the value
# of the old counter, when a key is accessed, the counter is incremented in
# this way:
#
# 1. A random number R between 0 and 1 is extracted.
# 2. A probability P is calculated as 1/(old_value*lfu_log_factor+1).
# 3. The counter is incremented only if R < P.
#
# The default lfu-log-factor is 10. This is a table of how the frequency
# counter changes with a different number of accesses with different
# logarithmic factors:
#
# +--------+------------+------------+------------+------------+------------+
# | factor | 100 hits | 1000 hits | 100K hits | 1M hits | 10M hits |
# +--------+------------+------------+------------+------------+------------+
# | 0 | 104 | 255 | 255 | 255 | 255 |
# +--------+------------+------------+------------+------------+------------+
# | 1 | 18 | 49 | 255 | 255 | 255 |
# +--------+------------+------------+------------+------------+------------+
# | 10 | 10 | 18 | 142 | 255 | 255 |
# +--------+------------+------------+------------+------------+------------+
# | 100 | 8 | 11 | 49 | 143 | 255 |
# +--------+------------+------------+------------+------------+------------+
#
# NOTE: The above table was obtained by running the following commands:
#
# redis-benchmark -n 1000000 incr foo
# redis-cli object freq foo
#
# NOTE 2: The counter initial value is 5 in order to give new objects a chance
# to accumulate hits.
#
# The counter decay time is the time, in minutes, that must elapse in order
# for the key counter to be divided by two (or decremented if it has a value
# less <= 10).
#
# The default value for the lfu-decay-time is 1. A Special value of 0 means to
# decay the counter every time it happens to be scanned.
#
# lfu-log-factor 10
# lfu-decay-time 1

########################### ACTIVE DEFRAGMENTATION #######################
#
# What is active defragmentation?
# -------------------------------
#
# Active (online) defragmentation allows a Redis server to compact the
# spaces left between small allocations and deallocations of data in memory,
# thus allowing to reclaim back memory.
#
# Fragmentation is a natural process that happens with every allocator (but
# less so with Jemalloc, fortunately) and certain workloads. Normally a server
# restart is needed in order to lower the fragmentation, or at least to flush
# away all the data and create it again. However thanks to this feature
# implemented by Oran Agra for Redis 4.0 this process can happen at runtime
# in an "hot" way, while the server is running.
#
# Basically when the fragmentation is over a certain level (see the
# configuration options below) Redis will start to create new copies of the
# values in contiguous memory regions by exploiting certain specific Jemalloc
# features (in order to understand if an allocation is causing fragmentation
# and to allocate it in a better place), and at the same time, will release the
# old copies of the data. This process, repeated incrementally for all the keys
# will cause the fragmentation to drop back to normal values.
#
# Important things to understand:
#
# 1. This feature is disabled by default, and only works if you compiled Redis
# to use the copy of Jemalloc we ship with the source code of Redis.
# This is the default with Linux builds.
#
# 2. You never need to enable this feature if you don't have fragmentation
# issues.
#
# 3. Once you experience fragmentation, you can enable this feature when
# needed with the command "CONFIG SET activedefrag yes".
#
# The configuration parameters are able to fine tune the behavior of the
# defragmentation process. If you are not sure about what they mean it is
# a good idea to leave the defaults untouched.

# Enabled active defragmentation
# activedefrag no

# Minimum amount of fragmentation waste to start active defrag
# active-defrag-ignore-bytes 100mb

# Minimum percentage of fragmentation to start active defrag
# active-defrag-threshold-lower 10

# Maximum percentage of fragmentation at which we use maximum effort
# active-defrag-threshold-upper 100

# Minimal effort for defrag in CPU percentage, to be used when the lower
# threshold is reached
# active-defrag-cycle-min 1

# Maximal effort for defrag in CPU percentage, to be used when the upper
# threshold is reached
# active-defrag-cycle-max 25

# Maximum number of set/hash/zset/list fields that will be processed from
# the main dictionary scan
# active-defrag-max-scan-fields 1000

# Jemalloc background thread for purging will be enabled by default
jemalloc-bg-thread yes

# It is possible to pin different threads and processes of Redis to specific
# CPUs in your system, in order to maximize the performances of the server.
# This is useful both in order to pin different Redis threads in different
# CPUs, but also in order to make sure that multiple Redis instances running
# in the same host will be pinned to different CPUs.
#
# Normally you can do this using the "taskset" command, however it is also
# possible to this via Redis configuration directly, both in Linux and FreeBSD.
#
# You can pin the server/IO threads, bio threads, aof rewrite child process, and
# the bgsave child process. The syntax to specify the cpu list is the same as
# the taskset command:
#
# Set redis server/io threads to cpu affinity 0,2,4,6:
# server_cpulist 0-7:2
#
# Set bio threads to cpu affinity 1,3:
# bio_cpulist 1,3
#
# Set aof rewrite child process to cpu affinity 8,9,10,11:
# aof_rewrite_cpulist 8-11
#
# Set bgsave child process to cpu affinity 1,10,11
# bgsave_cpulist 1,10-11

上传本地 egg 服务端代码到服务器

配置都改完了,把代码传上去。这里用的是最朴素的 scp,把本地打好的压缩包丢到服务器的 /home 下。

scp -rp egg.zip root@43.138.12.18:/home

-p 保留文件的时间戳和权限位,-r 递归。传的是 zip 而不是整个目录,一是快,二是省得 node_modules 那几万个小文件把传输拖死。

scp 上传代码压缩包到服务器

解压

unzip -u -d server egg.zip

-d server 是指定解压到 server 目录,-u 是只覆盖更新的文件。后续每次发版重新传一次包再解压,就能只更新变化的部分。
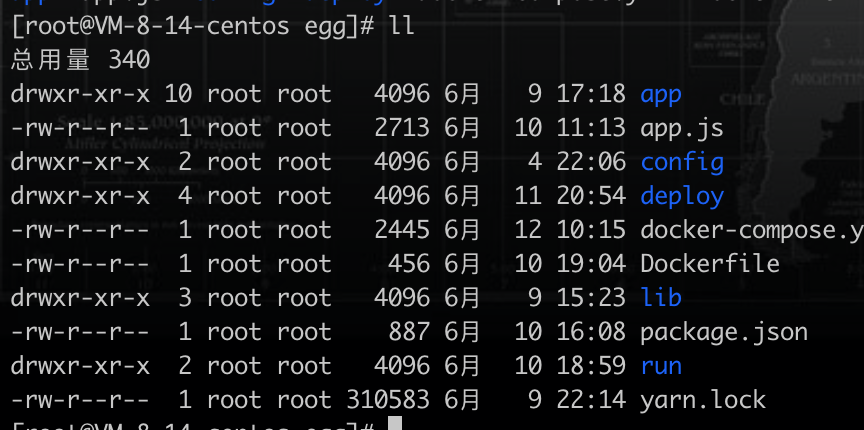
解压后得到完整的 egg 项目目录

启动 egg 服务

# cd egg
# -d 后台方式启动

docker-compose up -d

第一次跑这条会比较久,因为要拉四个镜像还要 build 一遍 Egg 的镜像,网络一般的话十几分钟很正常。中途别 Ctrl + C,让它跑完。
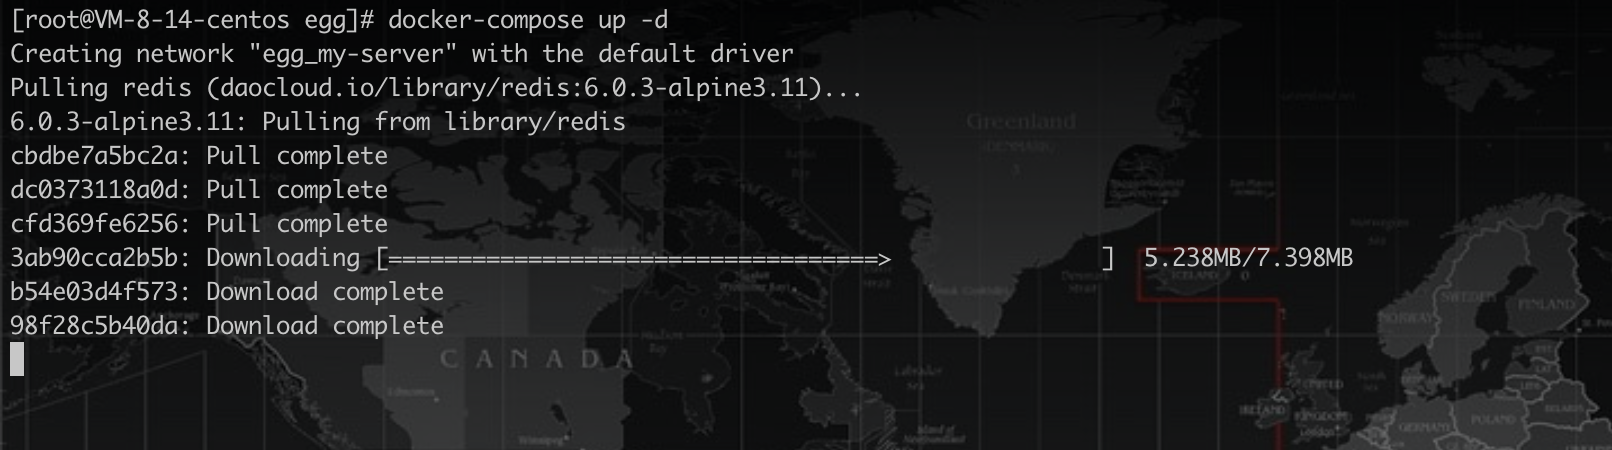
compose 在服务器上依次拉取镜像
egg 镜像构建过程中的日志输出
四个容器全部启动完成

测试服务

服务起来了不等于能用,得一层一层验过去。我的习惯是从最底下的数据库开始,一层通了再验上一层,这样出问题能立刻定位到是哪一环。

vscode本地连接线上数据库测试

先验最外层的连通性,用本地工具连线上 MySQL 的映射端口。这一步通了说明容器起来了、端口映射对了、安全组也放行了。
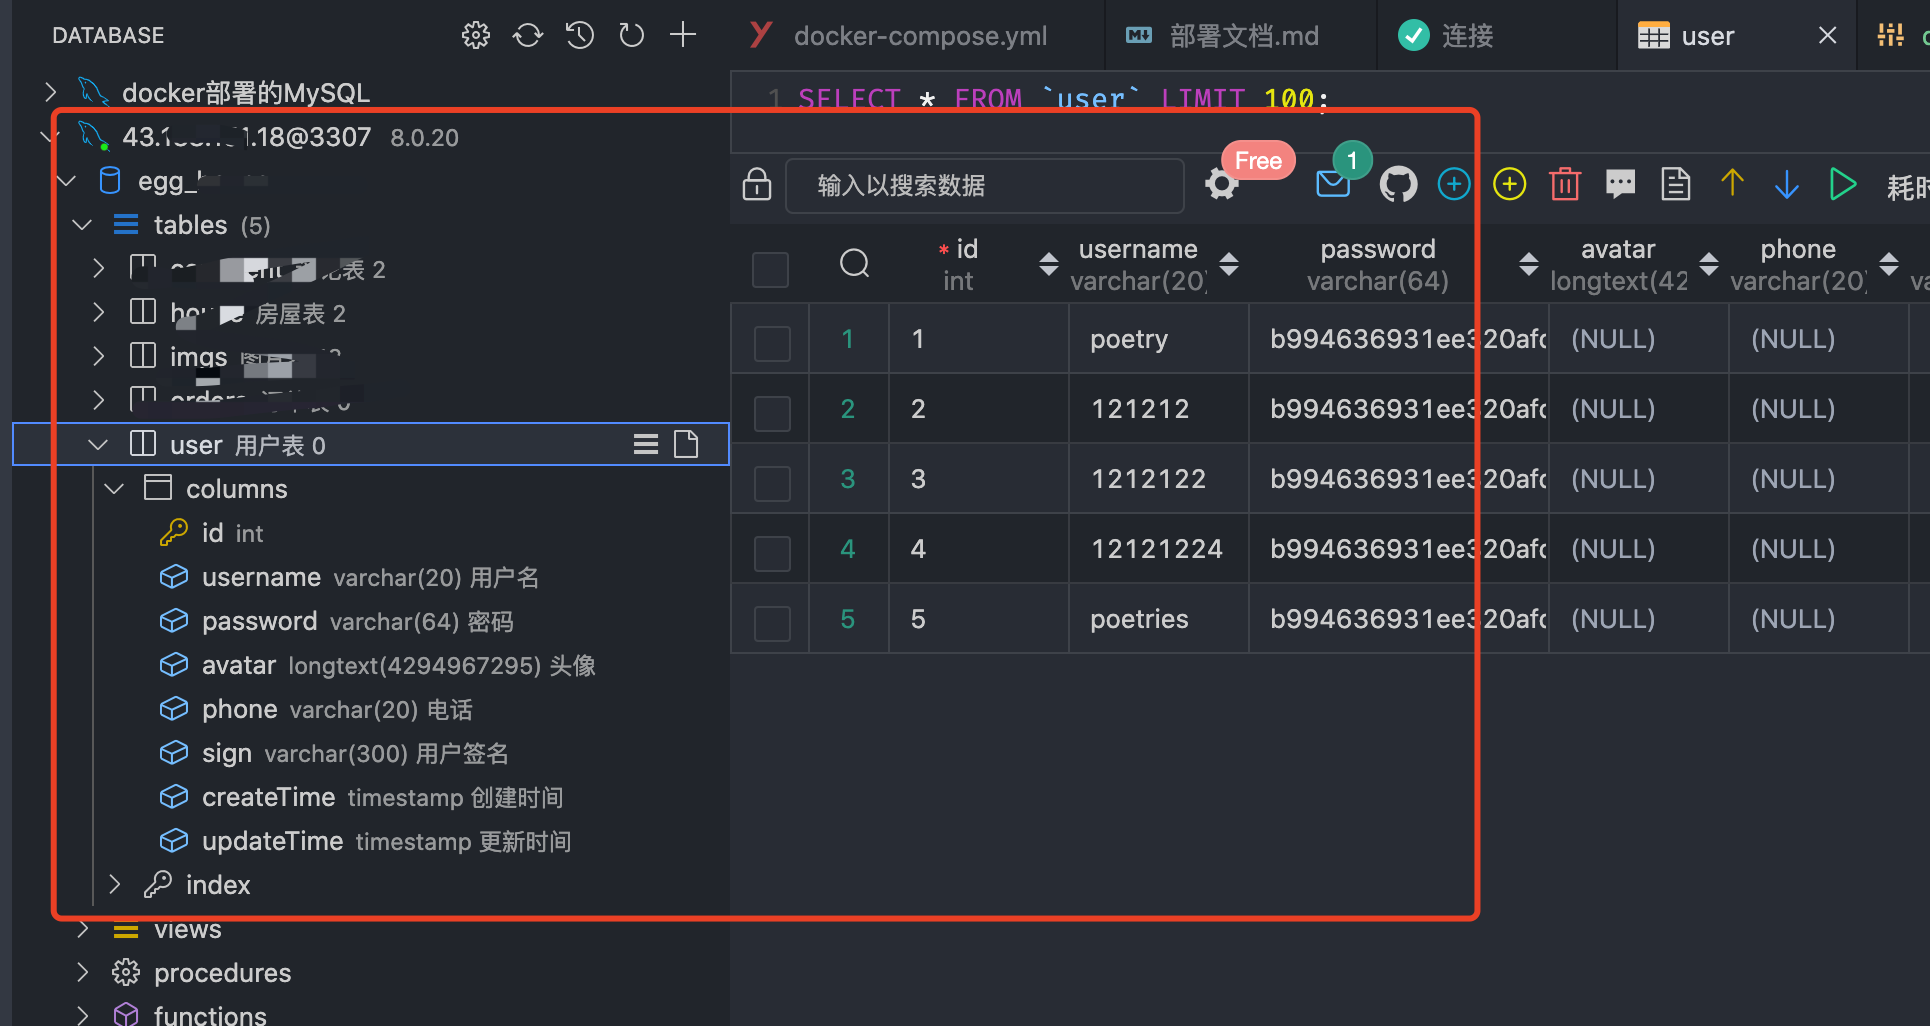
VS Code 数据库插件成功连上线上 MySQL

redis服务连接测试

无需密码登录

redis-cli -h 43.23.121.12 -p 6380

-h 后面跟服务器公网 IP,-p 是映射出来的 6380。没设密码的时候直接就能进。
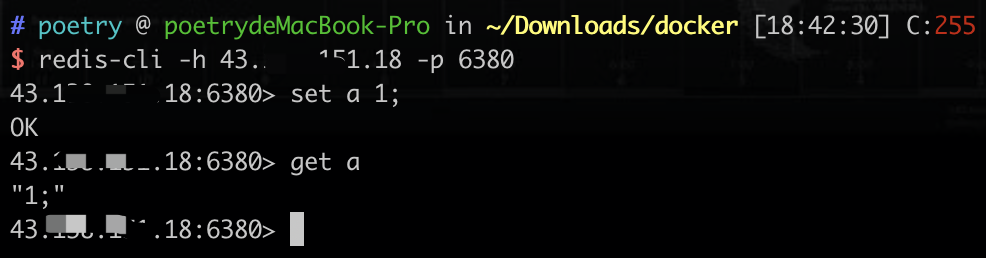
redis-cli 连接线上 Redis
在 redis-cli 中查看键值

设置密码后的登录方式

redis-cli -h 43.31.121.12 -p 6380

keys *
auth [username] password

这里的顺序其实是反着演示的。配了 requirepass 之后连进去也能连上,但敲任何命令都会返回 NOAUTH Authentication required,所以上面 keys * 是会失败的,得先 auth 你的密码 通过认证,后面的命令才正常。Redis 6 之后支持 ACL 多用户,auth 可以带用户名,用默认的 default 用户就只传密码。
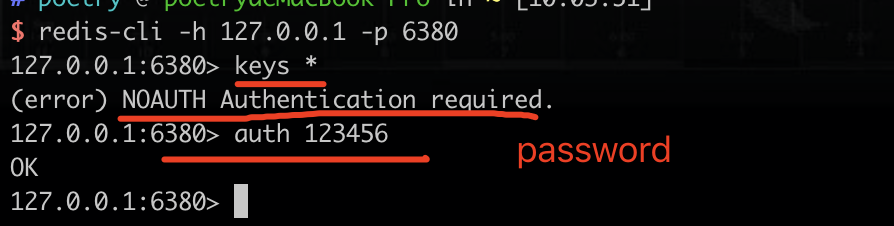
认证通过后 redis 命令正常执行

缓存服务测试

调一次带缓存的接口,再回 redis-clikeys * 看有没有对应的键写进来,能看到就说明 Egg 到 Redis 这条链路是通的。
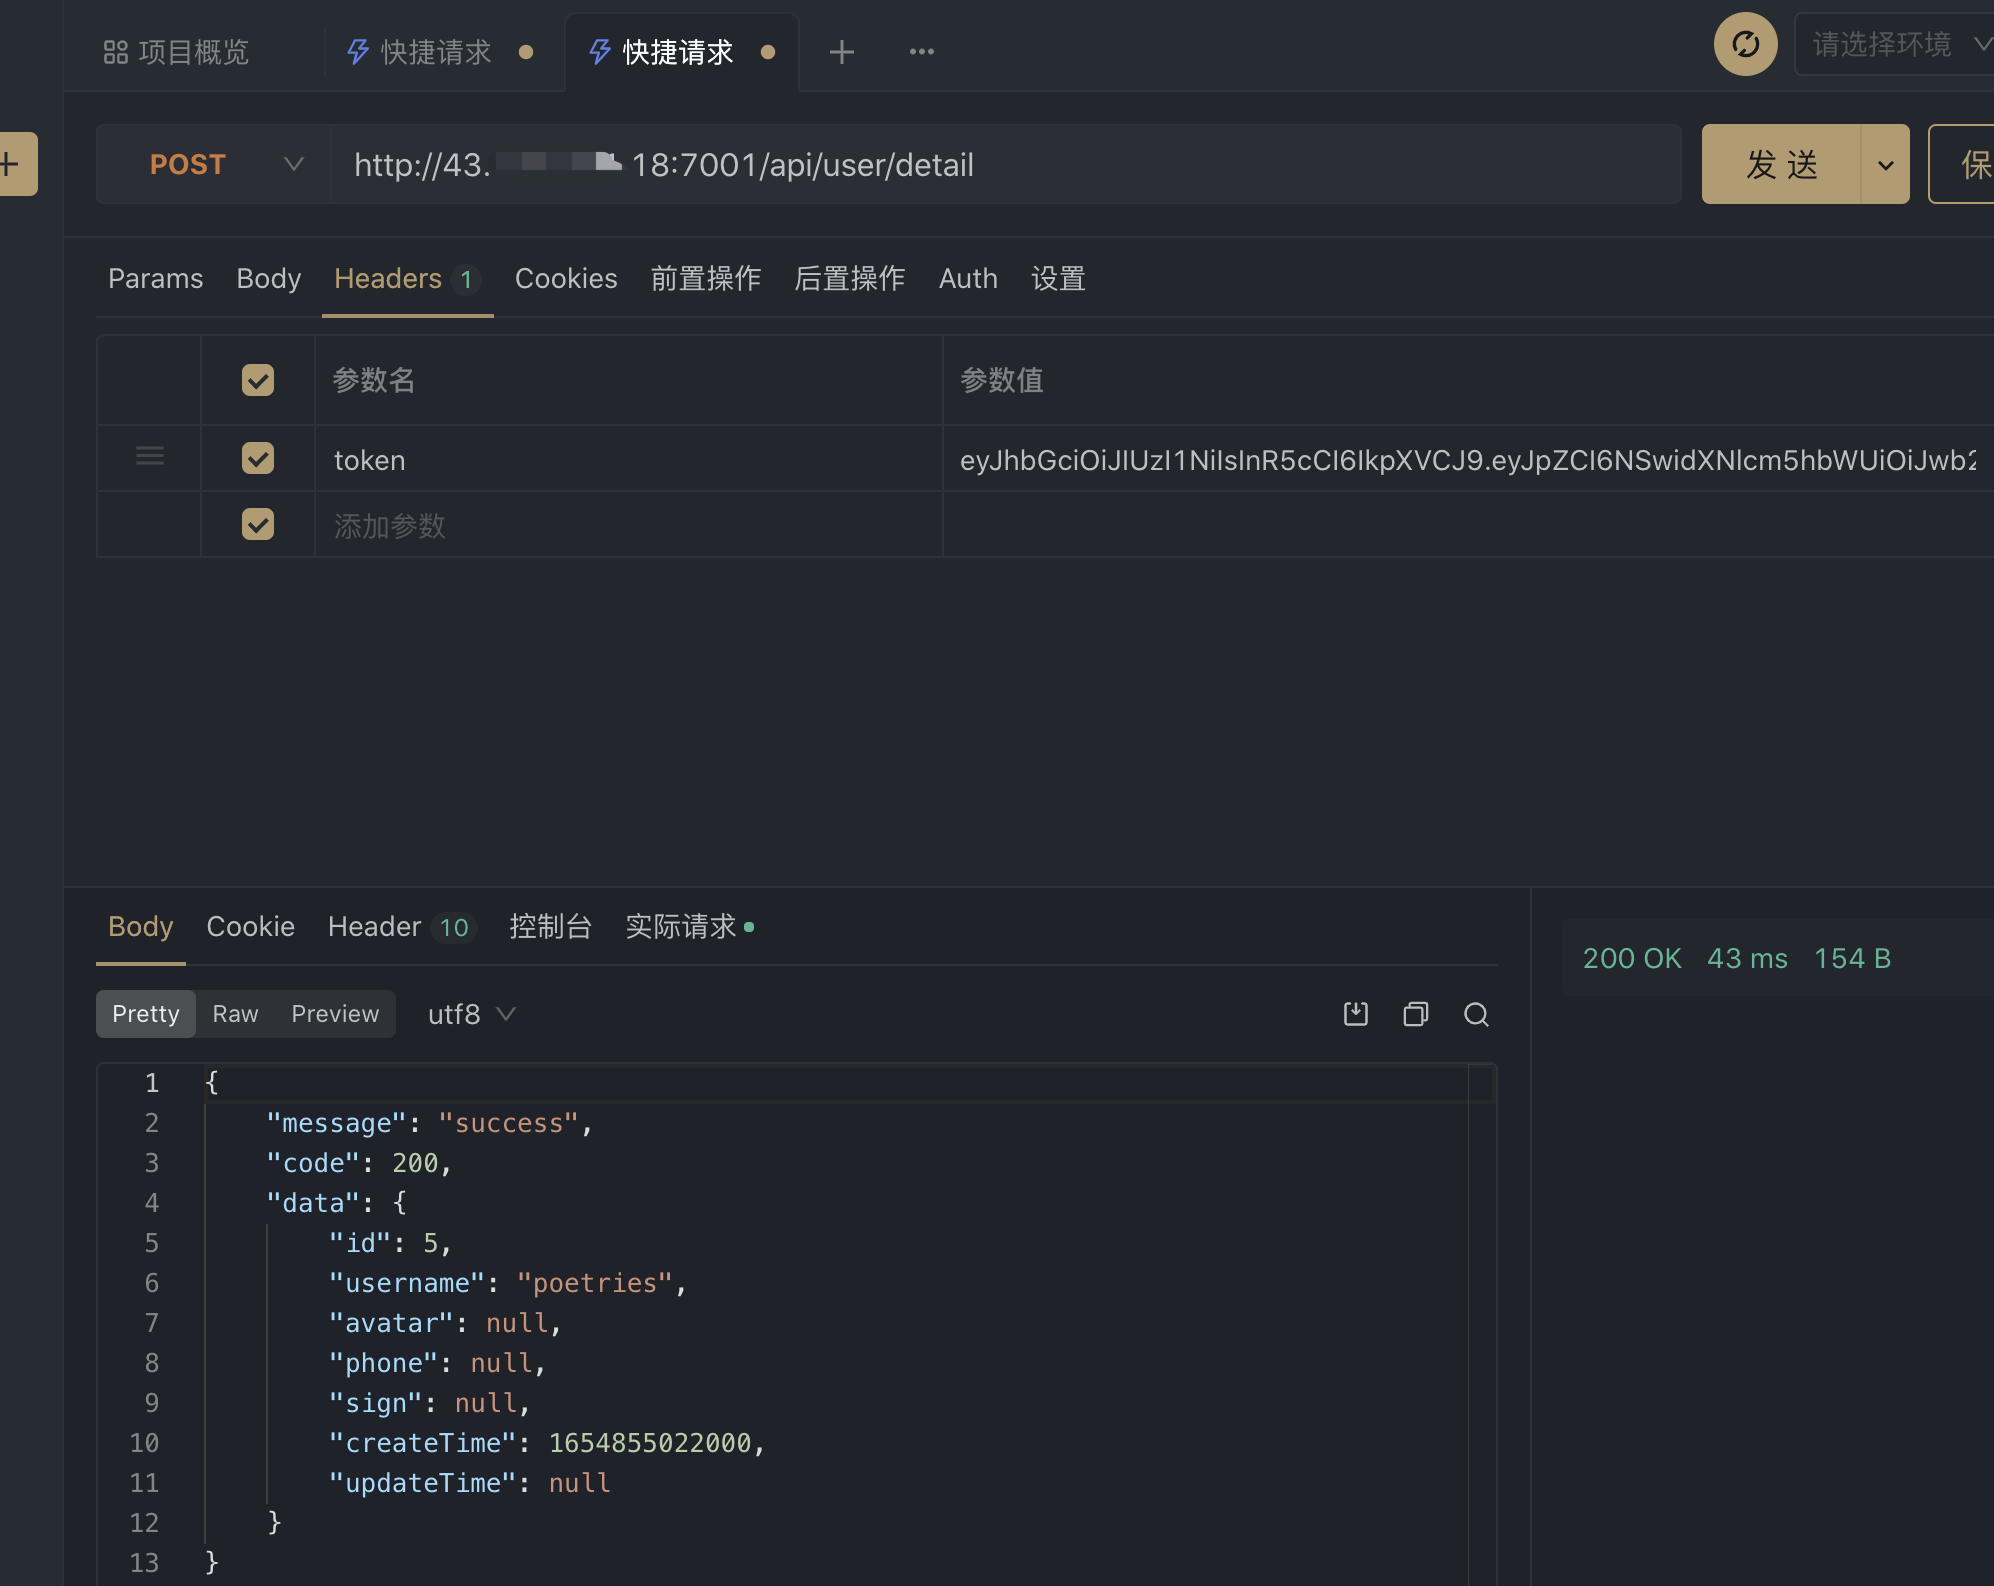
调用接口后 Redis 中出现缓存键
再次请求命中缓存

测试egg接口

Postman 直接请求 Egg 接口返回正常数据

访问前端项目测试接口

最后一层,前端页面通过 Nginx 访问接口。这一步和上一步的区别在于,它验的是 Nginx 反向代理那段配置对不对。前一步通、这一步不通,问题百分之百在 nginx.conf 里。
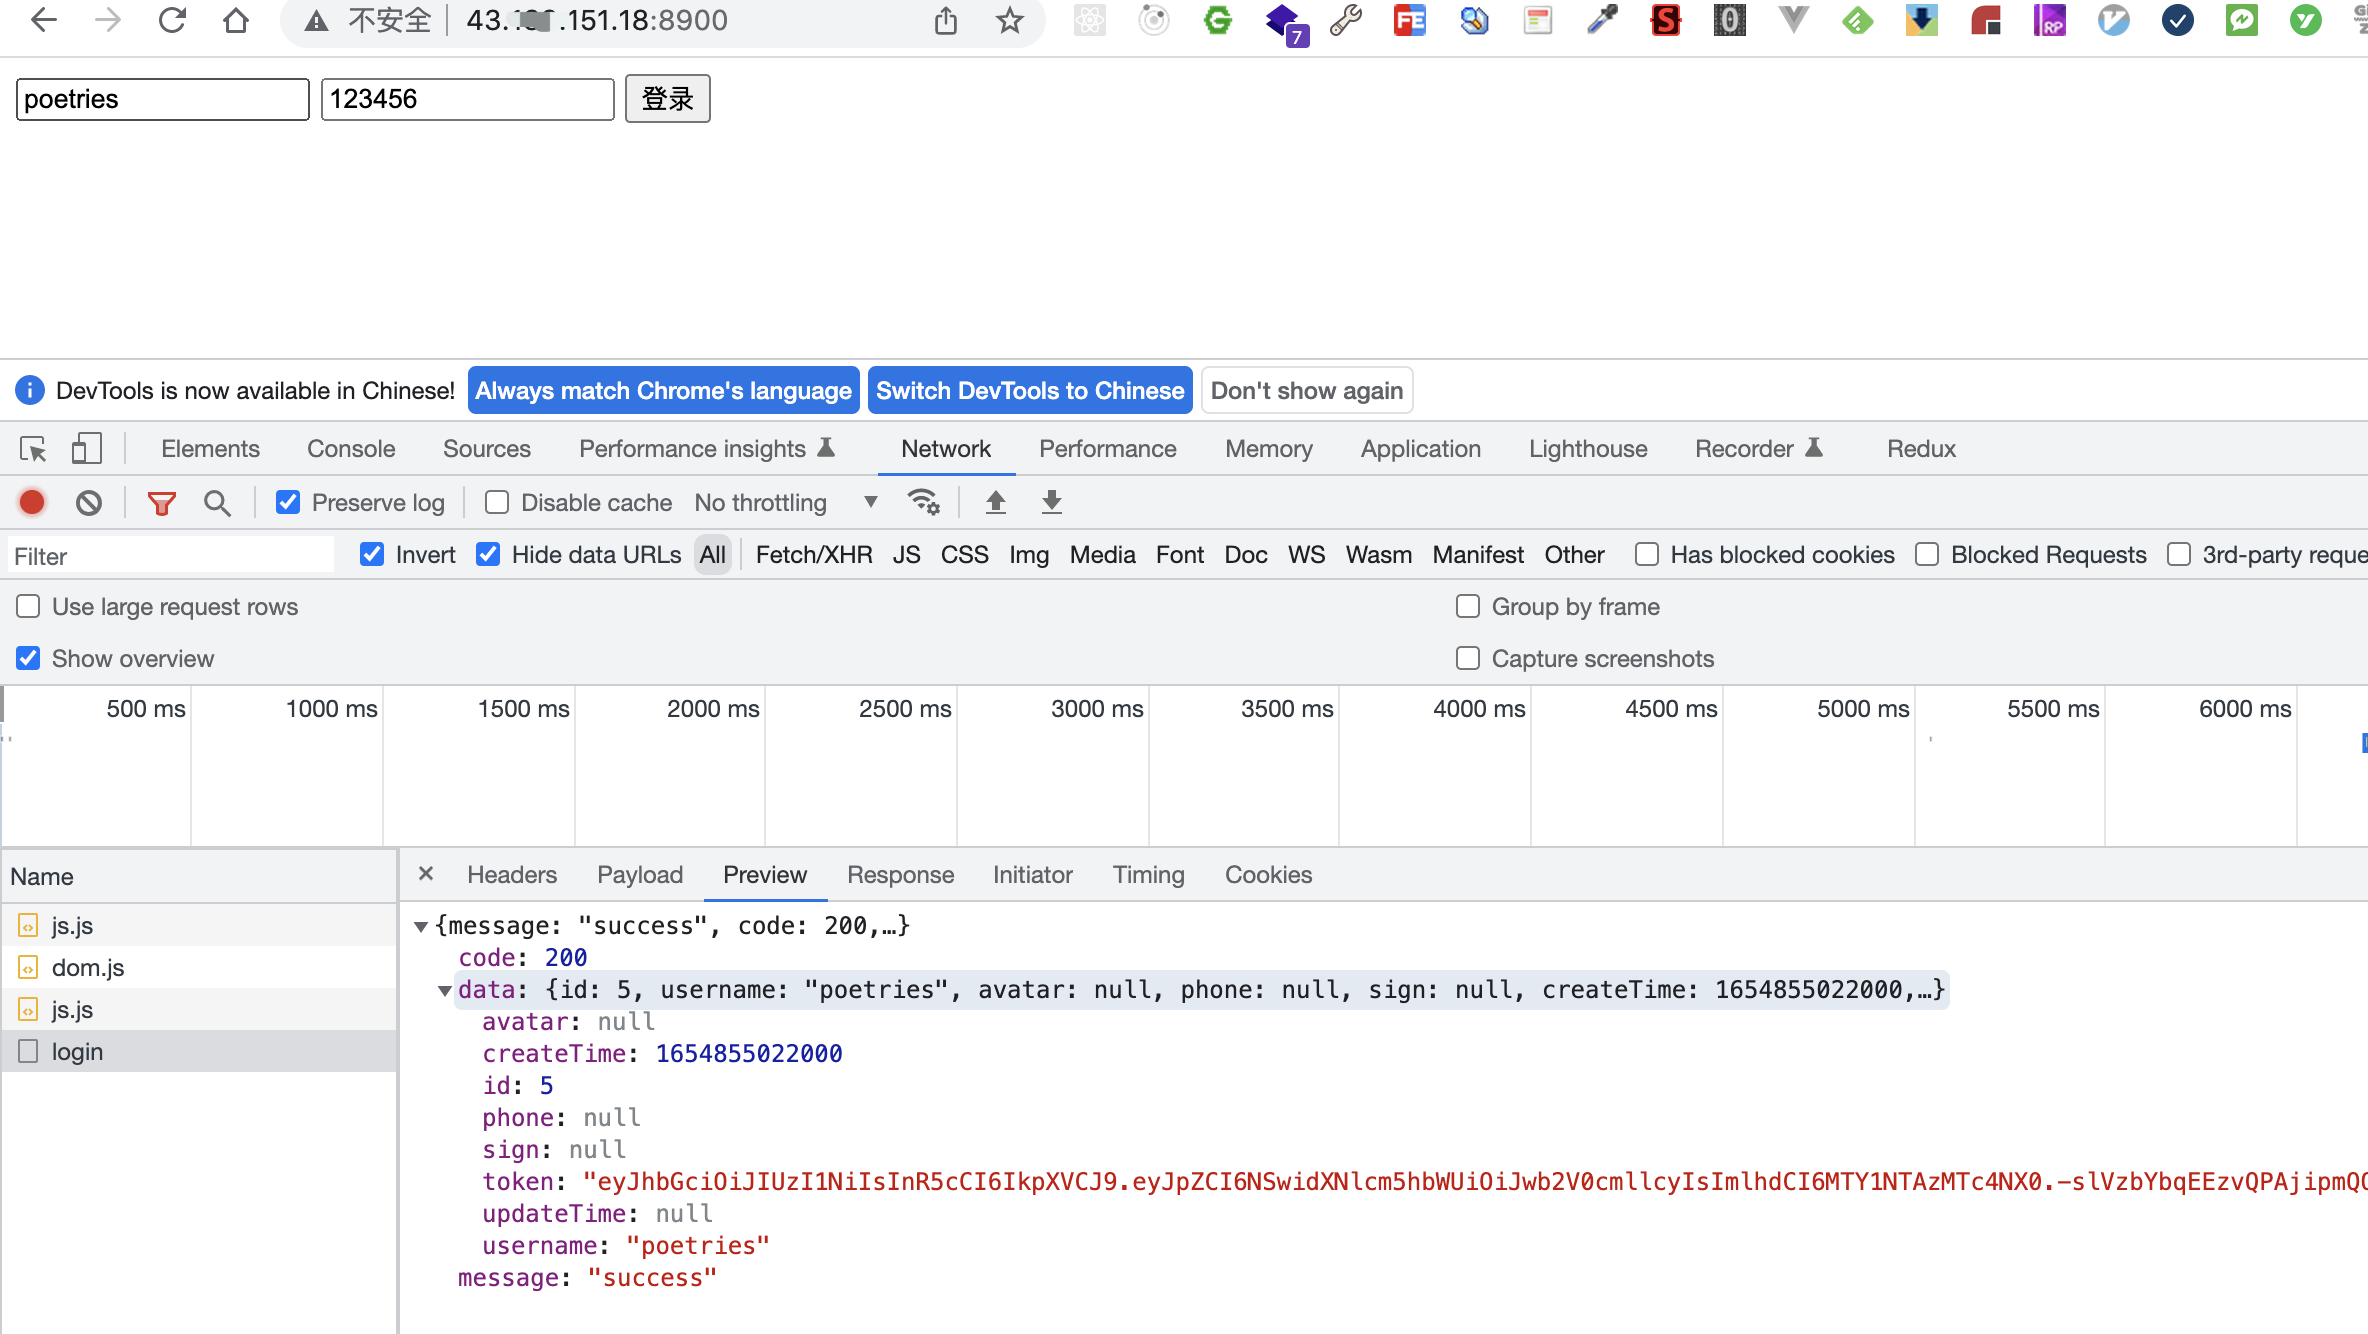
前端页面通过 Nginx 正常拿到接口数据

到这里,自建服务器这条路就完整走通了。它的好处是掌控力最强,想装什么装什么;代价是运维的活儿全归你,服务器要自己续费、系统要自己打补丁、监控告警要自己搭。如果你更想要「push 完就不管了」的体验,往下看。

关于 PM2 和 Docker 两种进程管理方式的取舍,我在 Node 项目用 PM2 和 Docker 部署的对比记录 里单独写过,这里就不展开了。

五、部署到微信云托管

云托管流水线部署更方便

云托管这条路的核心区别在于,你不用管服务器了。它接管的是「构建镜像、跑容器、扩缩容、给你一个域名」这一整段,你需要提供的只有一个 Dockerfile。对于要在小程序里调接口的场景,它还省掉了备案和 HTTPS 证书这些麻烦事。

5.1 redis 服务

云托管本身也提供托管的数据库和缓存,不过要额外付费。这里我们上面部署使用的自建服务器上docker搭建的redis服务作为演示,让云托管的 Egg 连回自建服务器上那套。
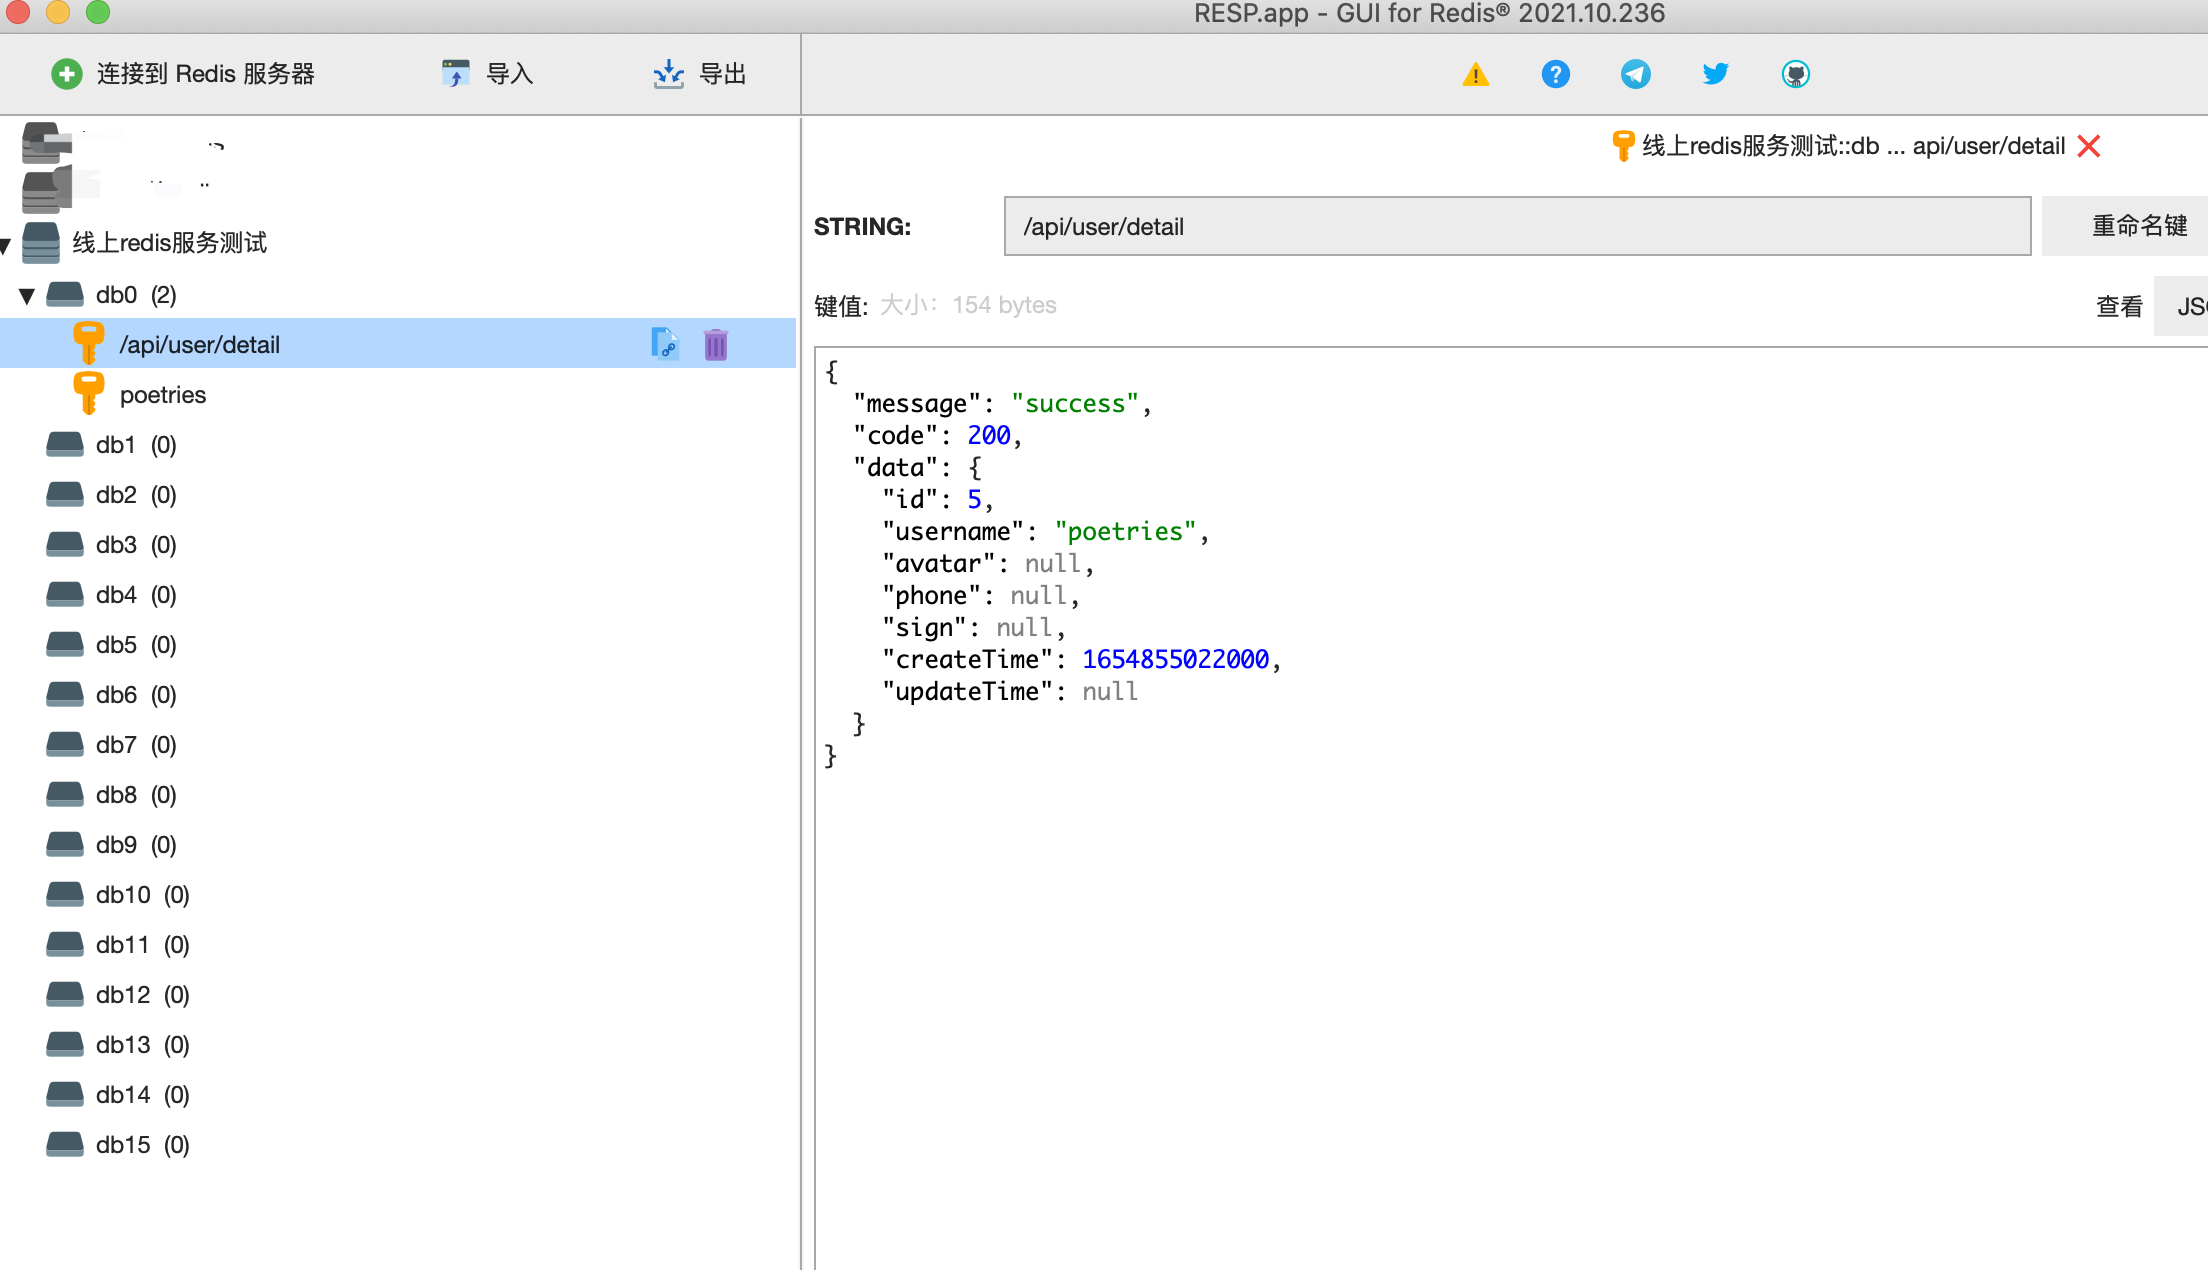
云托管服务中配置 Redis 连接信息

5.2 mysql 服务

这里我们上面部署使用的自建服务器上docker搭建的mysql服务作为演示,同理。
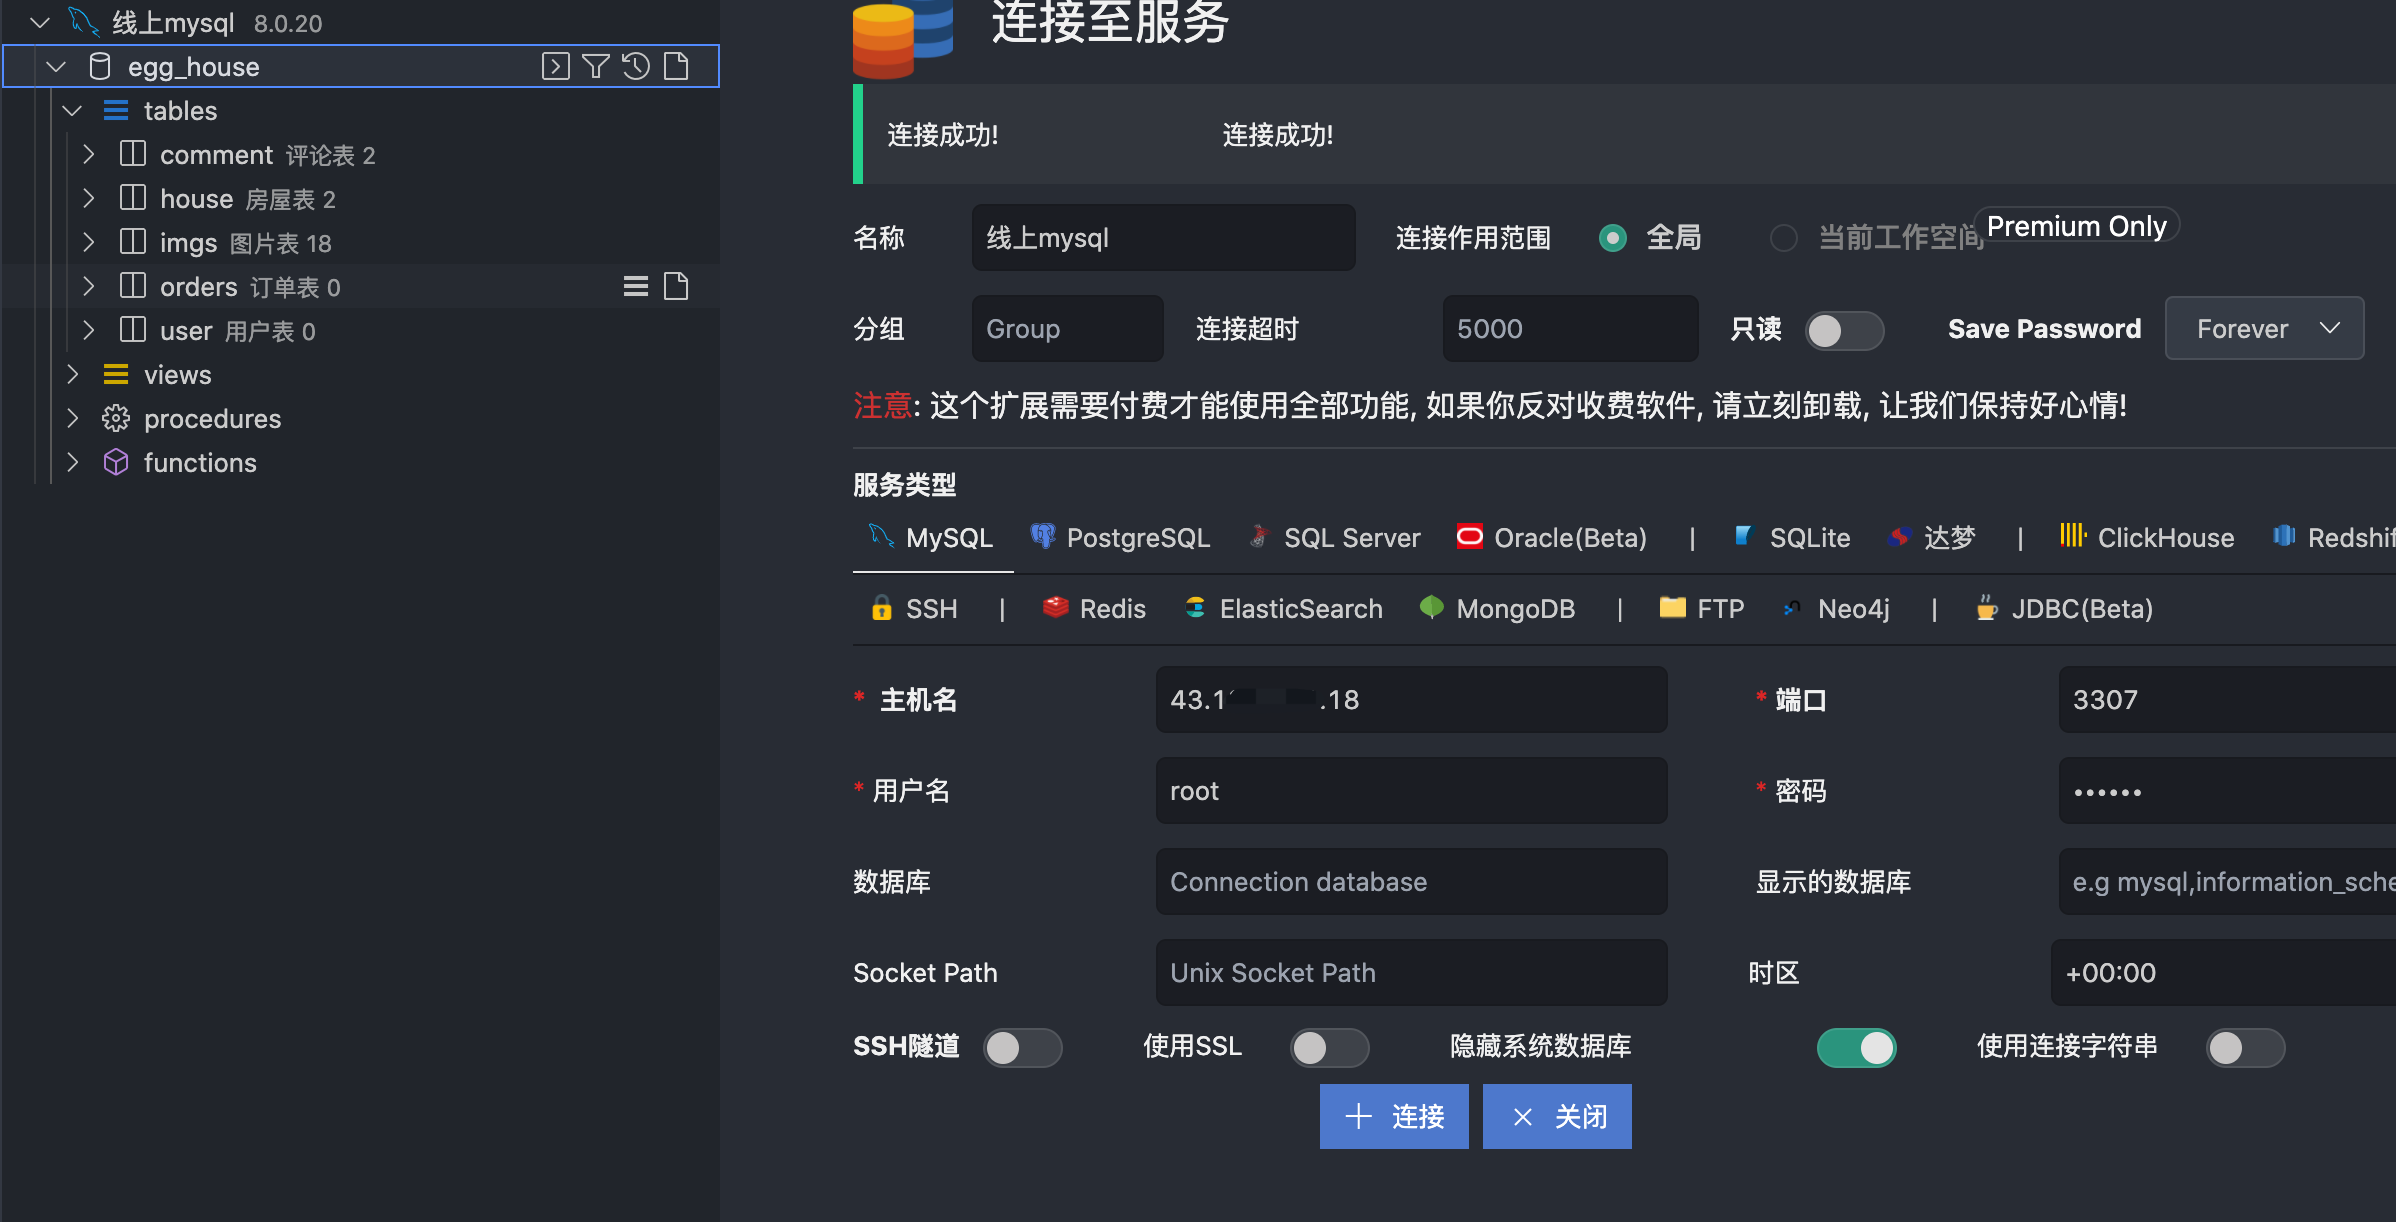
云托管服务中配置 MySQL 连接信息

这么搭有个前提得说清楚,自建服务器上的 MySQL 和 Redis 端口必须对公网开放,云托管的容器才连得进来。这也意味着安全组一定要收紧到只放行云托管的出口 IP,不然等于把数据库挂在公网上裸奔。真要上生产,还是老老实实用云托管自己的数据库实例走内网。

5.3 egg 部署

修改代码

主要就是把配置里的数据库地址从容器名换回服务器的公网地址,毕竟这时候 Egg 和 MySQL 已经不在同一个网桥里了。
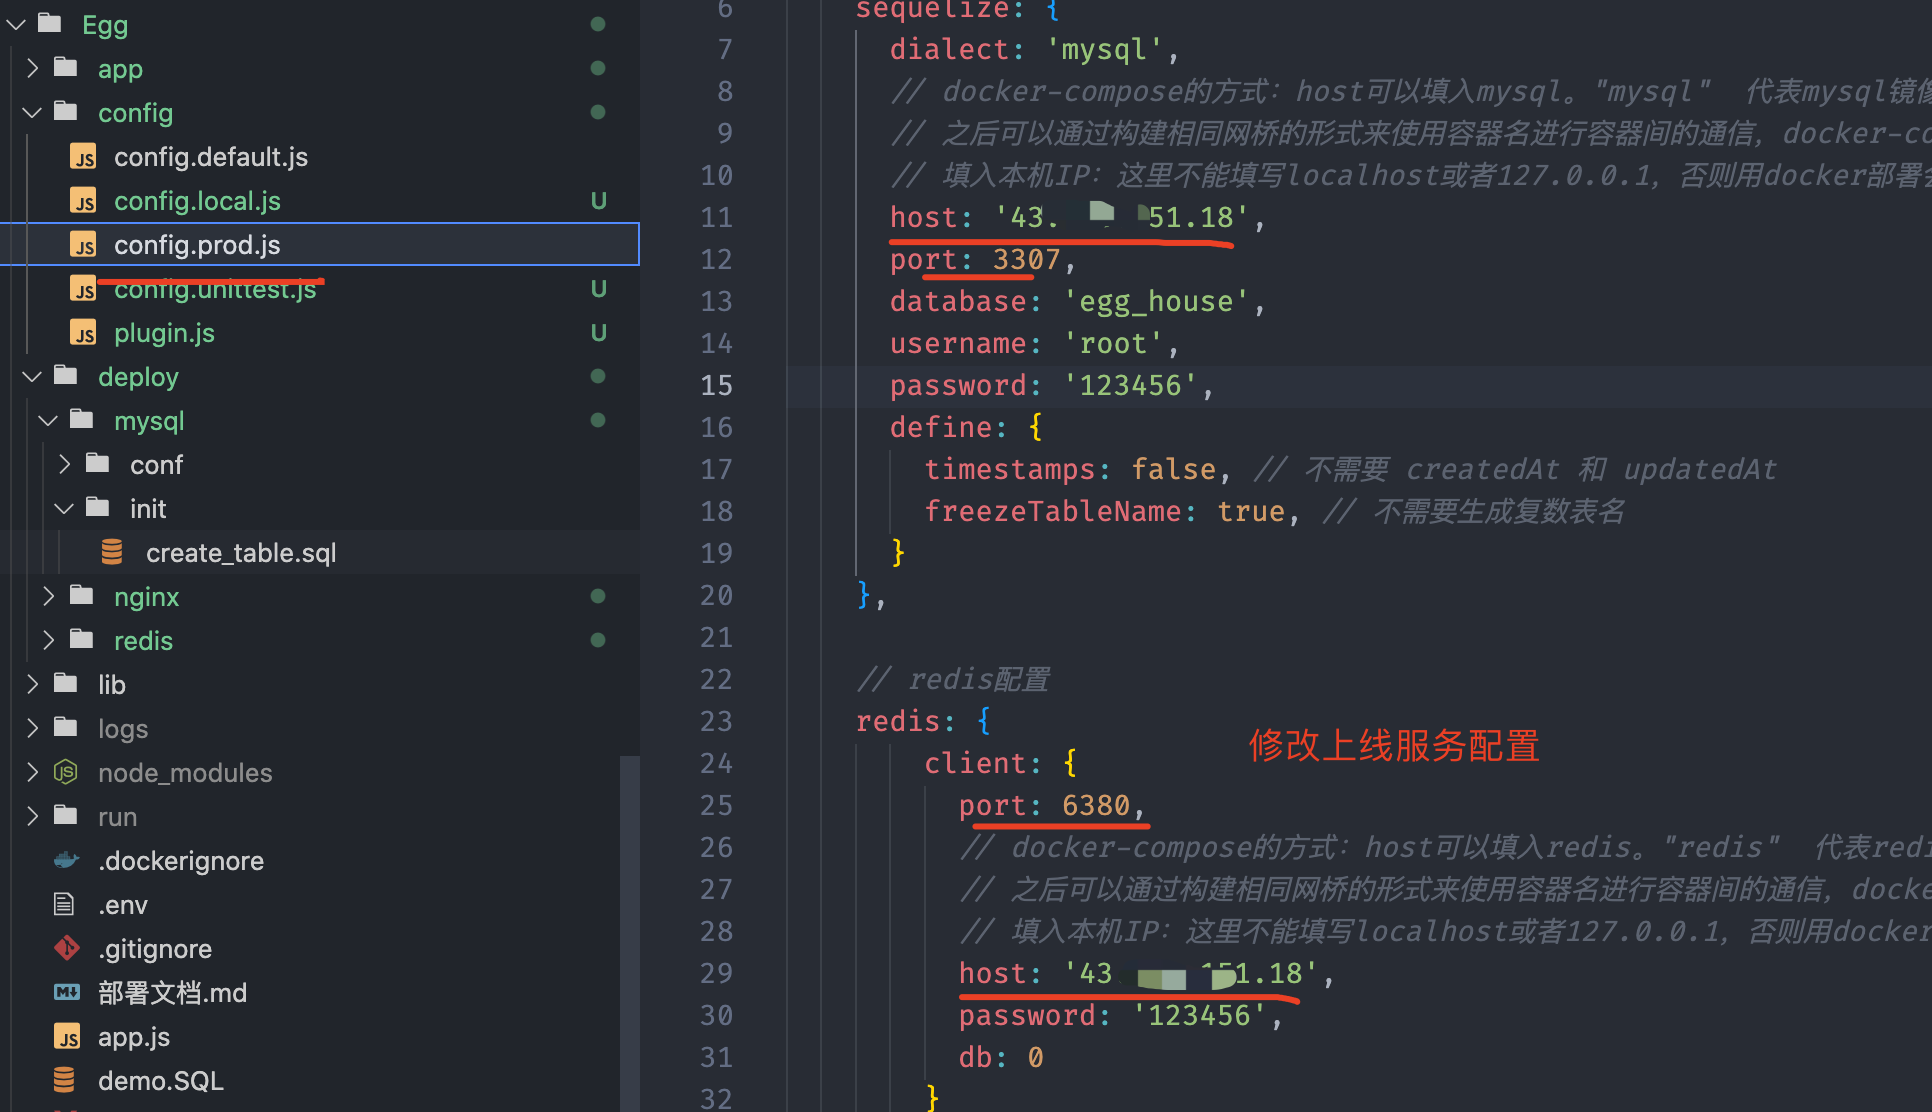
修改 Egg 配置中的数据库连接地址

然后上传代码到github,通过云托管流水线构建。

新建服务

在云托管控制台新建服务,关键的几项是代码仓库、Dockerfile 路径和监听端口。端口一定要和 Dockerfile 里 EXPOSE 的、以及 Egg 实际监听的对上,填错了平台的健康检查过不去,服务会一直显示部署中然后失败。
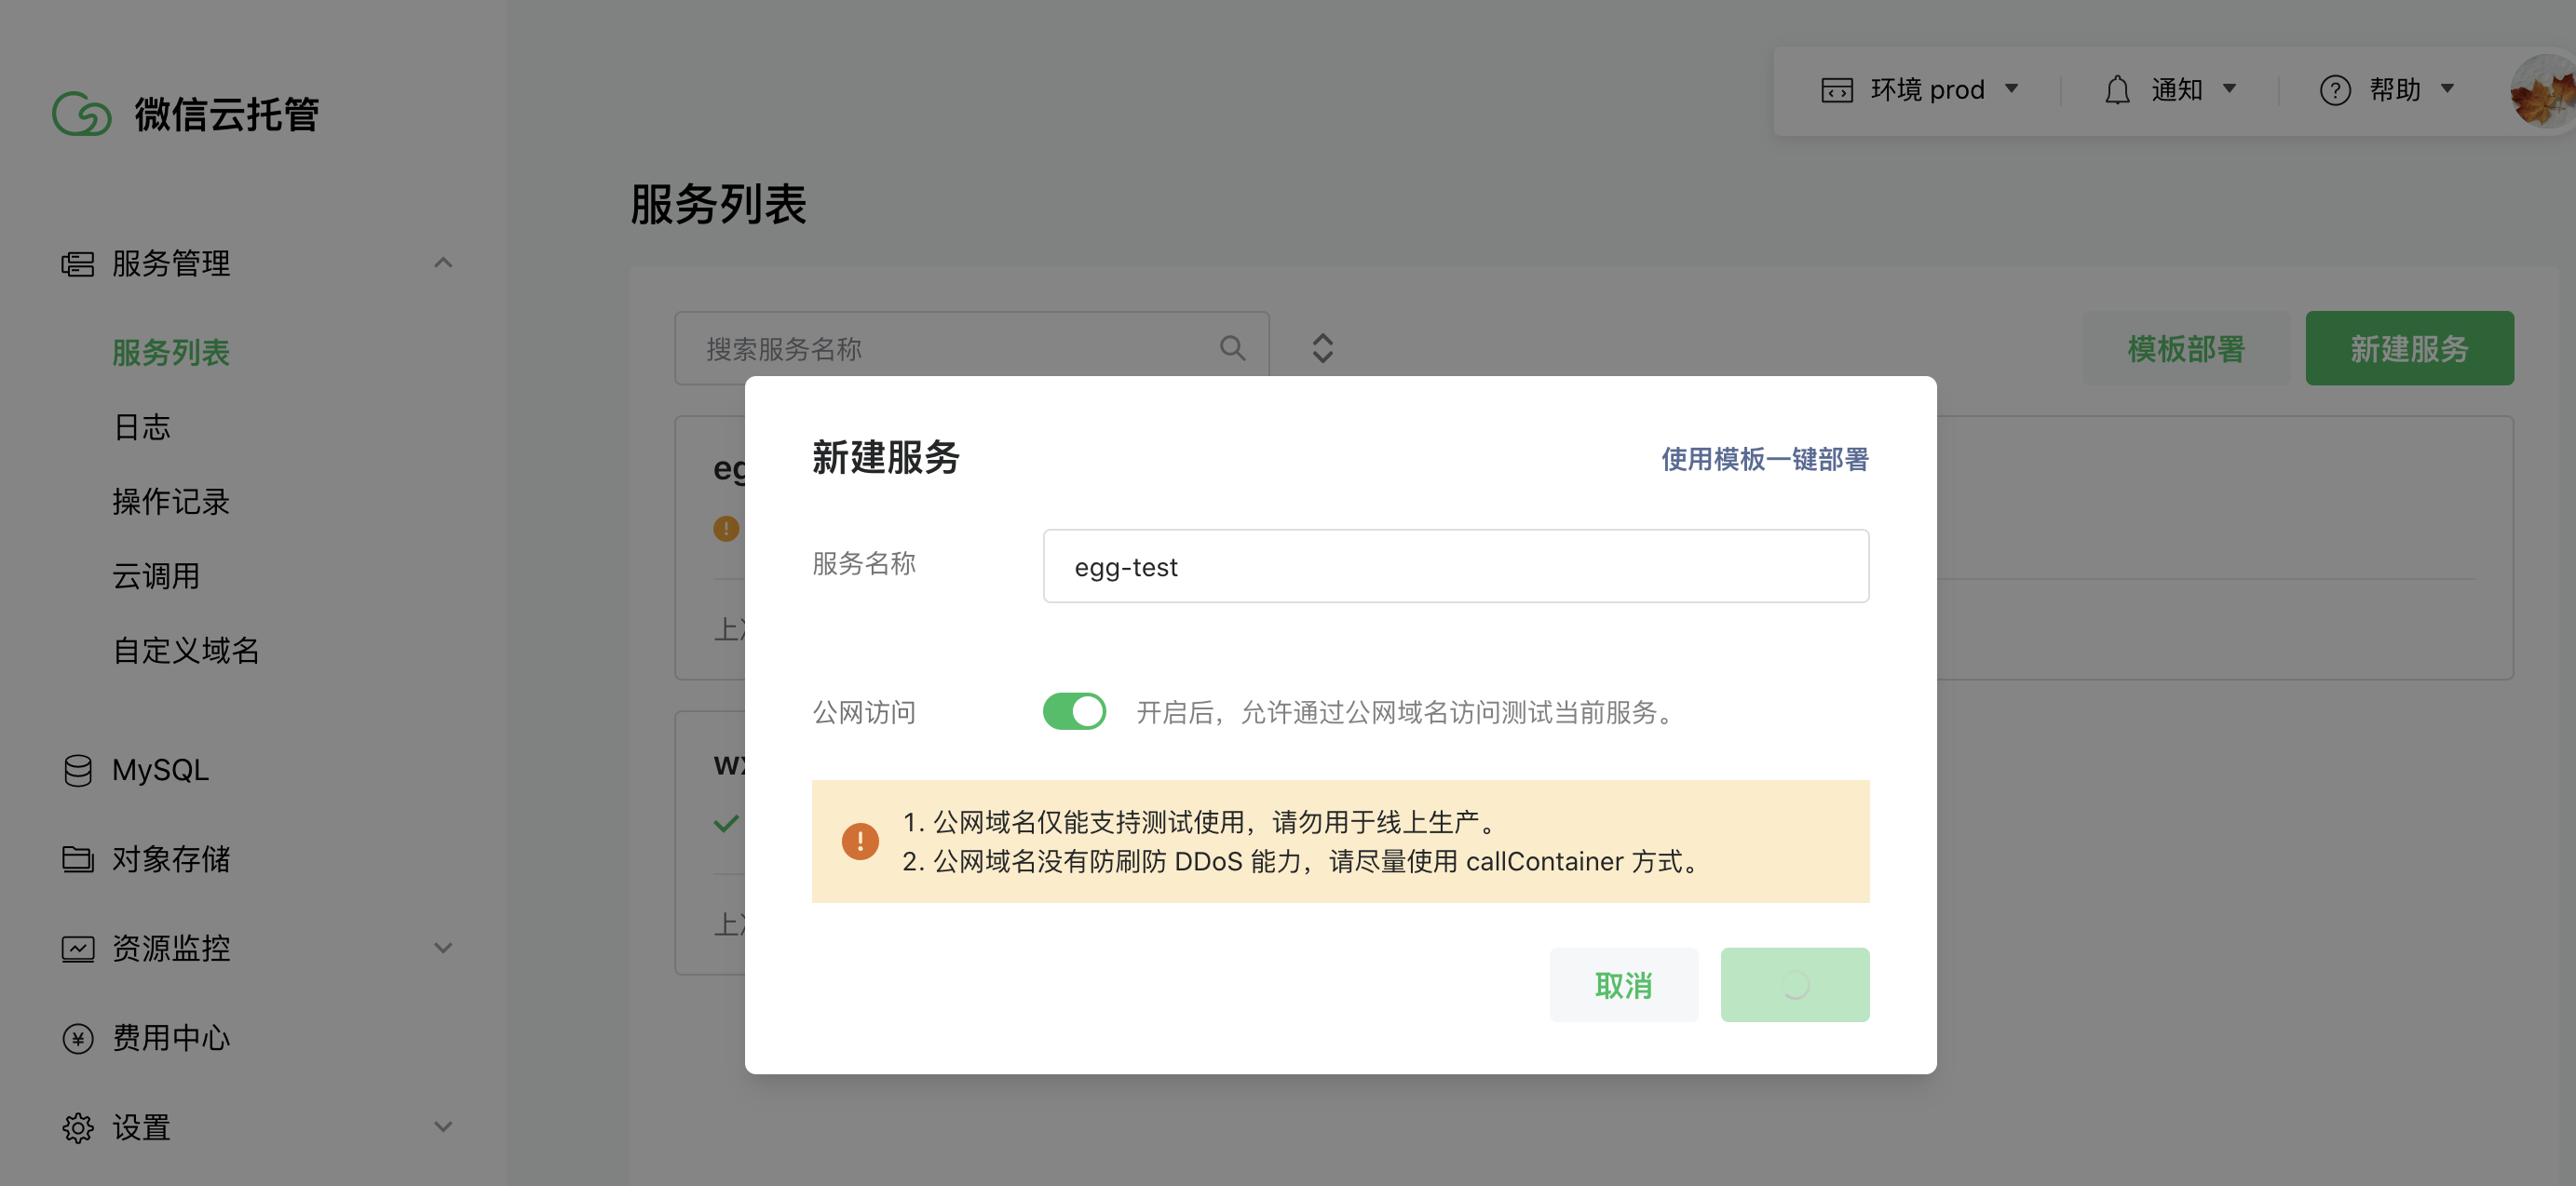
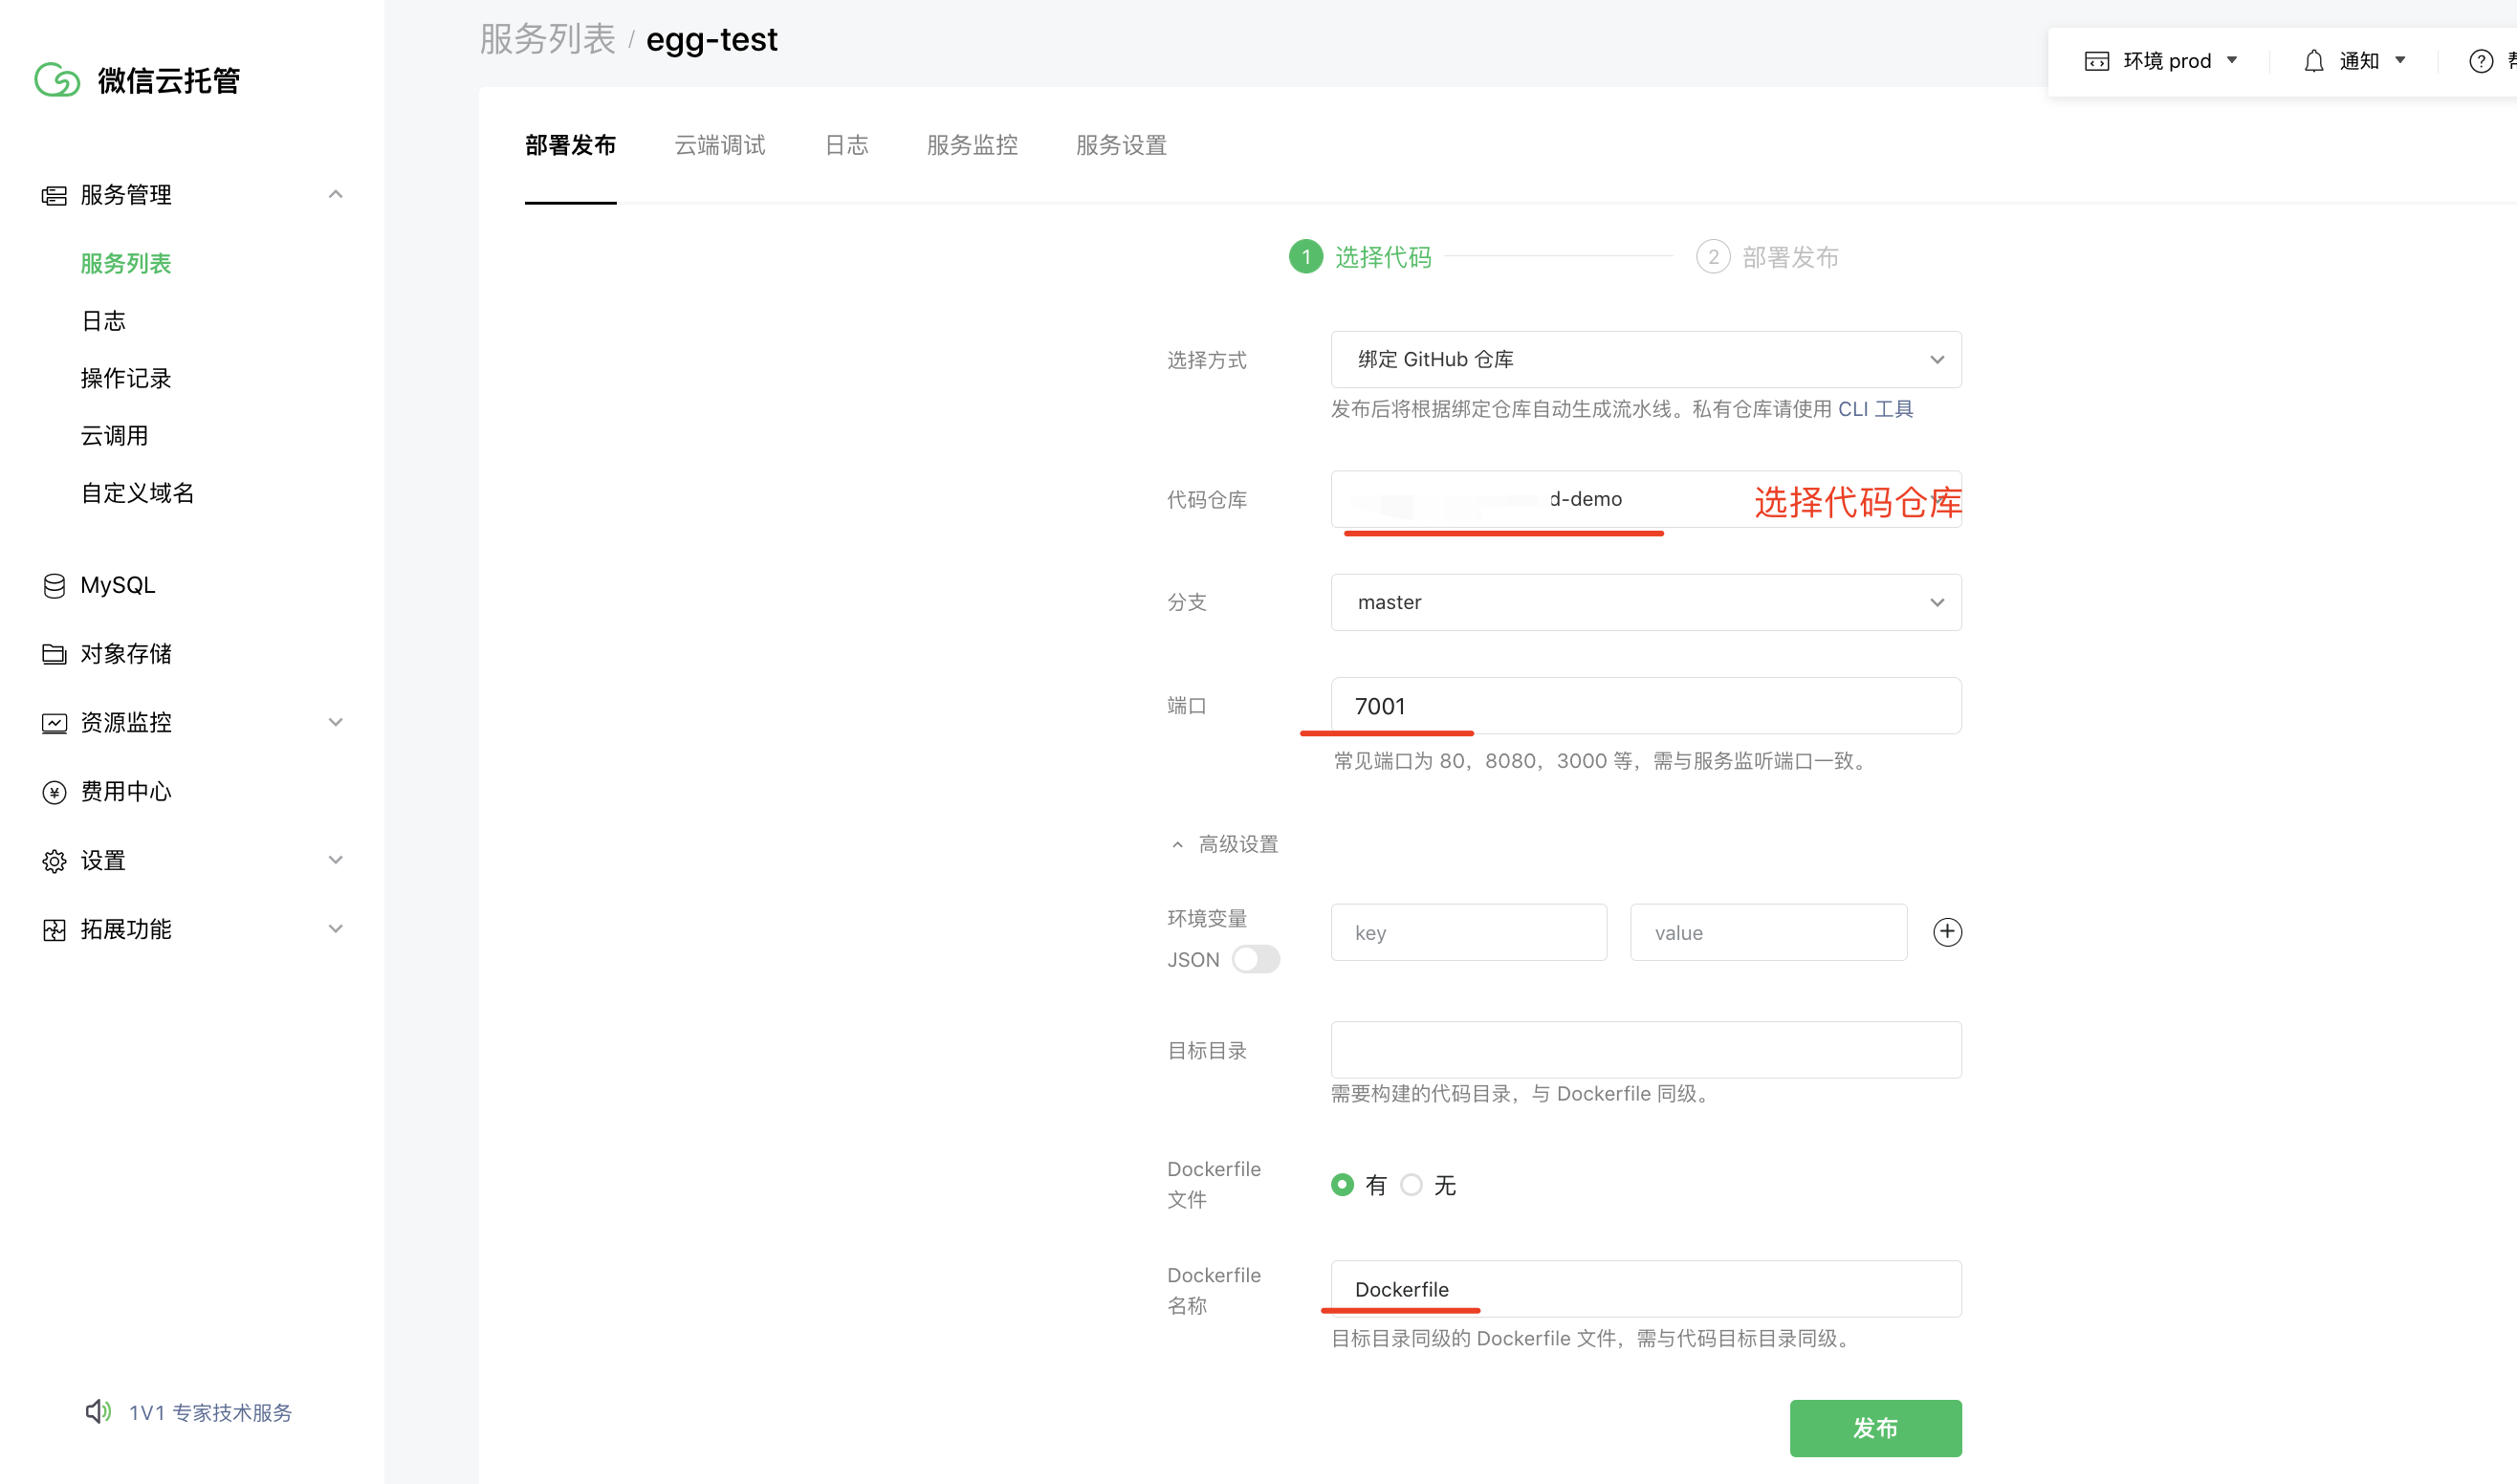
云托管控制台新建服务并关联代码仓库

填写构建配置和端口信息

点击发布后,云托管会执行Dockerfile构建流水线,到日志可以查看构建进度。构建失败的话日志里能看到卡在 Dockerfile 的哪一条指令上,和你本地 docker build 看到的输出是一样的。
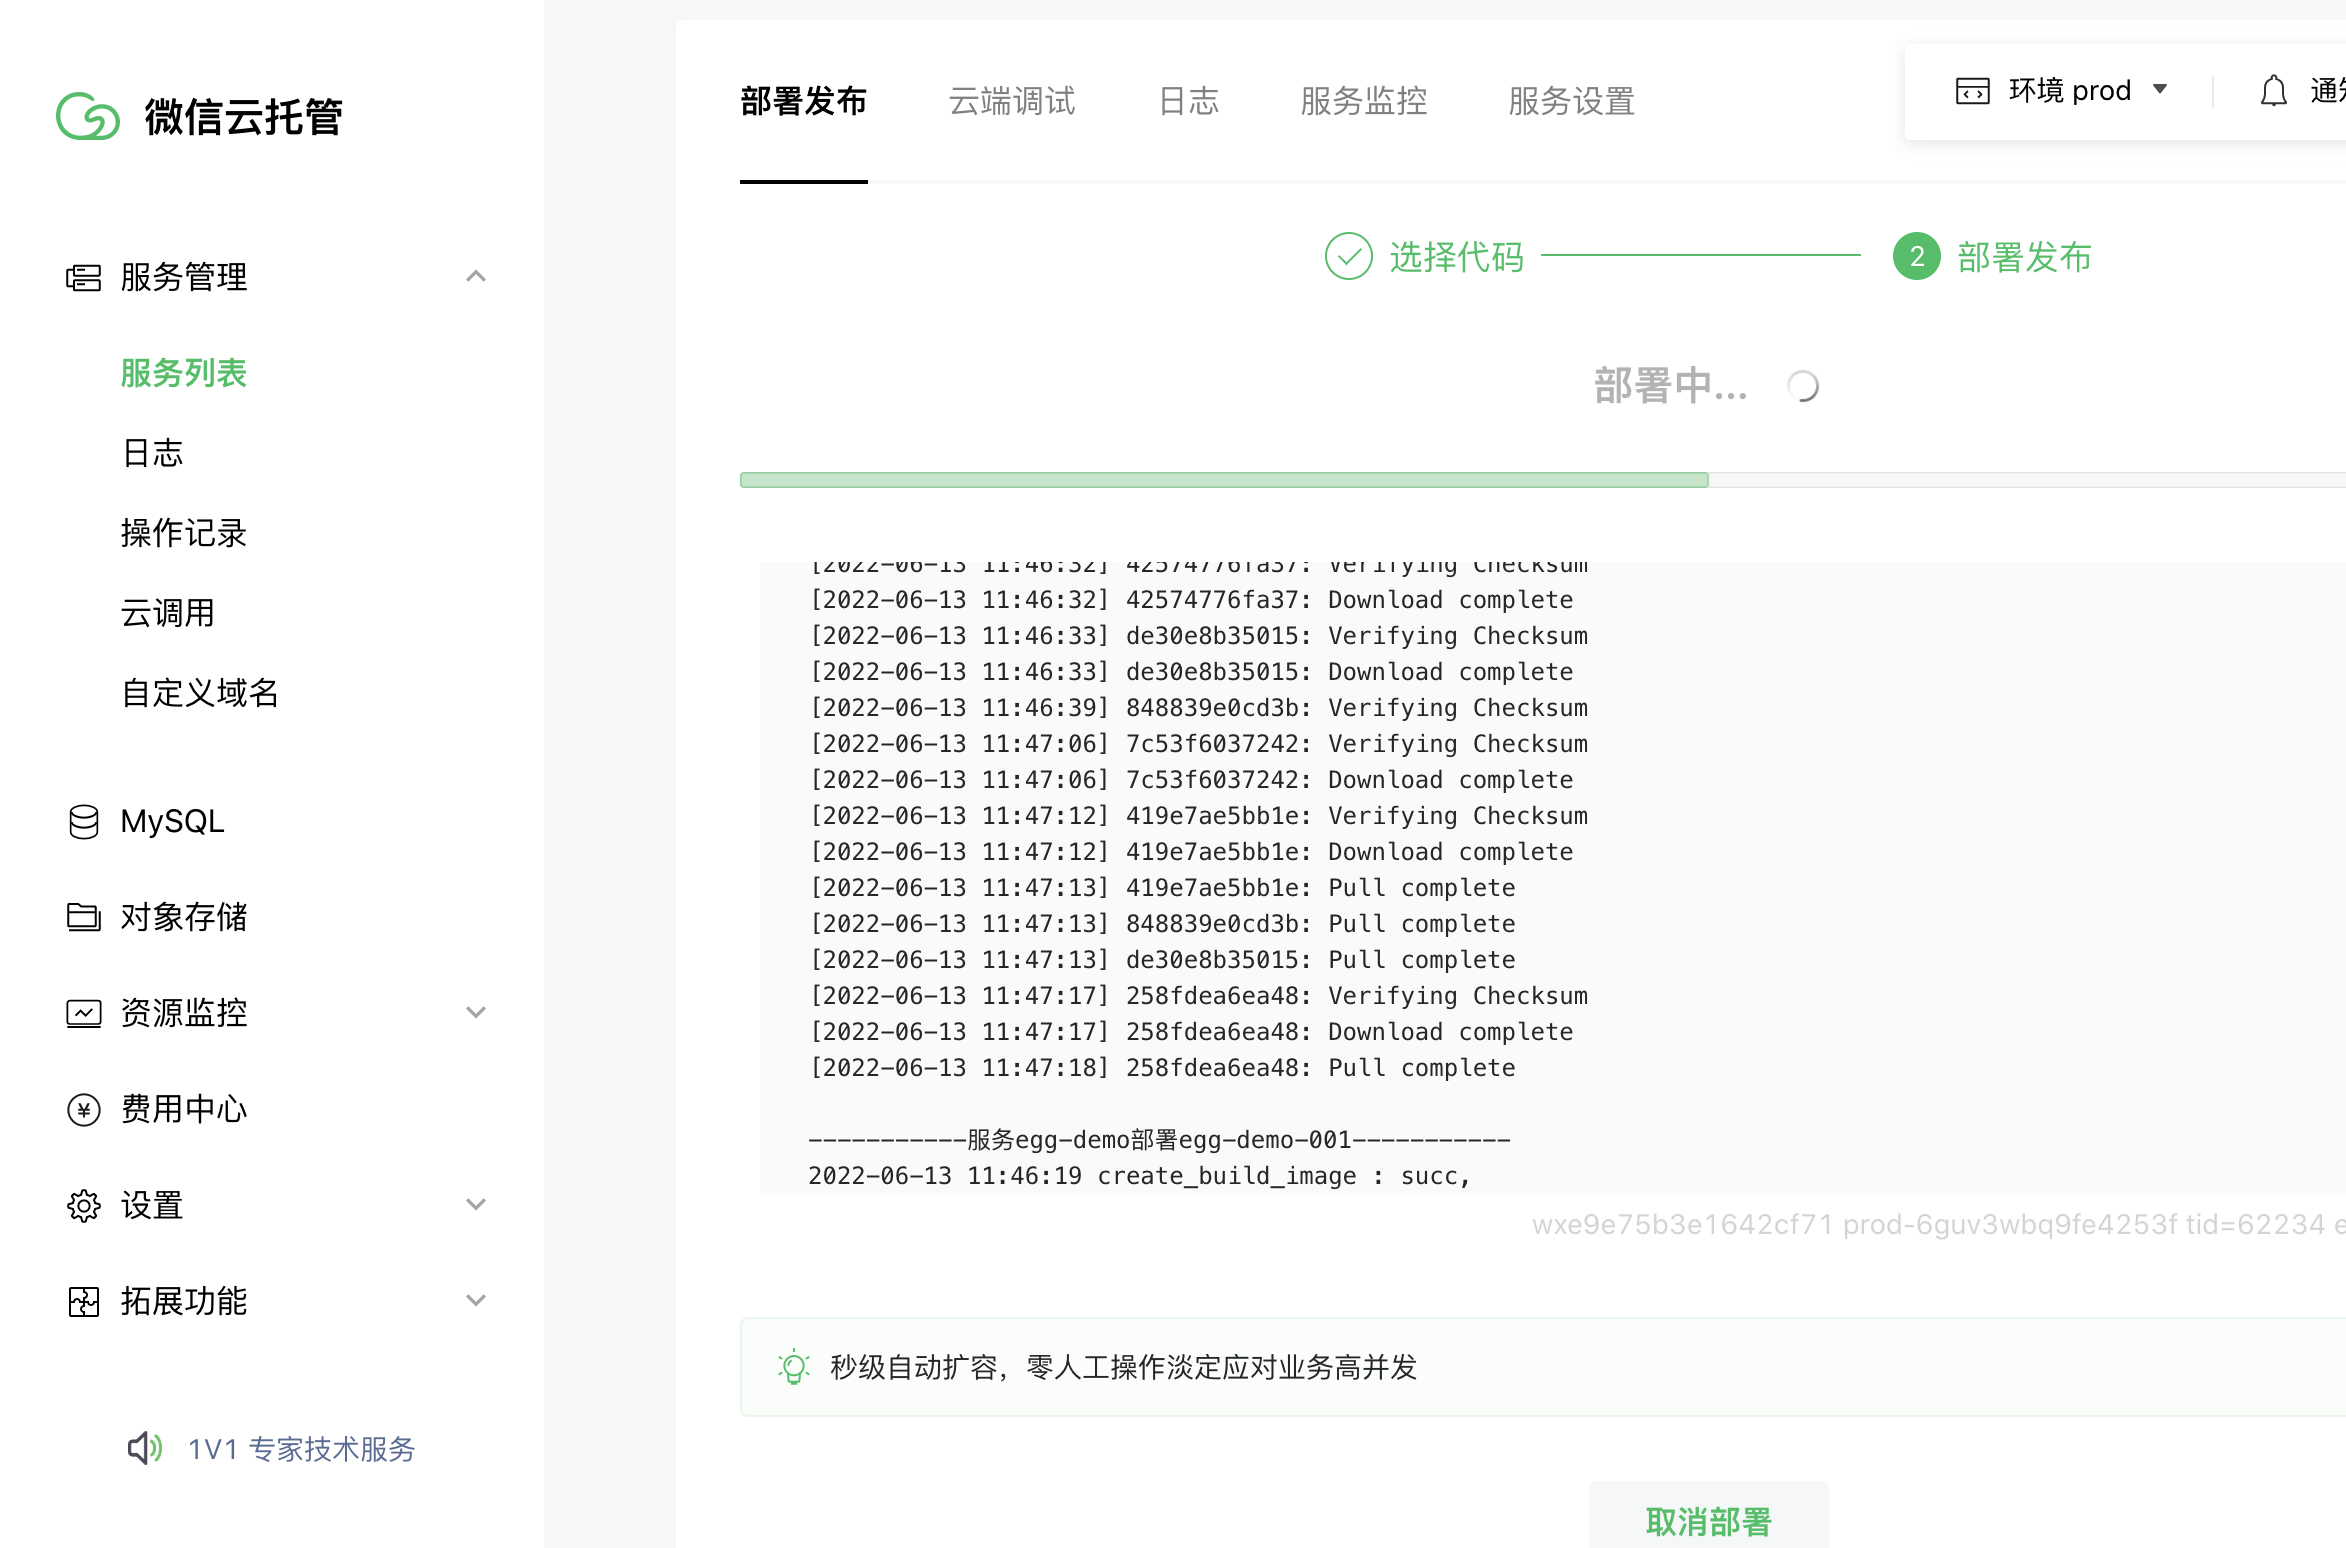
流水线执行 Dockerfile 构建

构建完成后服务进入运行状态

微信云托管部署成功后,可以在实例列表,点击进入容器看到代码,这里里面的内容不能修改,在容器启动后会覆盖。

这一点是容器化的基本原则,容器是无状态的、随时可替换的。你在里面改的任何东西,下次扩容或者重启拉起新实例时全部消失。要改就改代码重新构建,这也是为什么日志、上传文件这类需要持久化的东西必须往外存。
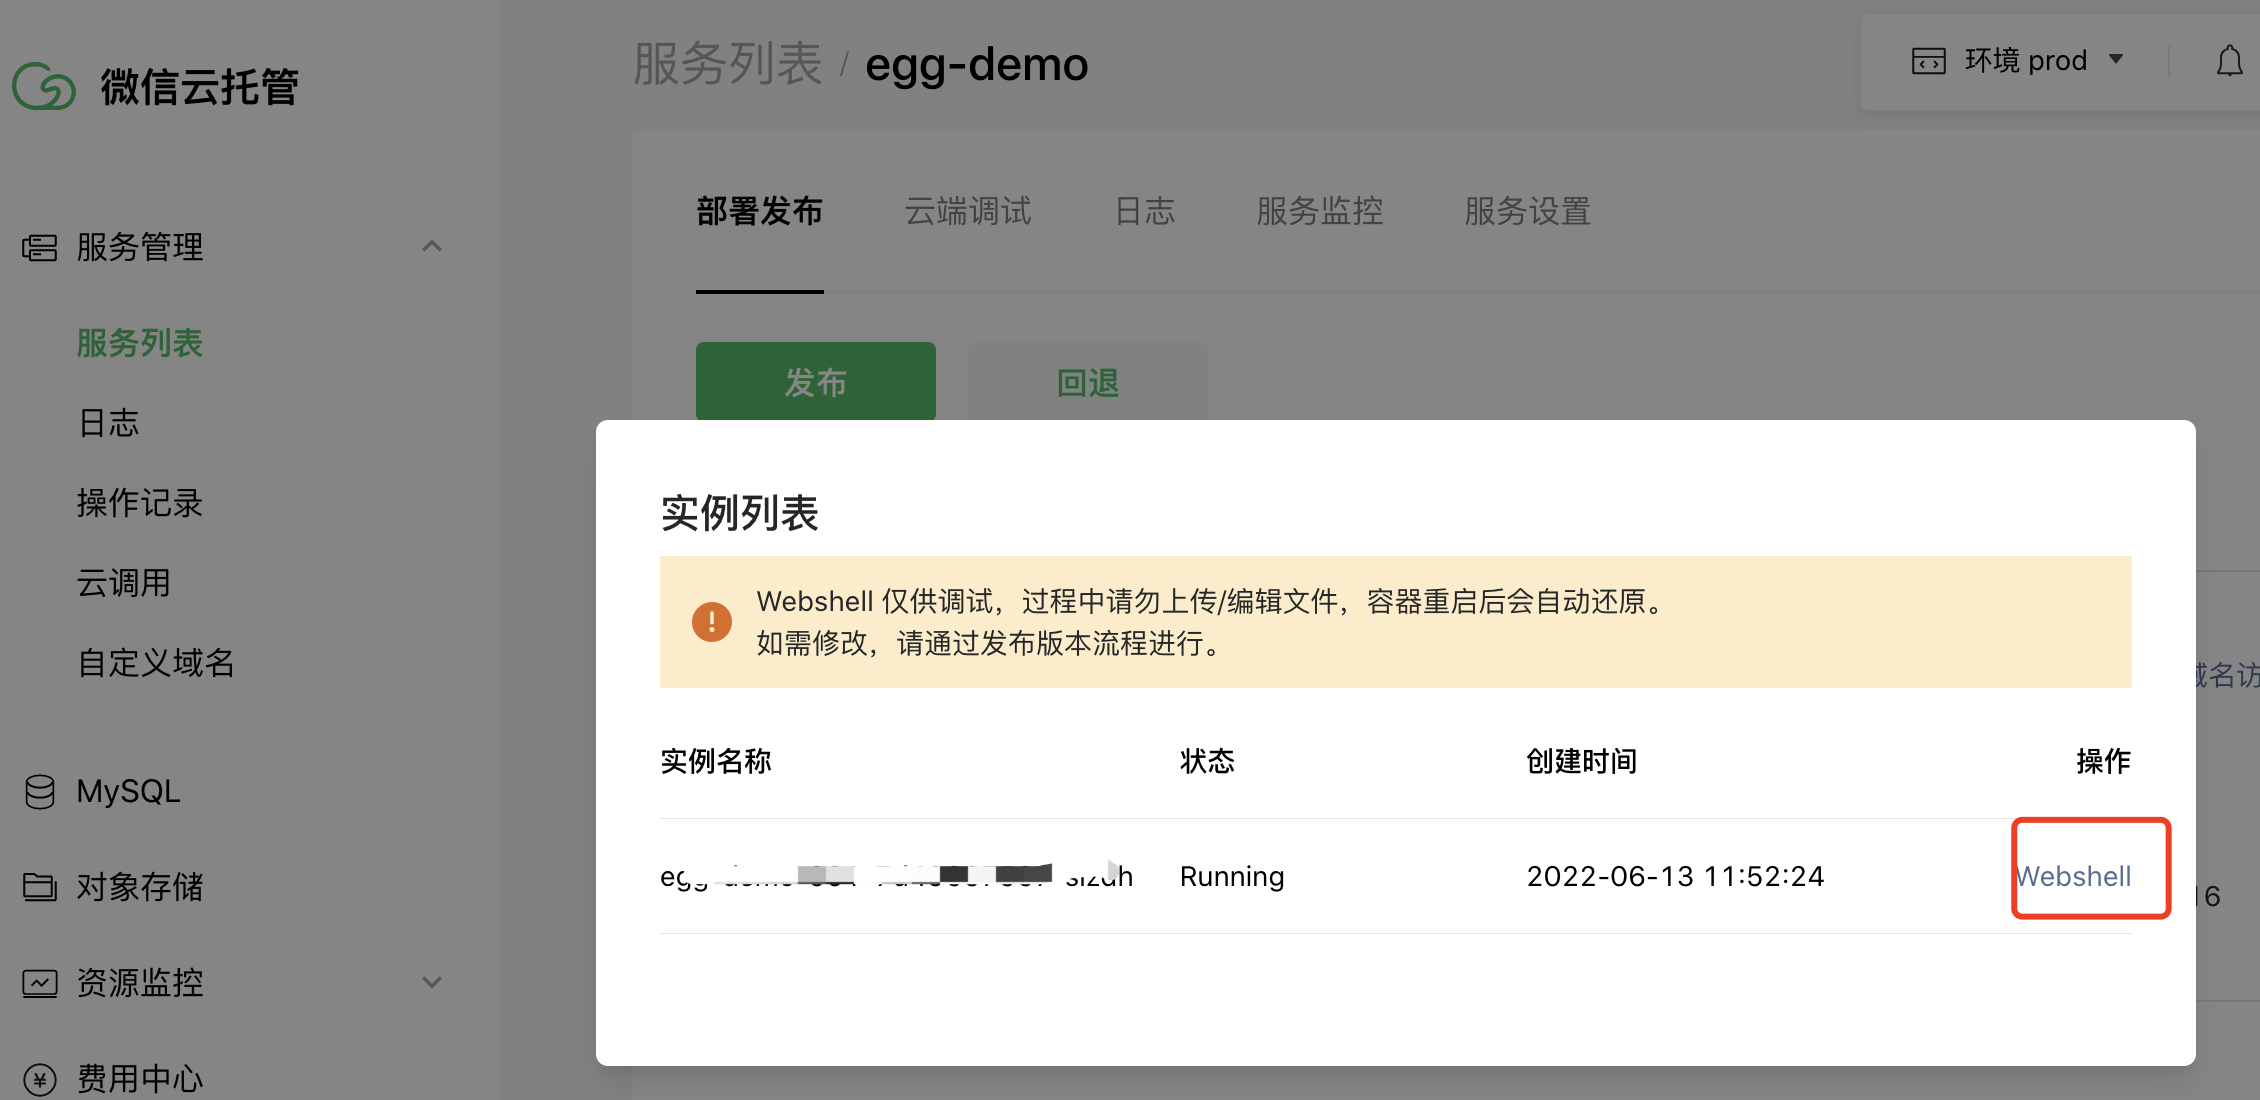

进入云托管容器实例查看代码
容器内的项目目录结构

调试接口

云托管控制台的接口调试面板

postman测试

Postman 请求云托管服务的公网地址

测试redis服务

云托管服务写入 Redis 缓存
在自建 Redis 中查到云托管写入的键

至此部署到微信云托管完成,后续修改代码提交到github会自动触发云托管部署。

这个体验是真的舒服,你本地写完代码 push 上去,剩下的全自动。代价是灵活性,平台怎么构建、怎么调度你说了不算,遇到平台特有的限制只能按它的规矩来。

六、egg 部署到腾讯云 serverless

第三条路是 serverless。它和前两种最大的差别是计费和生命周期,没有常驻进程,请求来了才拉起一个实例,没请求就缩到零,按调用次数和运行时长收钱。对于流量小、有明显波峰波谷的服务,成本能降很多。

代价也很明确,冷启动。长时间没人访问之后的第一个请求会明显变慢,因为要现场把运行环境和代码加载起来。另外文件系统是只读的,这一点直接影响 Egg 的配置,下面就会讲到。

需要注意,云函数的代码包不能超过500M。这个限制看着很宽松,但 Egg 加上完整 node_modules 是很容易超的,超了的话就得用「层」把依赖单独拆出去托管。
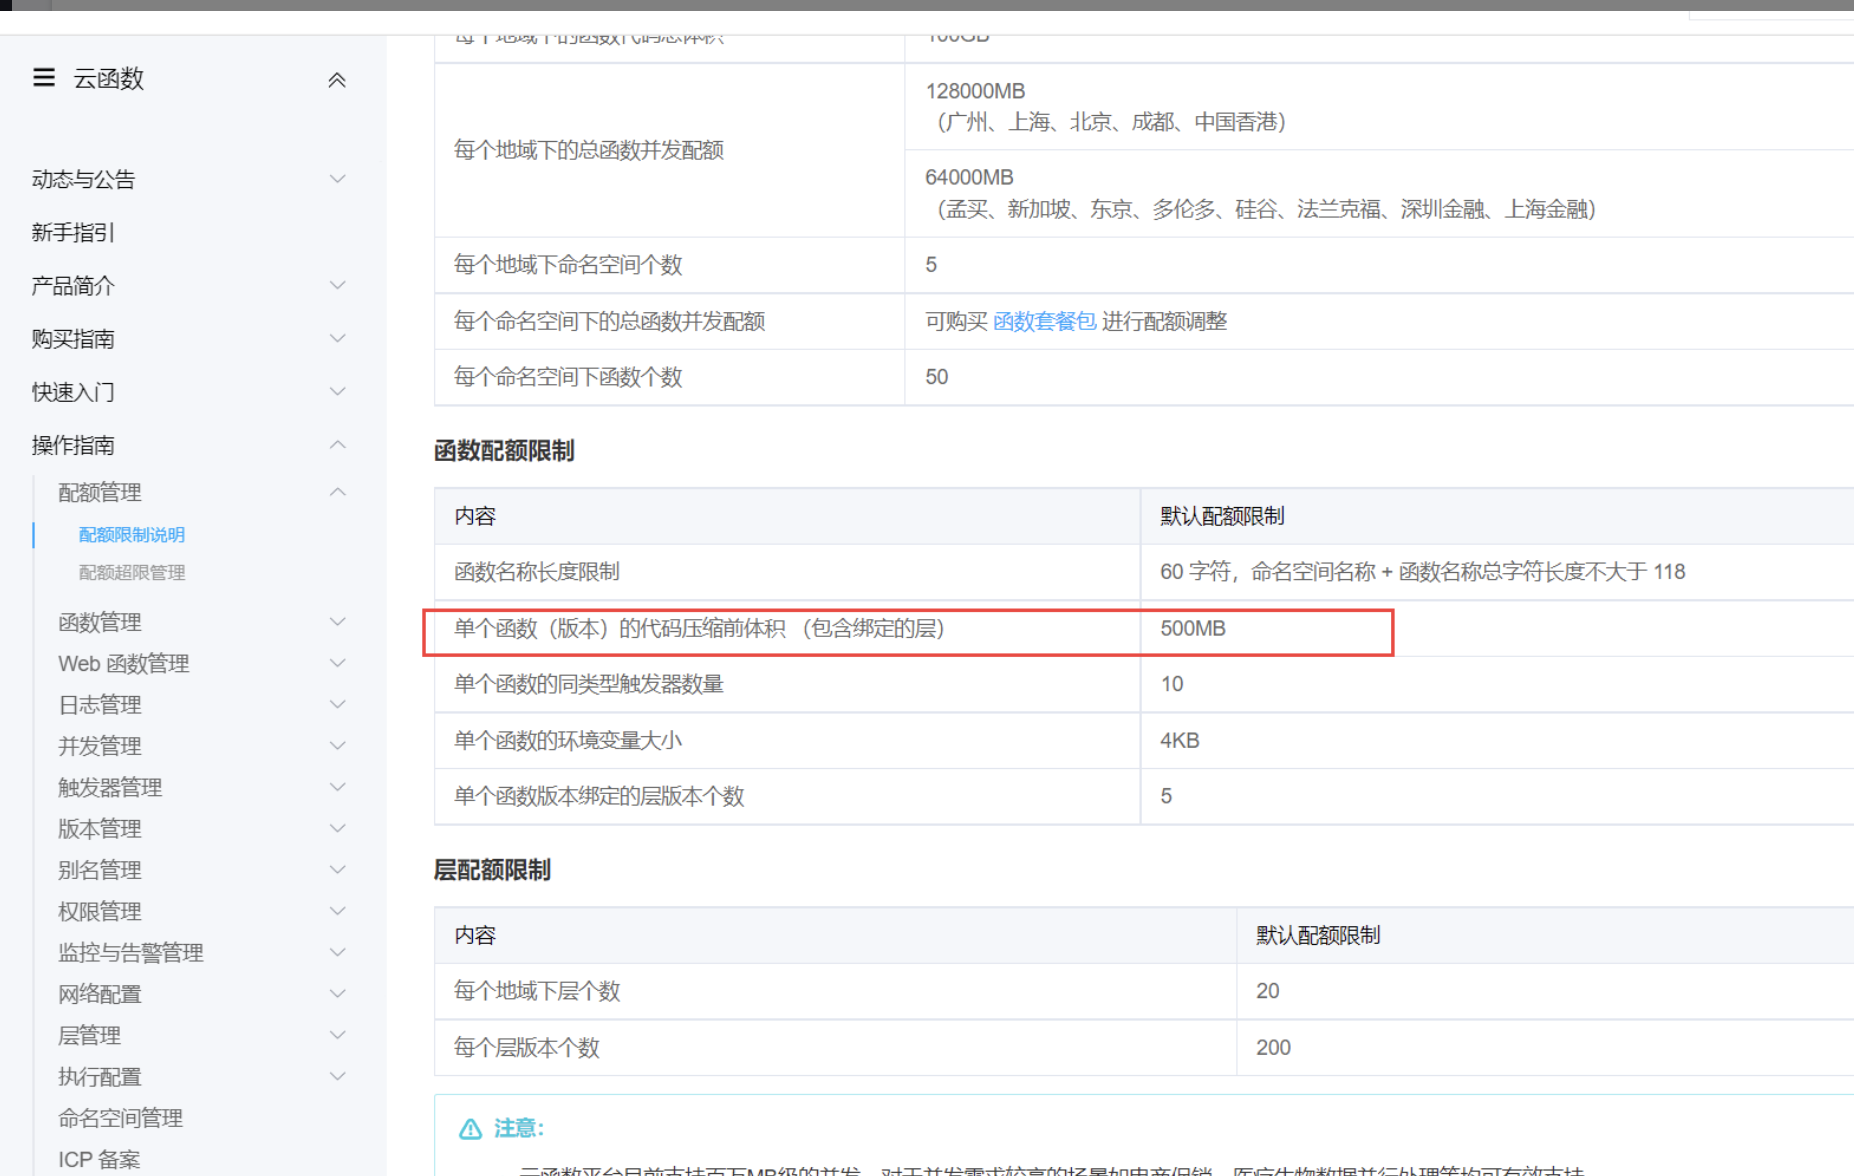
腾讯云 serverless 应用控制台

6.1 修改 egg 配置

由于云函数在执行时,只有 /tmp 可读写的,所以我们需要将 egg.js 框架运行尝试的日志写到该目录下,为此需要修改 config/config.default.js 中的配置如下:

const config = (exports = {
env: 'prod', // 推荐云函数的 egg 运行环境变量修改为 prod
rundir: '/tmp',
logger: {
dir: '/tmp'
}
})

这段配置是 serverless 环境下的必改项。云函数的运行环境里,除了 /tmp 之外整个文件系统都是只读的,而 Egg 启动时要往 run 目录写配置快照、往 logs 目录写日志,不改的话启动阶段就会因为写权限失败直接挂掉,日志还打不出来,排查起来非常懵。

顺带提一句 /tmp 的性质,它是实例级别的临时目录,实例被回收就没了,多个并发实例之间也不共享。所以日志真要留存得往日志服务推,别指望从 /tmp 里捞。

6.2 命令行部署

Serverless Framework 提供了封装好的 Egg 组件,几行 YAML 就能把函数、API 网关一起创建出来,不用手动去控制台点。

// 安装Serverless 框架
npm i -g serverless

配置 YAML

在 egg 项目根目录,新建 Serverless 配置文件 serverless.yml

app: appDemo
stage: dev
component: egg
name: eggDemo

inputs:
src: ./src
region: ap-guangzhou
functionName: eggDemo
runtime: Nodejs10.15
apigatewayConf:
protocols:
- http
- https
environment: release

几个字段解释一下。component: egg 指定用官方的 Egg 组件,它内部封装了打包、上传、创建函数、绑定网关这一串动作。src 是要上传的代码目录。region 选离用户近的地域,跨地域访问数据库延迟会很难看。apigatewayConf 里同时开 http 和 https,environment: release 是网关的发布环境,另外还有 test 和 prepub 可选。

runtime 那行写的是 Nodejs10.15,这是当年可选的版本,现在这个运行时早就下线了,实际部署要去控制台看当前支持的运行时列表再填。

部署到腾讯云

第一次执行会弹出二维码让你用腾讯云 App 扫码授权,之后凭证会缓存下来。
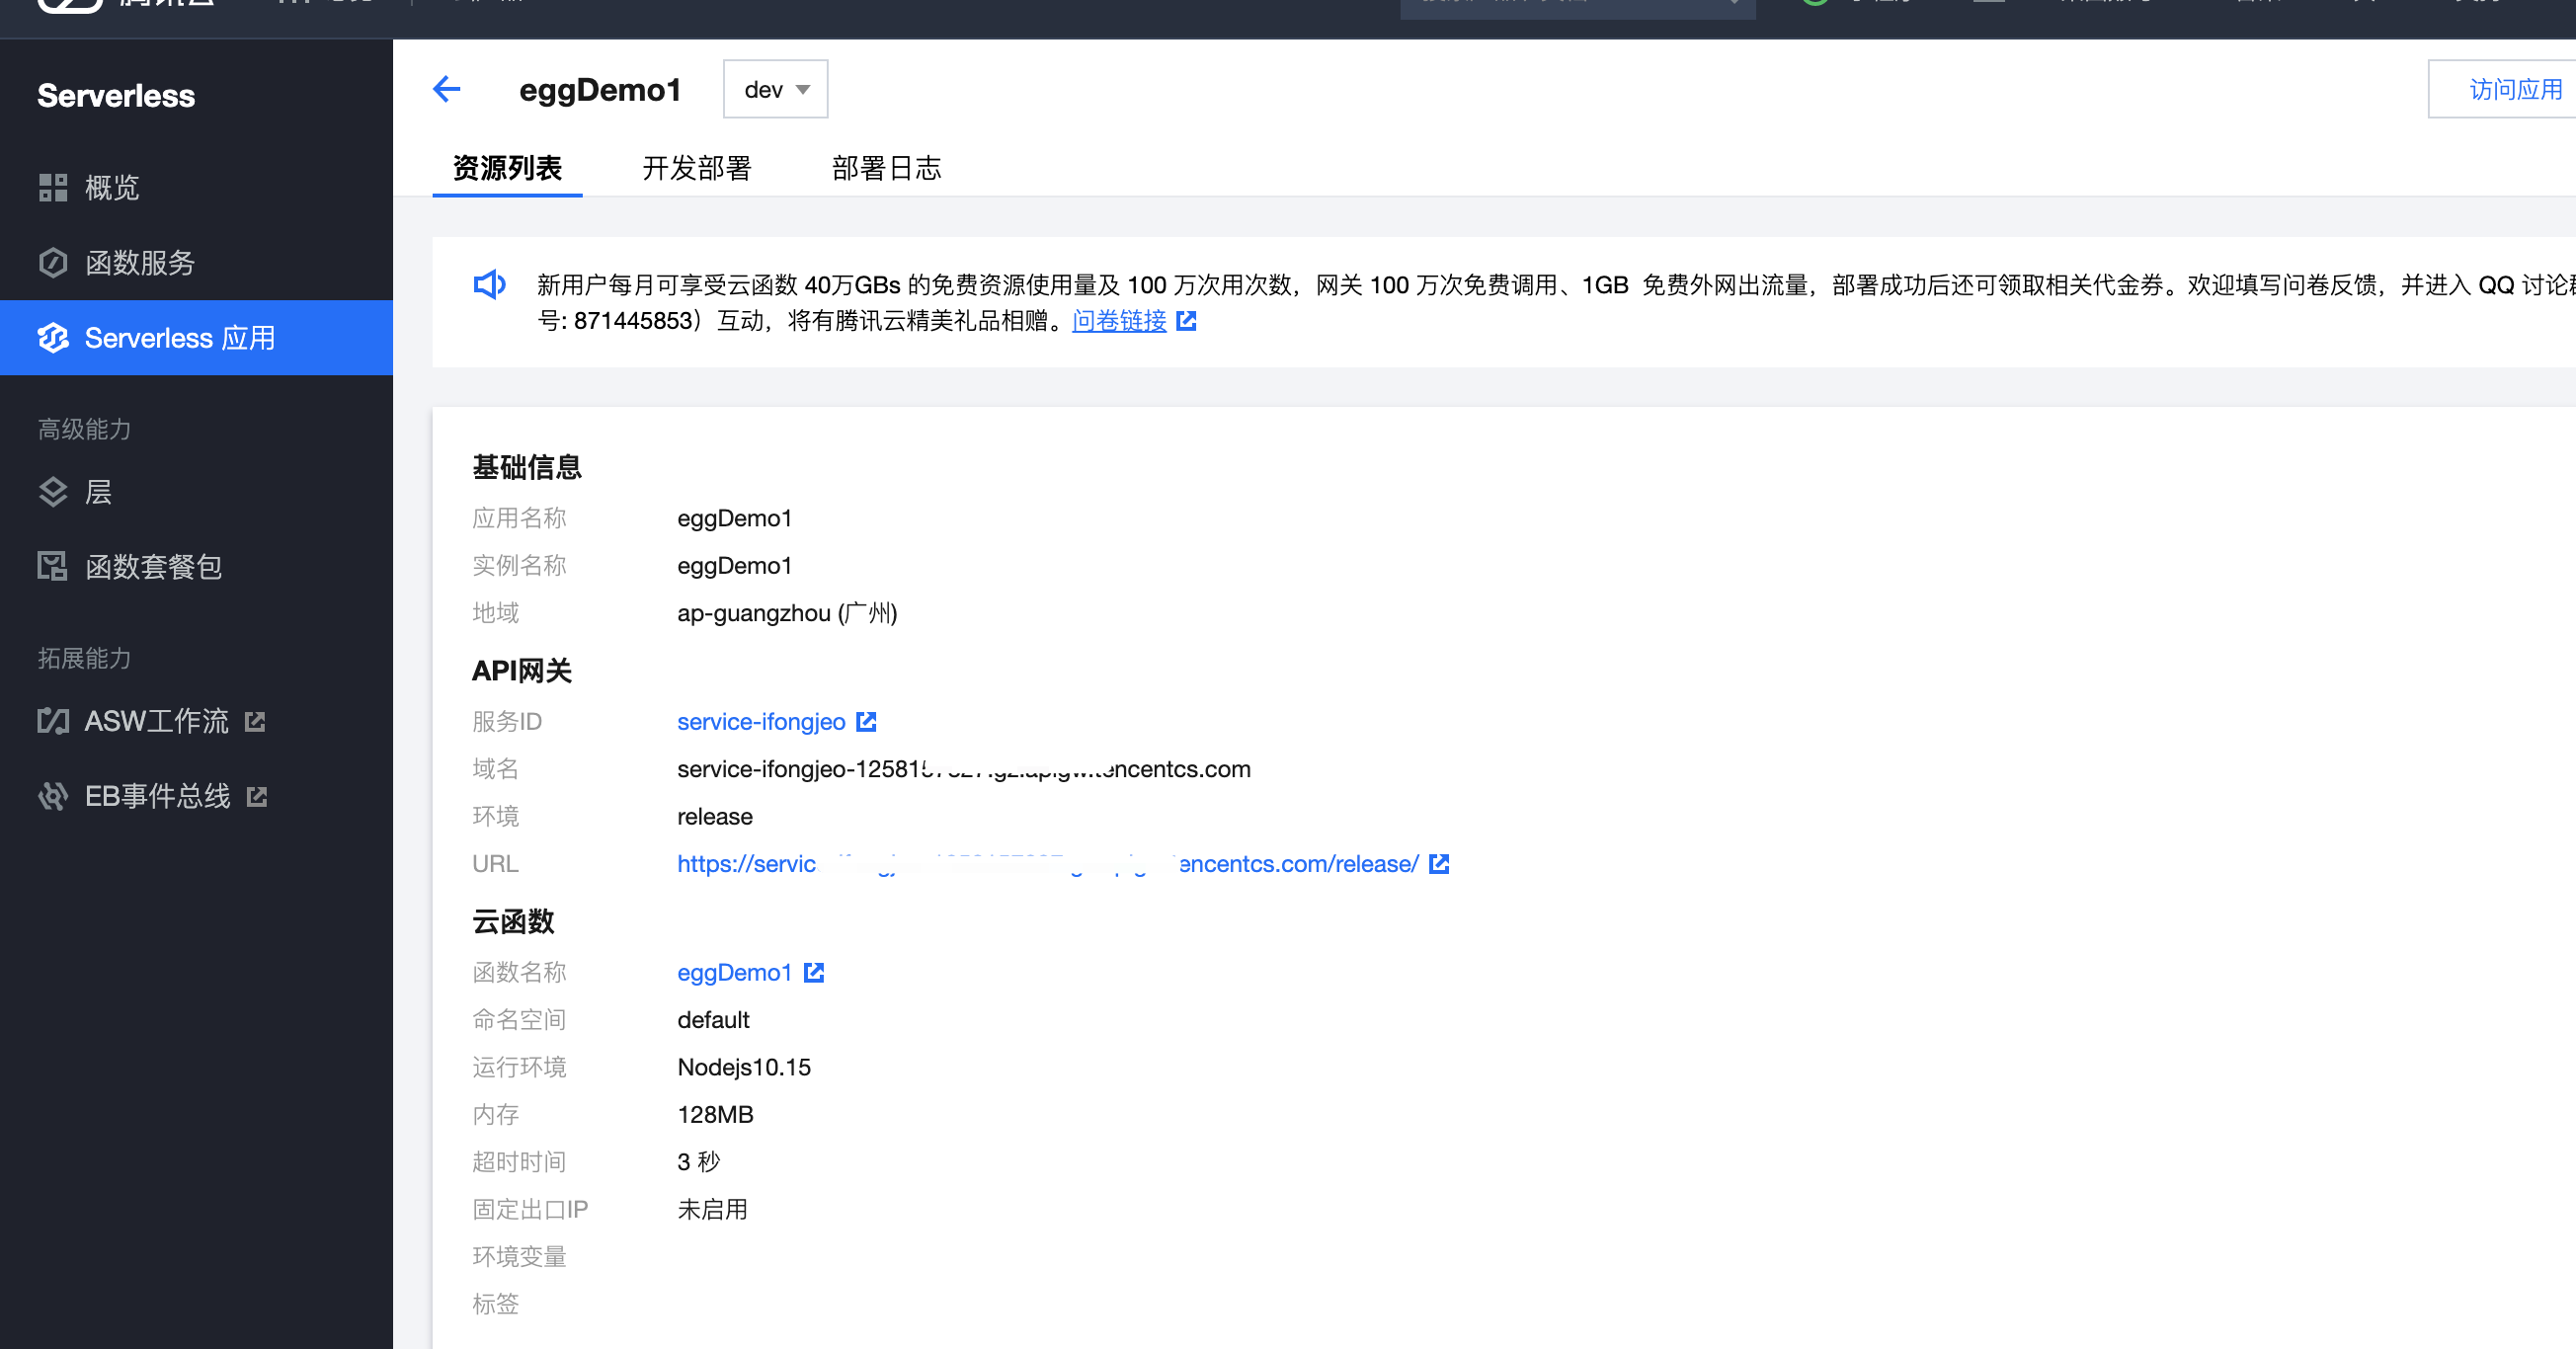
sls deploy 执行中的部署进度输出
部署完成后输出函数名和网关地址
浏览器访问 API 网关地址看到 Egg 返回内容

部署成功后终端会打印出一个 API 网关的地址,直接在浏览器里打开就能看到 Egg 的响应。这个地址是带随机前缀的临时域名,要正式用得去控制台绑自定义域名。

移除

serverless 按量计费,但 API 网关这类资源就算没流量也可能产生少量费用,测试完记得清理。通过以下命令移除部署的 Egg 服务资源,包括云函数和 API 网关。

$ sls remove

账号配置(可选)

当前默认支持 CLI 扫描二维码登录,如您希望配置持久的环境变量/秘钥信息,也可以在项目根目录 serverless-egg 中创建 .env 文件:

# .env
TENCENT_SECRET_ID=XXX
TENCENT_SECRET_KEY=XXX

如果已有腾讯云账号,可以在 API 密钥管理 中获取 SecretId 和SecretKey.

这个 .env 千万记得写进 .gitignore,密钥泄露到公开仓库会被扫号机器人在几分钟内捡走。要是给 CI 用,更推荐建一个只有云函数相关权限的子账号密钥,别直接拿主账号的。

注意!!!

通常初始化的 egg 项目,会自动创建 app/public 目录。但是在打包压缩时,如果该目录为空,则部署后,该目录不会存在。所以 egg 项目启动时会自动创建,但是云函数是没有操作权限的,建议可以在 app/public 目录下创建一个空文件 .gitkeep,来解决此问题。

这个坑很典型,值得多说两句。Git 和 zip 都不记录空目录,只记录文件,所以一个空的 app/public 在打包这一步就悄无声息地消失了。到了云函数里,Egg 发现目录不存在想去创建,又撞上只读文件系统,于是启动直接失败。放一个 .gitkeep 进去,目录里有了文件就能被打包带上,问题就绕过去了。

6.3 控制台创建部署(模板部署)

如果你只是想先看看效果,控制台的模板部署最快,不用装任何东西,几次点击就能跑起来一个示例应用。

  1. 登录控制台 https://console.cloud.tencent.com/sls
  2. 单击新建应用,选择Web 应用>Egg 框架,如下图所示

控制台新建应用时选择 Egg 框架模板

  1. 单击「下一步」,完成基础配置选择。

填写应用的基础配置

  1. 上传方式,选择示例代码直接部署,单击完成,即可开始应用的部署。
  2. 部署完成后,您可在应用详情页面,查看示例应用的基本信息,并通过 API 网关生成的访问路径 URL 进行访问,查看您部署的 Egg 项目。

应用详情页展示访问地址和运行状态

6.4 控制台创建部署(自定义部署)

模板部署跑通之后,真实项目肯定要用自己的代码,那就走自定义部署这条路。

如果除了代码部署外,您还需要更多能力或资源创建,如自动创建层托管依赖、一键实现静态资源分离、支持代码仓库直接拉取等,可以通过应用控制台,完成 Web 应用的创建工作

这里提到的「层托管依赖」正好能解上面说的 500M 限制。层是一份独立打包、可以被多个函数共享的依赖包,把 node_modules 放进层里,代码包本身就只剩几百 KB,部署速度也快很多。

初始化项目

mkdir egg-example && cd egg-example
npm init egg --type=simple
npm i

部署上云

接下来执行以下步骤,对本地已创建完成的项目进行简单修改,使其可以通过 Web Function 快速部署,对于 Egg 框架,具体改造说明如下

  • 修改监听地址与端口为 0.0.0.0:9000
  • 修改写入路径,serverless 环境下只有 /tmp 目录可读写。
  • 新增 scf_bootstrap 启动文件。

这三条一条都不能少,原因各不相同。监听 0.0.0.0 是因为平台要从容器外面转发请求进来,只监听 127.0.0.1 收不到;9000 是 Web Function 约定的默认端口。写入路径的问题前面讲过。scf_bootstrap 则是 Web Function 的入口约定,平台拉起实例时执行的就是它。

1. (可选)配置 scf_bootstrap 启动文件

您也可以在控制台完成该模块配置。
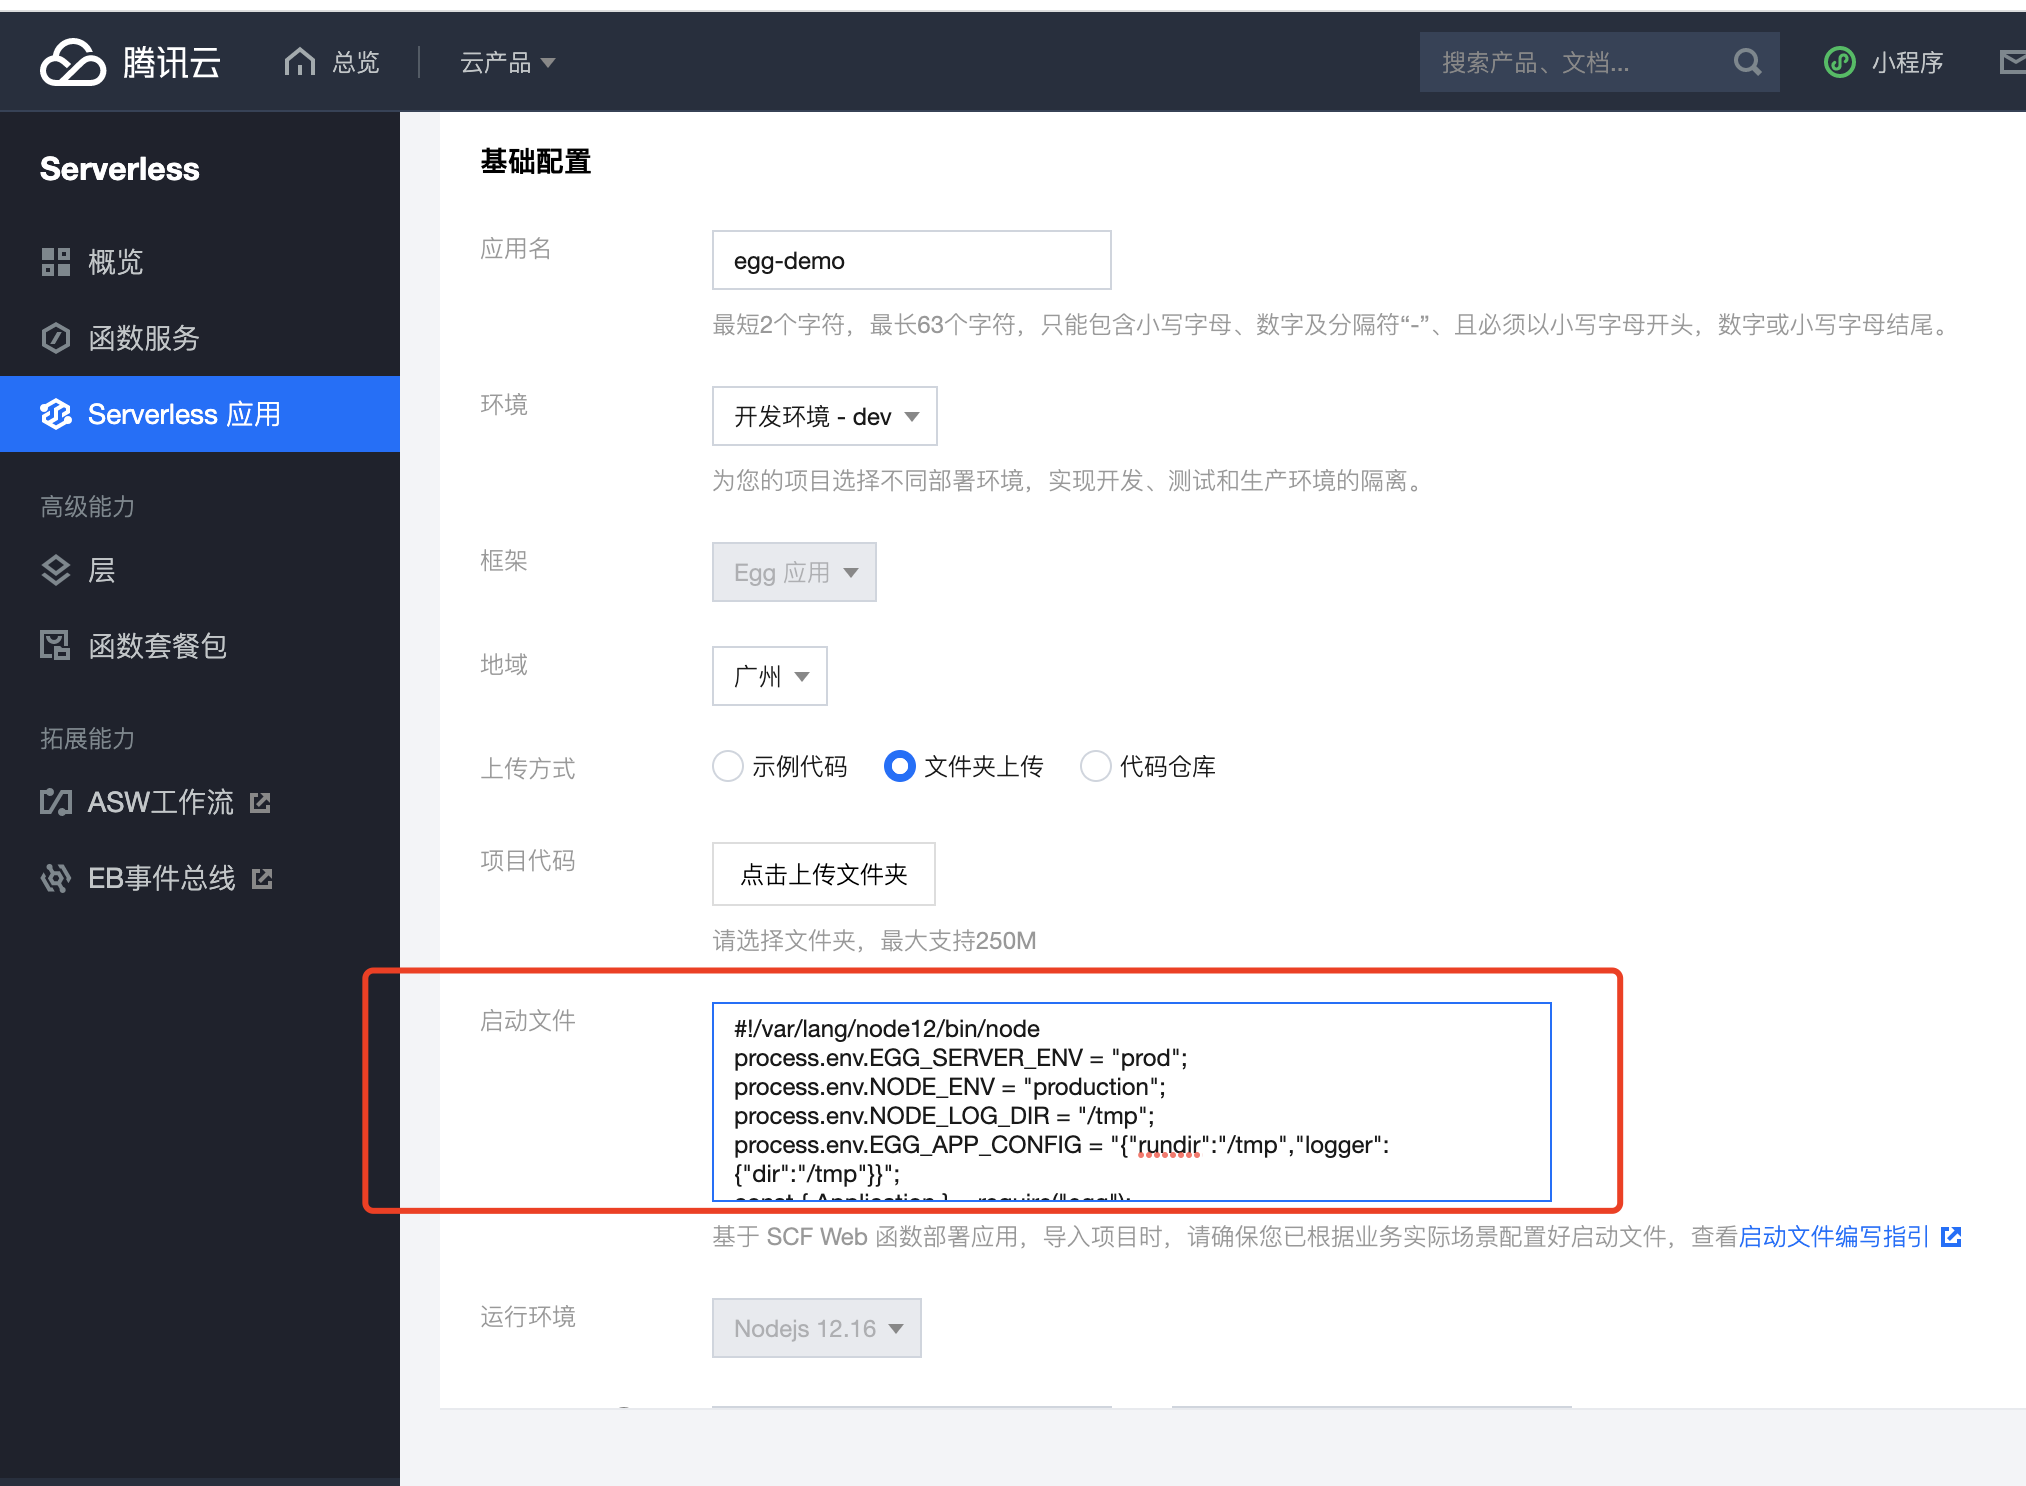
控制台中配置 scf_bootstrap 启动命令

在项目根目录下新建 scf_bootstrap 启动文件,在该文件添加如下内容(用于配置环境变量和启动服务,此处仅为示例,具体操作请以您实际业务场景来调整):

#!/var/lang/node12/bin/node

'use strict'

/**
* docker 中 node 路径:/var/lang/node12/bin/node
* 由于 serverless 函数只有 /tmp 读写权限,所以在启动时需要修改两个环境变量
* NODE_LOG_DIR 是为了改写 egg-scripts 默认 node 写入路径(~/logs)-> /tmp
* EGG_APP_CONFIG 是为了修改 egg 应有的默认当前目录 -> /tmp
*/

process.env.EGG_SERVER_ENV = 'prod'
process.env.NODE_ENV = 'production'
process.env.NODE_LOG_DIR = '/tmp'
process.env.EGG_APP_CONFIG = '{"rundir":"/tmp","logger":{"dir":"/tmp"}}'

const { Application } = require('egg')

// 如果通过层部署 node_modules 就需要修改 eggPath
Object.defineProperty(Application.prototype, Symbol.for('egg#eggPath'), {
value: '/opt'
})

const app = new Application({
mode: 'single',
env: 'prod'
})

app.listen(9000, '0.0.0.0', () => {
console.log('Server start on http://0.0.0.0:9000')
})

这个文件里最值得盯一眼的是那三行环境变量。NODE_LOG_DIR 改的是 egg-scripts 默认往 ~/logs 写日志的行为,EGG_APP_CONFIG 用一段 JSON 覆盖了 Egg 的 rundirlogger.dir,两个都指向 /tmp。这是在启动阶段就把写入路径掰过来,比改 config.default.js 更早生效,能覆盖到框架自身初始化那一段。

Object.defineProperty 那段改 eggPath 是为层部署准备的,把依赖放到层里之后 node_modules 会挂在 /opt 下,不改这个 Egg 找不到框架本体。如果你没用层,这段可以不要。

新建完成后,还需执行以下命令修改文件可执行权限,默认需要 777 或 755 权限才可正常启动。示例如下

chmod 777 scf_bootstrap

这一步在 Windows 上开发的同学特别容易翻车,因为 Windows 文件系统没有 Unix 权限位这个概念,打包上去权限就丢了,函数启动会报 permission denied。碰到这种情况,用控制台那种在线配置启动命令的方式更省事。

2. 控制台上传

您可以在控制台完成启动文件 scf_bootstrap 内容配置,配置完成后,控制台将为您自动生成 启动文件,和项目代码一起打包部署

启动文件以项目内文件为准,如果您的项目里已经包含 scf_bootstrap 文件,将不会覆盖该内容。
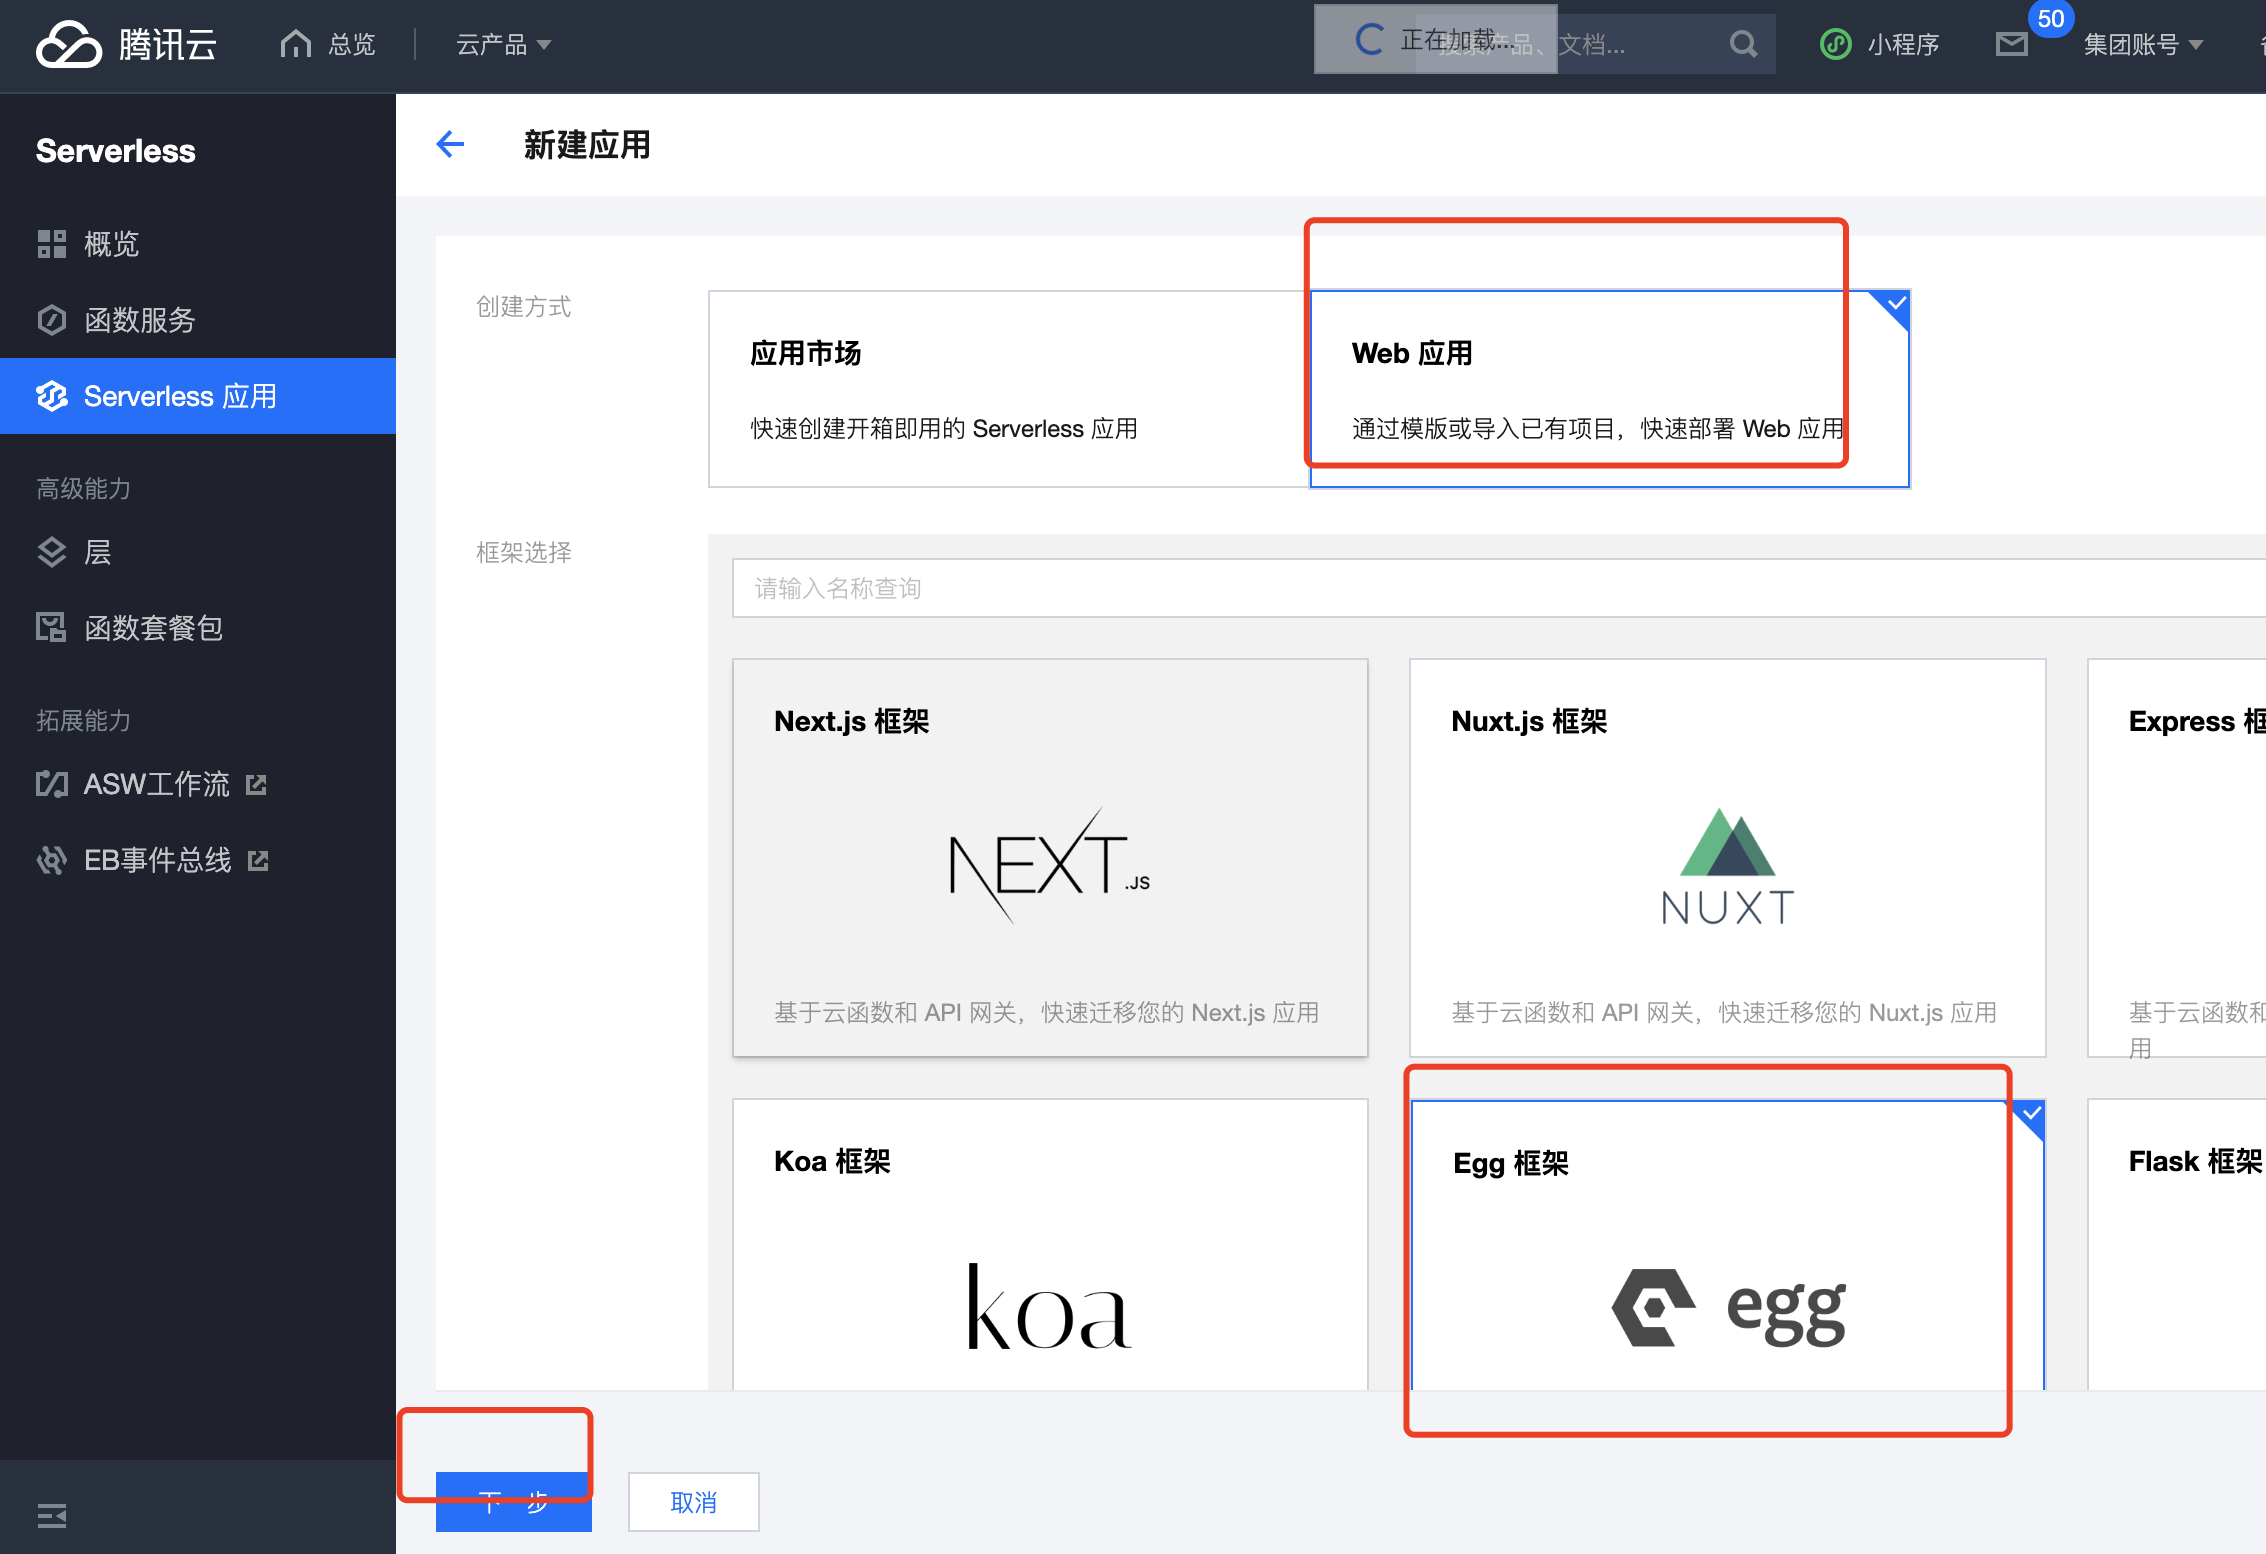
控制台选择本地上传项目代码
填写启动文件和运行环境配置
确认部署配置

应用创建完成

查看函数,修改代码查看日志等。在线编辑器改完记得点部署,不然改的只是草稿。函数的运行日志也在这个页面,冷启动耗时、内存占用这些指标都能看到。
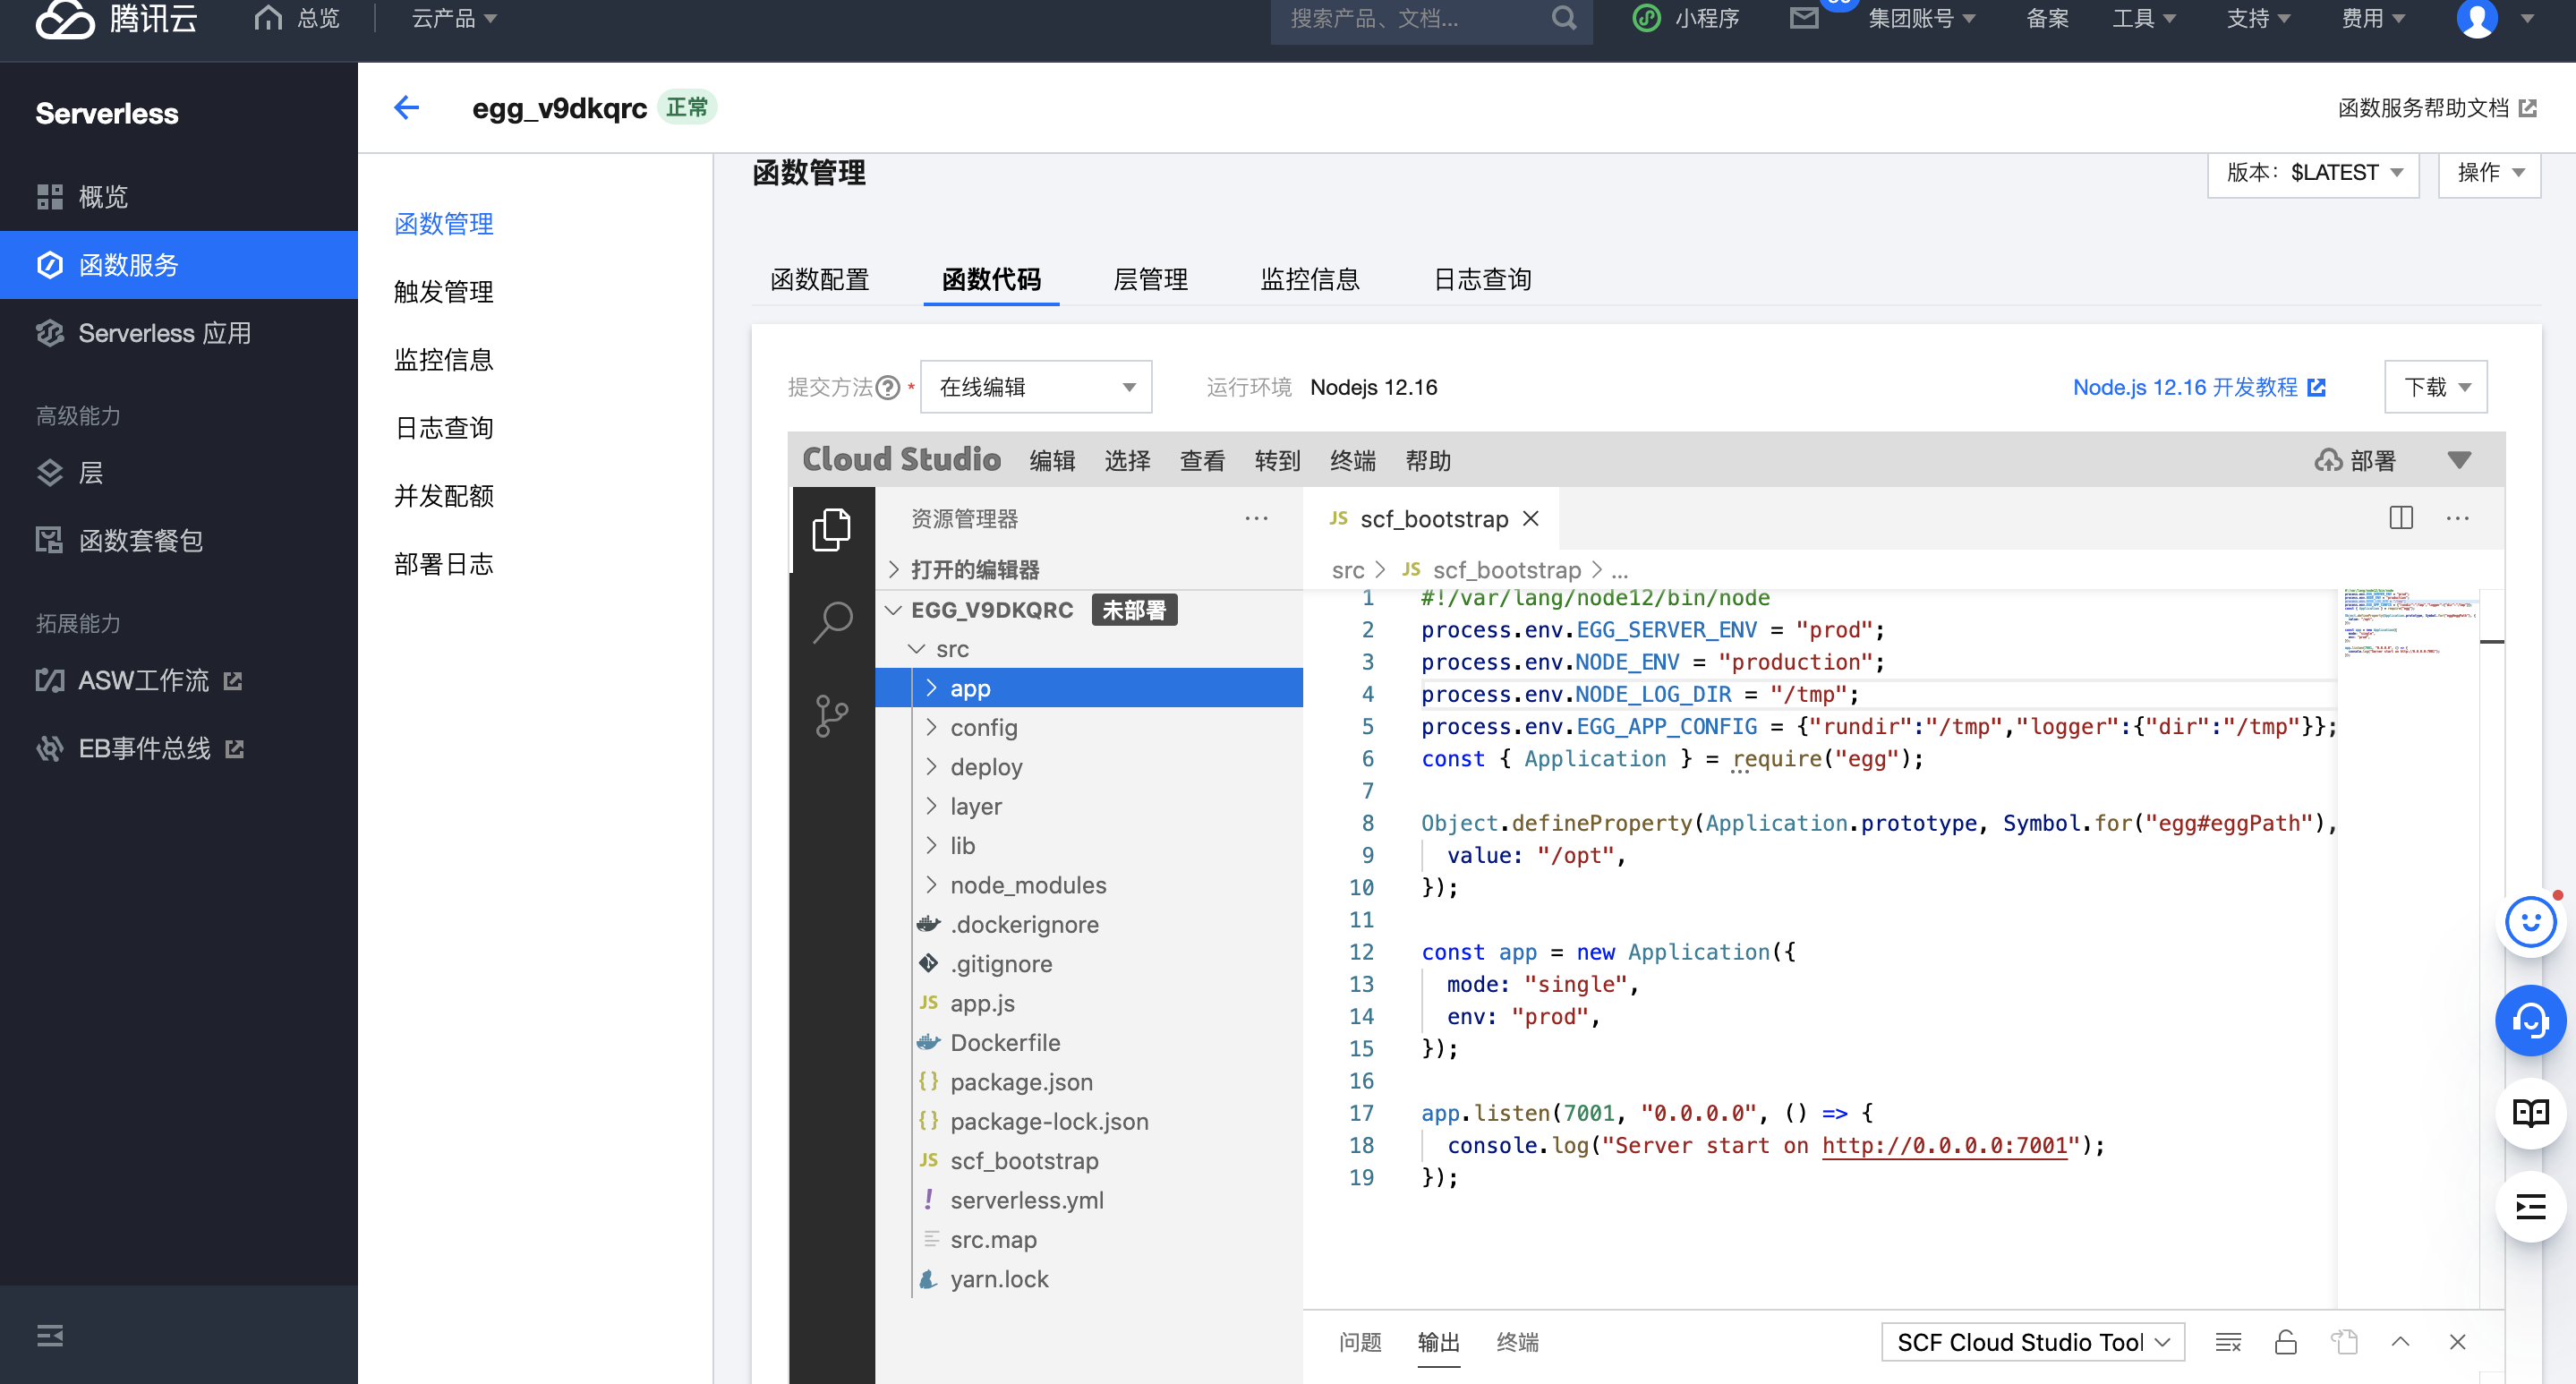
云函数详情页可以在线查看代码和日志

高级配置管理

您可在「高级配置」里进行更多应用管理操作,如创建层、绑定自定义域名、配置环境变量等。

数据库密码这类敏感信息就该放在这里的环境变量里,别硬编码进 config.prod.js 跟着代码一起提交。

高级配置面板中的层和环境变量设置

6.5 测试接口

请求 serverless 部署的 Egg 接口返回数据
接口在浏览器中正常返回
云函数调用日志中可以看到本次请求记录

第一次请求的耗时会明显高于后面几次,那就是冷启动。它在测试的时候只是「慢了一下」,但如果你的服务是低频调用的后台接口,用户每次点进来都要吃这个延迟,体验上是能感知到的。有预置并发这类手段可以缓解,代价是要为常驻实例付费,那就又回到成本和体验的取舍上了。

七、这套流程放到今天要改哪些地方

这篇写于 2022 年 6 月,隔了这么久,思路没变,但几个具体的东西确实变了,一并说清楚,免得你照着敲卡在半路。

Compose 从独立程序变成了 Docker CLI 的内置插件,命令由 docker-compose 改成 docker compose,第 4.2 节那套单独下载二进制文件的步骤可以整个跳过。同时 compose 文件顶部的 version 字段已经废弃,写了会有告警,删掉最省事。

Node 12 早已结束维护,node:12.18 这类基础镜像不该再出现在新项目里,换成当前的 LTS 大版本。npm 的淘宝源域名也换了,registry.npm.taobao.org 停用,现在是 registry.npmmirror.com。文中所有 Dockerfile 我都已经按新域名改过了。

Docker Hub 的国内加速地址这几年被动过好几轮,公共的第三方加速源不太靠得住,文中 daocloud.io 那套地址你不一定还能拉通。稳妥的做法是去自己云厂商的容器镜像服务里申请一个专属加速地址,或者干脆把常用镜像推到自己的私有 registry。

腾讯云 serverless 那边,Nodejs10.15 这个运行时已经下线,serverless.yml 里的 runtime 得按控制台当前支持的列表填。Serverless Framework 本身的版本和组件也有变化,跑之前建议先翻一眼官方仓库的 README。

至于 Egg 框架本身,我最近的新项目更多是用 Nest,写法和生态更贴近现在的 TypeScript 习惯,部署思路其实是完全一样的,我在 Nest 项目部署完整记录 里写过一份对照,感兴趣可以对着看。

总结

这三条路我都跑通了,选哪条其实取决于你在意什么。

自建服务器加 docker-compose,掌控力最强,四个服务怎么编排、日志往哪存、配置怎么改全是你说了算,适合有多个服务要互相通信、或者对数据存放位置有要求的项目。代价是运维成本,从装 Docker 到放行端口到续费打补丁,全归你。

云托管胜在流水线,push 代码就自动构建部署,还省掉了域名备案和证书这些事,小程序后端这类场景很合适。但平台怎么构建、怎么调度不由你控制,遇到平台限制只能按它的规矩来。

serverless 适合流量小、有明显波峰波谷的服务,不用为闲置资源付钱。冷启动和只读文件系统是它的两个硬约束,Egg 那几处 /tmp 的改造就是被逼出来的。

真正通用的东西其实不是这三套流程,而是中间这些不变的部分。Dockerfile 里先拷 package.json 再装依赖的分层顺序,容器之间靠服务名而不是 IP 通信,需要持久化的东西一律往容器外挂,敏感配置走环境变量不进代码库。这几条不管你最后选哪条路都用得上。

如果你现在正准备把手上的 Node 服务往线上搬,我的建议是从 docker-compose 那条路先跑一遍。它不是最省事的,但它会逼你把每一层的连通性都亲手验一遍,等你以后用托管平台遇到问题,至少知道该从哪儿开始查。

参考