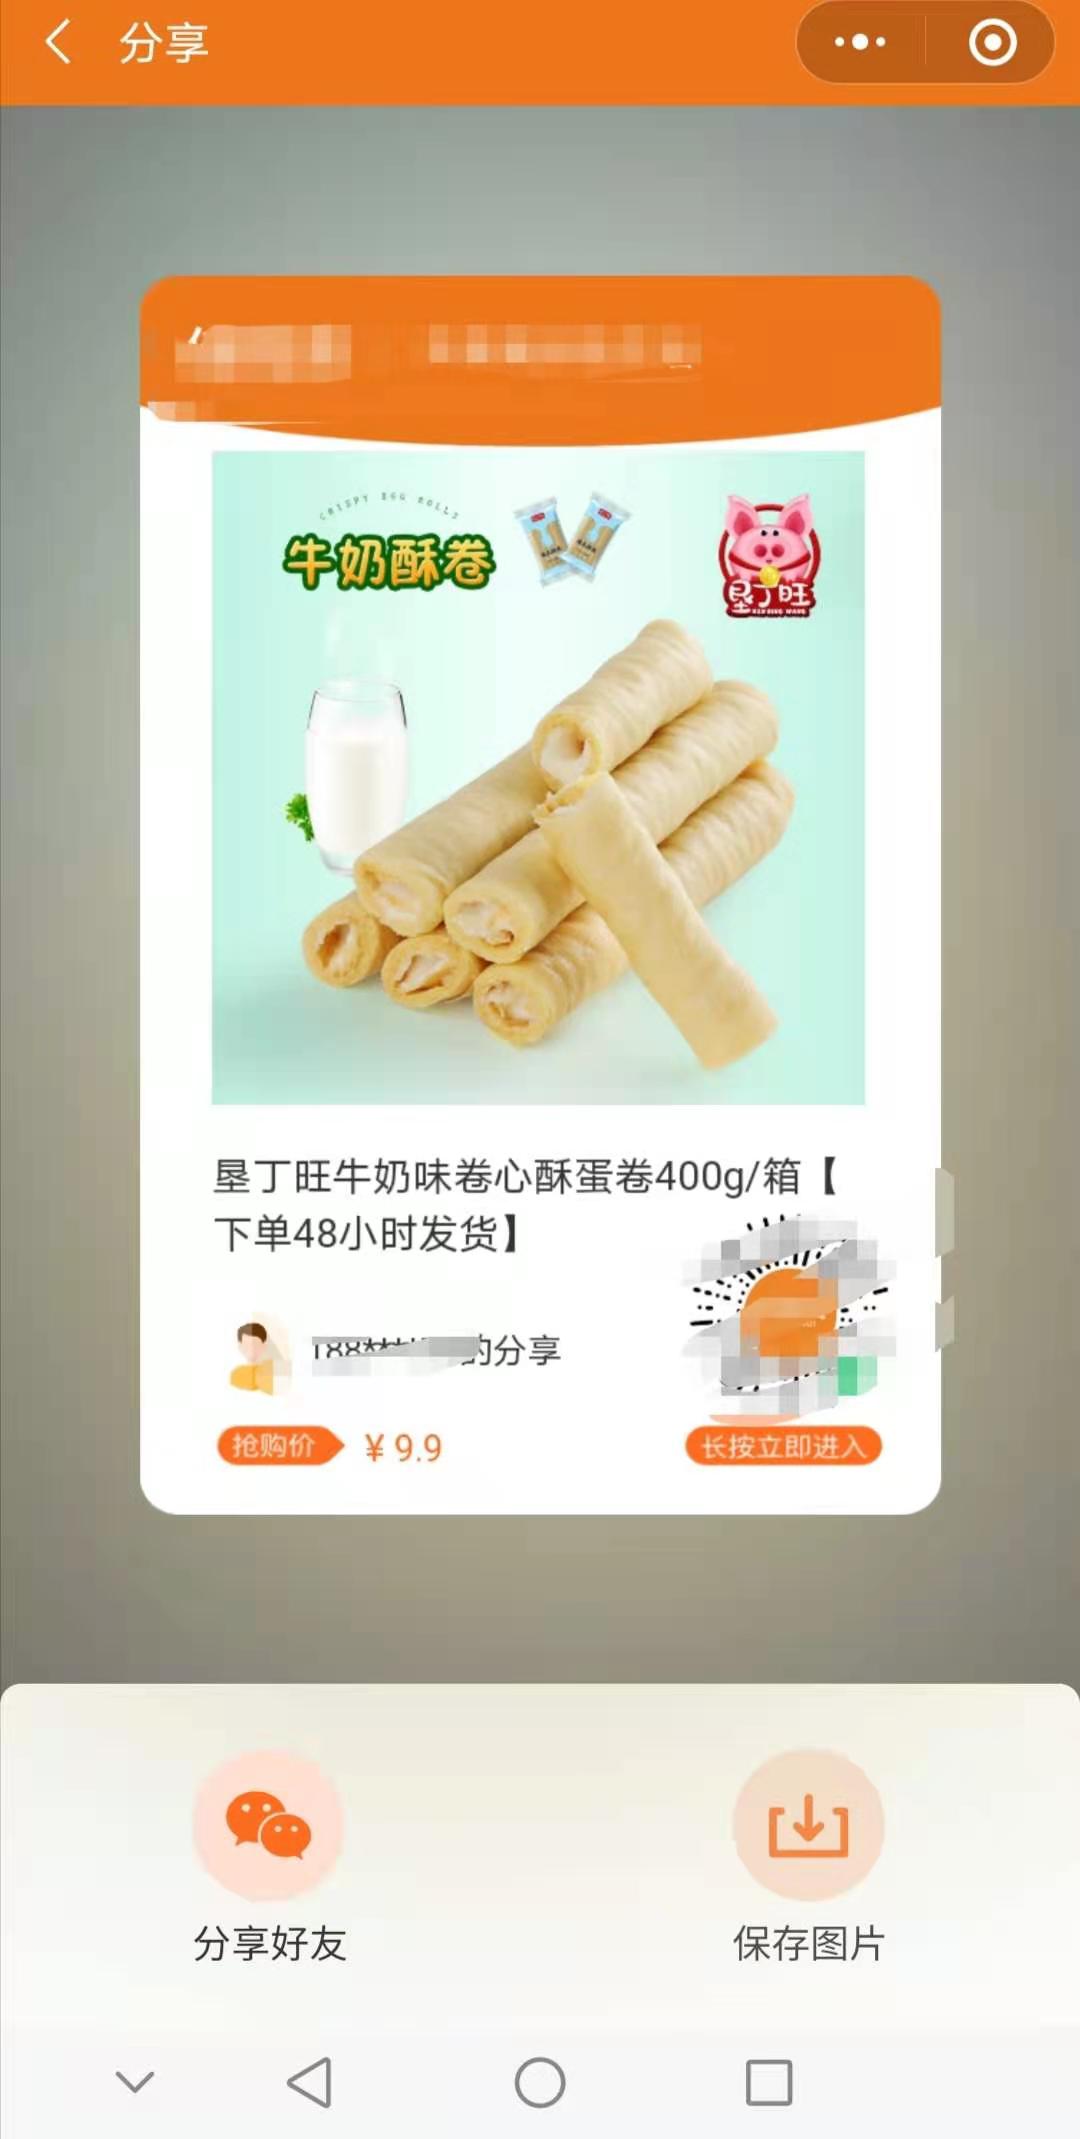
运营要一个「分享赚钱」的功能,用户点一下弹出一张带自己头像、昵称和专属二维码的海报,长按保存发朋友圈。听着就是画张图的事,真动手才发现全是细节,画布往哪儿放才不挡页面、网络图片为什么画不上去、头像圆角怎么切、文字超出一行怎么折。
这篇把当时踩过的坑整理成两套完整实现。一套是用旧版 wx.createCanvasContext 封装成组件,哪儿要海报就往哪儿塞;另一套是用新的 type="2d" 画布配一个 Draw 工具类,把 view、image、text 的绘制抽象出来。两套代码都能直接抄,后面会说清楚各自适合什么场景。
在本篇文章中,我们将从浅入深,和大家一起学习以下知识:
小程序里生成海报为什么绕不开 canvas
用旧版 createCanvasContext 把海报封装成一个可复用组件的完整代码
隐藏画布的定位技巧,为什么不能用 display: none
网络图片、base64 二维码怎么画进画布,域名白名单要配什么
圆形头像的裁剪写法,以及 save 和 restore 为什么必须配对
新版 canvas 2d 的用法,配一个通用 Draw 类处理 view、image、text
多行文本折行、字号、高清屏模糊这些细节怎么处理
保存到相册的授权流程和几个容易忽略的失败分支
一、小程序里画海报,为什么只能用 canvas 先把前提说清楚。海报的最终形态是一张图片,用户要长按保存到相册,所以它必须是真正的图片文件,不能是一堆 view 拼出来的页面。小程序没有 html2canvas 那种把 DOM 截图的能力,服务端渲染图片又要多一次网络往返和一套图片服务,于是客户端 canvas 就成了最直接的路。
流程固定是三步。往画布上画背景、图片、文字,调 wx.canvasToTempFilePath 把画布导出成一个临时文件路径,再用 wx.saveImageToPhotosAlbum 存进相册。中间那步是关键,画布本身用户是看不到也保存不了的,能保存的只有导出后的那个临时文件。
理解了这条链路,后面那些奇怪的写法就都有解释了。
二、方案一,用旧版 canvas 接口封装成组件 这套是最早写的,基于 wx.createCanvasContext。好处是可以整个封装进一个自定义组件,页面里引入之后调一个方法就出海报。
2.1 组件配置 先声明这是个组件,并引入弹层和图标:
{ "component" : true , "usingComponents" : { "van-popup" : "@vant/weapp/popup/index" , "van-icon" : "@vant/weapp/icon/index" } }
"component": true 这一行决定了它是自定义组件而不是页面,弹层用的是 Vant Weapp 的 van-popup,你项目里用别的组件库或者自己写一个都行,不影响绘制逻辑。
2.2 结构,画布 + 弹层 + 两个按钮 结构分两块,一块是那个用来画图的 canvas,一块是海报出来之后展示的弹层:
<canvas canvas-id ="poster-share" class ="poster" /> <view bind:tap ="handleShare" > <slot wx:if ="{{useSlot}}" /> </view > <van-popup custom-class ="page-van-popup" show ="{{ showShare }}" bind:close ="shareClose" > <view class ="df fxdc h100v w100v" wx:if ="{{showShare}}" > <view class ="df jcc aic fxa posr mt120" bind:tap ="shareClose" > <image class ="poster-image" src ="{{ tempFilePath }}" mode ="aspectFit" /> </view > <view class ="fxn h238 bgfff df aic jcc bdrs16t" > <view class ="fxa w0 df aic jcc" > <view class ="df fxdc posr" > <button class ="posa t0 l0 w100p h100p op0" open-type ="share" /> <image class ="h108 w108" src ="./assets/ic_fenxiang.svg" /> <text class ="mt16 c333 fz28" > 分享好友</text > </view > </view > <view class ="fxa w0 df aic jcc" > <view class ="df fxdc" bind:tap ="savePicture" > <image class ="h108 w108" src ="./assets/ic_baocun.svg" /> <text class ="mt16 c333 fz28" > 保存图片</text > </view > </view > </view > </view > </van-popup >
这里有三个点值得单独拎出来。
弹层里展示的是 tempFilePath,也就是画布导出后的临时文件,不是画布本身。用户看到的、长按的、保存的都是这张图。
「分享好友」那个按钮用了一个绝对定位、透明度为 0 的 button 盖在图标上,open-type="share" 只能挂在 button 上,但设计稿要的是一个图标加一行字。透明按钮盖上去是小程序里最常用的解法,比强行改 button 的默认样式省事。
slot 配合 useSlot 属性,是为了让调用方自己决定触发海报的入口长什么样,有的页面是个悬浮按钮,有的是列表里的一行文字。
2.3 样式,重点是把画布藏起来 @import "../../../../libs/wxss/index.wxss" ;.container { width : 100% ; } .h377 { height : 377 rpx; } .h417 { height : 417 rpx; } .pb70 { padding-bottom : 70 rpx; } .bgview { height : 651 rpx; opacity : .63 ; } .tip ,.share { right : 0 ; border-radius : 100 rpx 0 0 100 rpx; width : 88 rpx; height : 36 rpx; background : #ffd300 ; color : #007142 ; } .tip { top : 75 rpx; } .share { top : 140 rpx; } .title-wrap { width : 100% ; height : 85 rpx; background : #fff0e5 ; } .shopping-num { border-radius : 15 rpx; height : 28 rpx; background : linear-gradient (90deg , rgba (255 , 64 , 0 , 1 ) 0% , rgba (255 , 163 , 41 , 1 ) 100% ); } .page-van-popup { --popup-background-color : transparent; } .popup__content { width : 590 rpx; height : 800 rpx; } .poster { position : fixed; left : 0 ; top : -1000000px ; z-index : 1000 ; width : 570px ; height : 920px ; pointer-events : none; } .nodata { padding-top : 150 rpx; height : 700 rpx; } .count-down .van-count-down { width : 200 rpx; line-height : unset; font-size : 20 rpx; color : unset; } .poster-image { width : 690 rpx; height : 920 rpx; } .cffffff88 { color : #ffffff88 ; } .w252 { width : 252 rpx; }
样式里最关键的是 .poster 这一段,单独看一遍:
画布用 position: fixed 加 top: -1000000px 挪到了屏幕外面,还加了 pointer-events: none。为什么要这么写?因为旧版 canvas 是原生组件,display: none 或者 visibility: hidden 之后它就不参与渲染了,你画上去的东西导不出来,canvasToTempFilePath 会返回一张空白图甚至直接失败。宽高也不能设成 0,画布的尺寸就是最终图片的尺寸。所以只能让它「存在但看不见」,挪出可视区是最稳的办法。
顺带说一句单位。.poster 的宽高用的是 px 而不是 rpx,因为绘制时传给 drawImage 的坐标是按画布的逻辑像素算的,混用 rpx 会导致你在设计稿上量的坐标和实际画出来的对不上。展示海报的 .poster-image 才用 rpx,那是给用户看的,需要跟着屏幕宽度走。
另外那行 #fff88 是原文的笔误,十六进制颜色不存在五位写法,按类名 cffffff88 推断应该是 #ffffff88,这里改过来了。写错的后果不是报错,是这条颜色规则整条失效,排查时很容易漏掉。
2.4 绘制逻辑,一行一行画上去 下面是组件的核心,代码有点长,先看完再拆:
import { rGetShareErCode } from '../../../../netapi/redPackets/index' ;import { KEY_APP_ID } from '../../../../constants/config' ;import { stringLimit } from '../../../../utils/string' Component ({ properties : { useSlot : { type : Boolean , value : false }, showShare : { type : Boolean , value : false }, pagePath : { type : String , value : '/pages/packagesSection/redPacketsDistribute/index' , }, }, data : { tempFilePath : '' , }, query : {}, observers : { }, methods : { shareClose ( this .setData ({ showShare : false }); }, } })
properties 和 data 这两处我调整了一下。原文里 showShare 同时出现在 properties 和 data 里,小程序自定义组件不允许这样,同名的话行为取决于实现细节,开发者工具也会告警。既然它需要由外部传入控制弹层显隐,就留在 properties 里,data 只保留组件自己维护的 tempFilePath。
tempFilePath 存在的意义是缓存。海报画一次要下载好几张网络图,慢的时候两三秒起步,所以生成过一次之后就把临时路径存下来,再点直接弹窗,不重画。
接着看核心的 sharePoster,它是整段代码里最长的一个方法,我按绘制顺序拆开讲。
async sharePoster ({sharePic} ) { const { token } = await getApp ().getAuthInfo (); if (!token) { this .triggerEvent ('isLogin' ) return ; } if (this .data .tempFilePath ) { this .setData ({ showShare : true }); return ; } wx.showLoading ({ title : '正在生成海报...' }); try { const { userId = '' , userInfo, mobile } = getApp ().data .authinfo ; const { shareId, pagePath } = this .data if (!this .qrcode ) { this .qrcode = await rGetShareErCode (); } const ctx = wx.createCanvasContext ('poster-share' , this ); this .canvas = ctx; const { path : posterBg } = await wx.wxp .getImageInfo ({ src : 'https://hyzmj.oss-cn-shenzhen.aliyuncs.com/jyh/posterBg.png' , }); await ctx.drawImage (posterBg, 0 , 0 , 570 , 920 ); ctx.save ();
这一段做了四件事。没登录先抛事件让宿主页面去处理,有缓存直接弹窗,然后请求专属二维码,最后拿到画布上下文开始画背景。
wx.createCanvasContext('poster-share', this) 的第二个参数千万别漏。在自定义组件里,不传 this 的话小程序会去页面级作用域找 canvas-id,找不到就静默失败,画布一片空白。这个坑我排查了很久,因为它连报错都没有。
wx.getImageInfo 这一步是旧版接口绕不开的。ctx.drawImage 在旧接口下只认本地路径,网络地址直接传进去画不出来,得先用 getImageInfo 或者 downloadFile 把图拉到本地拿临时路径。相应的,图片所在域名必须加进小程序后台的 downloadFile 合法域名列表,这个白名单和 request 的是分开配的,我在微信小程序开发总结 里整理过后台那一堆配置项。开发者工具勾了「不校验合法域名」的话本地看着一切正常,真机上就白屏,这是最容易上线才发现的问题。
代码里 wx.wxp 是把小程序 API promise 化之后的对象,用 wx-promise-pro 之类的库或者自己包一层都行,作用就是让这些异步调用能配合 async/await,不然这段绘制逻辑会写成一层套一层的回调。
接着往上叠图片和二维码:
const { path : banner } = await wx.wxp .getImageInfo ({ src : sharePic, }); ctx.beginPath (); ctx.arc (385 + 45 , 500 , 500 , 0 , 2 * Math .PI ); ctx.closePath (); ctx.drawImage (banner, 45 , 130 , 500 , 470 ); ctx.beginPath (); ctx.arc (385 + 45 , 760 , 200 , 0 , 2 * Math .PI ); ctx.closePath (); ctx.clip (); const { path : filePath } = await wx.wxp .getImageInfo ({ src : this .qrcode .data , }); ctx.drawImage (filePath, 360 , 660 , 190 , 190 ); ctx.restore ();
这一段里注释掉的那几行很有信息量,别急着删。它记录的是旧接口画 base64 图片的正确姿势:ctx.drawImage 不接受 data:image/png;base64, 开头的字符串,得先用正则把格式和内容拆出来,通过 wx.getFileSystemManager().writeFileSync 写成一个真实文件,再把文件路径喂给 drawImage。后来后端把二维码接口改成返回图片地址,才换成了 getImageInfo 这条更省事的路。如果你的二维码接口返回的是 base64,注释里那段就是现成答案。
ctx.clip() 配 ctx.arc 是圆形裁剪的标准写法,先画一个圆形路径,clip 之后再画的内容都只会显示在这个圆里面。关键在 save 和 restore 必须成对,clip 是会一直生效的,不 restore 的话后面画的所有东西都被压在那个圆里,表现就是文字莫名其妙不见了。
这里还有个原文遗留的小问题我保留了原样,// banner 那段先 beginPath 画了个 arc 又 closePath,但中间没有 clip,所以那个圆形路径实际上不产生任何效果,banner 图还是方的。想要圆角 banner 得补上 clip,或者干脆删掉那两行减少干扰。
再往下是头像和文字:
const { statusCode, tempFilePath } = await wx.wxp .downloadFile ({ url : userInfo.imgPath || 'https://hyzmj.oss-cn-shenzhen.aliyuncs.com/zyj-weapp/note/mine_avatar.png' , }) ctx.setFontSize (22 ) ctx.setFillStyle ('#000' ); ctx.fillText ('微信零钱立即到账无需提现' , 40 + 5 , 640 ) if (statusCode === 200 ) { let userName = stringLimit (userInfo.userName ,12 ) ctx.beginPath (); ctx.arc (40 + 45 , 710 + 45 , 40 , 0 , 2 * Math .PI ); ctx.closePath (); ctx.setFontSize (22 ) ctx.setFillStyle ('#222' ); ctx.fillText ('来自' , 140 + 5 , 740 + 5 ) ctx.fillText (mobile.replace (/^(\d{3})\d{4}(\d+)/ , "$1****$2" ) + '推荐' , 140 + 5 , 780 + 5 ) ctx.clip (); ctx.drawImage (tempFilePath, 40 + 5 , 710 + 5 , 80 , 80 ); }
头像走的是 downloadFile 而不是 getImageInfo,因为微信头像地址偶尔会挂,downloadFile 能拿到 statusCode 自己判断。代码里也确实做了判断,只有 200 才画头像和昵称,拿不到就整块跳过,海报少个头像总比生成失败强。这种降级在海报场景里很有必要,一张图要下四五个资源,任何一个失败都不应该让整个流程崩掉。
手机号那行 mobile.replace(/^(\d{3})\d{4}(\d+)/, "$1****$2") 是脱敏,前三位后四位保留中间打星。海报是要发出去给别人看的,用户的手机号、真实姓名这类信息一律要脱敏,这条别等法务来提。
坐标里那些 40 + 5、710 + 45 的写法看着别扭,其实是照着设计稿标注一点点调出来的,保留加法是为了让人一眼看出「基准位置 + 微调」。canvas 没有布局引擎,所有位置都得自己算,这也是这套方案最累人的地方。
最后一步是导出:
const _this = this const file = await new Promise ((resolve, reject ) => { ctx.draw (false , () => { wx.canvasToTempFilePath ({ canvasId : 'poster-share' , success : resolve, fail : reject, }, _this); }); }); this .setData ({ tempFilePath : file.tempFilePath , showShare : true }); console .log (file) console .log (this .data ) } catch (err) { console .log (err); wx.showToast ({ title : '生成海报失败' , icon : 'none' }); } wx.hideLoading (); },
这段是整个流程的收口,也是最容易写错的地方。ctx.draw() 才是真正执行绘制的那一下,前面所有 drawImage、fillText 都只是往队列里塞指令,不调 draw 画布上什么都不会出现。第一个参数 false 表示不保留上一次的内容,也就是每次重画都从空白开始。
导出必须放在 draw 的回调里。canvasToTempFilePath 拿的是画布当前的像素,绘制还没落地就去导,得到的是一张空白图或者只画了一半的图。这个时序问题和我在小程序直播总结 里写过的 setData 回调里才能推流是同一类,小程序里凡是涉及原生组件的,都要多想一层「视图层到底更新了没有」。
还有 _this 那个变量。wx.canvasToTempFilePath 的第二个参数同样是组件实例,和 createCanvasContext 一样,在组件里用就必须传。因为它写在 new Promise 的回调里,this 已经不指向组件了,所以先存一份。用箭头函数也能解决,原文这种写法在老代码里更常见。
外面那层 try/catch 建议一定要有。海报绘制链路上任何一个网络请求失败都会抛错,没有兜底的话用户点了按钮之后 loading 一直转,什么反馈都没有。
剩下的是保存到相册:
async savePicture ( wx.showLoading ({ title : '正在保存...' }); await wx.wxp .saveImageToPhotosAlbum ({ filePath : this .data .tempFilePath }).catch ((err ) => { wx.hideLoading (); wx.showToast ({ title : '保存失败' , icon : 'none' }); throw err; }); wx.hideLoading (); wx.showToast ({ title : '保存成功' , icon : 'none' }); }, } })
saveImageToPhotosAlbum 会触发相册写入授权。用户第一次点是弹系统授权框,但如果他点了拒绝,之后再调这个接口就直接走 fail 分支,不会再弹框。所以规范的做法是在 catch 里判断一下错误信息,如果是授权被拒,引导用户用 wx.openSetting 去设置页手动打开。原文这里只是简单 toast 了一句「保存失败」,用户会一脸懵。这块算是这套代码里我留的一个技术债。
2.5 调用与效果 页面里给组件加个 id,需要的时候拿到实例调方法就行:
this .selectComponent ('#poster' ).sharePoster ({ sharePic : shareImageUrl })
selectComponent 是自定义组件之间通信的一种方式,直接拿实例调方法,比 triggerEvent 加属性传值那套简单。代价是耦合,页面得知道组件里有个叫 sharePoster 的方法。组件数量不多的时候这么写没问题。
最终效果是这样:
三、方案二,canvas 2d 加一个通用 Draw 类 第一套方案能用,但写第三张海报的时候我受不了了。每张海报都要重新算一遍坐标、重新处理一遍网络图片、重新写一遍圆角裁剪,同样的代码在几个页面里各复制了一份。
于是把绘制能力抽成一个 Draw 类。思路是把画布上的元素归成三种,容器 view、图片 image、文字 text,每种给一个方法,参数统一成 box(位置和尺寸)加 style(颜色、圆角、字号),用起来就有点像写 CSS。
同时画布也换成了新的 type="2d"。这个接口和 Web 标准的 Canvas API 基本一致,拿到的是真正的 CanvasRenderingContext2D,能直接 ctx.fillStyle = xxx 而不是调 setFillStyle,也不需要手动 draw() 提交。
先看这个类的骨架和容器绘制:
class Draw { constructor (context, canvas, use2dCanvas = false ) { this .ctx = context; this .canvas = canvas || null ; this .use2dCanvas = use2dCanvas; } roundRect (x, y, w, h, r, fill = true , stroke = false ) { if (r < 0 ) return ; const ctx = this .ctx ; ctx.beginPath (); ctx.arc (x + r, y + r, r, Math .PI , (Math .PI * 3 ) / 2 ); ctx.arc (x + w - r, y + r, r, (Math .PI * 3 ) / 2 , 0 ); ctx.arc (x + w - r, y + h - r, r, 0 , Math .PI / 2 ); ctx.arc (x + r, y + h - r, r, Math .PI / 2 , Math .PI ); ctx.lineTo (x, y + r); if (stroke) ctx.stroke (); if (fill) ctx.fill (); } drawView (box, style = {} ) { const ctx = this .ctx ; const { left : x, top : y, width : w, height : h } = box; const { borderRadius = 0 , borderWidth = 0 , borderColor, color = '#000' , backgroundColor = 'transparent' } = style; ctx.save (); if (borderWidth > 0 ) { ctx.fillStyle = borderColor || color; this .roundRect (x, y, w, h, borderRadius); } ctx.fillStyle = backgroundColor; const innerWidth = w - 2 * borderWidth; const innerHeight = h - 2 * borderWidth; const innerRadius = borderRadius - borderWidth >= 0 ? borderRadius - borderWidth : 0 ; this .roundRect (x + borderWidth, y + borderWidth, innerWidth, innerHeight, innerRadius); ctx.restore (); }
roundRect 是这个类的地基,四个 arc 接四个角画出一个圆角矩形。canvas 原生没有圆角矩形,所有带圆角的东西都得这么拼出来。注意它开头判断了 r < 0 直接返回,避免传了负值画出诡异形状。
drawView 画边框的思路很讨巧,不是真的去描边,而是先用边框色画一个大的圆角矩形,再用背景色在里面画一个小的盖上去,露出来的一圈就是边框。这样做的好处是圆角处不会出现 stroke 那种内外圆角不同心的毛病。内圈半径这里也做了处理,borderRadius - borderWidth 小于 0 就取 0,不然内圈会画反。
接下来是图片,这块是整个类里最绕的:
async drawImage (img, box = {}, style = {} ) { await new Promise ((resolve, reject ) => { const ctx = this .ctx ; const canvas = this .canvas ; const { borderRadius = 0 } = style; const { left : x, top : y, width : w, height : h } = box; ctx.save (); this .roundRect (x, y, w, h, borderRadius, false , false ); ctx.clip (); const _drawImage = (img ) => { if (this .use2dCanvas ) { const Image = canvas.createImage (); Image .onload = () => { ctx.drawImage (Image , x, y, w, h); ctx.restore (); resolve (); }; Image .onerror = () => { reject (new Error (`createImage fail: ${img} ` )); }; Image .src = img; } else { ctx.drawImage (img, x, y, w, h); ctx.restore (); resolve (); } }; const isTempFile = /^wxfile:\/\// .test (img); const isNetworkFile = /^https?:\/\// .test (img); const isBase64 = /^data:image\/(\w+);base64,/ .test (img); if (isTempFile) { _drawImage (img); } else if (isBase64) { _drawImage (img); } else if (isNetworkFile) { wx.downloadFile ({ url : img, success (res ) { if (res.statusCode === 200 ) { _drawImage (res.tempFilePath ); } else { reject (new Error (`downloadFile:fail ${img} ` )); } }, fail ( reject (new Error (`downloadFile:fail ${img} ` )); }, }); } else { reject (new Error (`image format error: ${img} ` )); } }); }
这个方法把四种图片来源统一处理了。本地临时文件 wxfile:// 开头的直接画,base64 直接画,网络图片先 wx.downloadFile 下载再画,其它格式直接报错。分支判断用正则做,比 indexOf 清楚。
关键差异在 use2dCanvas 这个开关上。走 2d 接口时不能把路径直接丢给 drawImage,得先 canvas.createImage() 造一个图片对象,设置 src 等 onload 之后再画,这一点和浏览器里的 new Image() 一模一样。走旧接口时才是直接传路径。所以这个类同时兼容两种画布,构造函数的第三个参数就是干这个的。
base64 在 2d 接口下能直接当 src 用,不用再写文件系统那一套,这是换新接口最爽的地方之一。二维码接口返回 base64 的场景一下就简单了。
整个方法用 Promise 包起来并且 async,是因为 onload 和 downloadFile 都是异步的。调用方必须 await,不然会出现「文字画上去了图片还没到」的层级错乱。canvas 是后画的盖前面的,顺序错了背景图能把内容全糊掉。
再往下是文字,也是最啰嗦的一块:
drawText (text, box = {}, style = {} ) { const ctx = this .ctx ; let { left : x, top : y, width : w, height : h } = box; let { color = '#000' , lineHeight = '1.4em' , fontSize = 14 , textAlign = 'left' , verticalAlign = 'top' , backgroundColor = 'transparent' } = style; if (typeof lineHeight === 'string' ) { lineHeight = Math .ceil (parseFloat (lineHeight.replace ('em' , '' )) * fontSize); } if (!text || lineHeight > h) return ; ctx.save (); ctx.textBaseline = 'top' ; ctx.font = `${fontSize} px sans-serif` ; ctx.textAlign = textAlign; ctx.fillStyle = backgroundColor; this .roundRect (x, y, w, h, 0 ); ctx.fillStyle = color; switch (textAlign) { case 'left' : break ; case 'center' : x += 0.5 * w; break ; case 'right' : x += w; break ; default : break ; } const textWidth = ctx.measureText (text).width ; const actualHeight = Math .ceil (textWidth / w) * lineHeight; let paddingTop = Math .ceil ((h - actualHeight) / 2 ); if (paddingTop < 0 ) paddingTop = 0 ; switch (verticalAlign) { case 'top' : break ; case 'middle' : y += paddingTop; break ; case 'bottom' : y += 2 * paddingTop; break ; default : break ; } const inlinePaddingTop = Math .ceil ((lineHeight - fontSize) / 2 );
前半段全是在算位置。lineHeight 支持 1.4em 这种写法,转换时要把 em 去掉再乘字号。原文这里写的是 lineHeight.replace('em'),只传了一个参数,replace 会把 em 替换成字符串 undefined,结果变成 1.4undefined。碰巧 parseFloat 遇到非数字就停,值算出来还是对的,所以这个 bug 一直没被发现。我补上了第二个参数,别人抄过去改成别的单位就不一定这么走运了。
水平对齐这块要特别注意,ctx.textAlign 设成 center 之后,fillText 的 x 参数含义变成了「文字中心点」,所以代码里要把 x 加上半个宽度。right 同理加满宽。这是 canvas 文字最容易画歪的原因,坐标系跟着对齐方式变了。
垂直方向上 canvas 只认基线,代码里先把 textBaseline 设成 top,再用容器高度减去文本实际高度算出上边距,模拟出居中和底部对齐的效果。actualHeight 是用总宽度除以容器宽度估算行数得来的,遇到中英文混排会有偏差,追求精确得逐行 measureText。
后半段是折行逻辑:
if (textWidth <= w) { ctx.fillText (text, x, y + inlinePaddingTop); ctx.restore (); return ; } const chars = text.split ('' ); const _y = y; let line = '' ; for (const ch of chars) { const testLine = line + ch; const testWidth = ctx.measureText (testLine).width ; if (testWidth > w) { ctx.fillText (line, x, y + inlinePaddingTop); y += lineHeight; line = ch; if (y + lineHeight > _y + h) break ; } else { line = testLine; } } if (y + lineHeight <= _y + h) { ctx.fillText (line, x, y + inlinePaddingTop); } ctx.restore (); }
折行的做法是逐字累加,每加一个字就 measureText 量一次,超过容器宽度就把当前这行画出去,换行继续。中文按字断没问题,英文长单词会被从中间劈开,要处理得按空格分词再拼。商品名这种场景中文居多,逐字断够用了。
if (y + lineHeight > _y + h) break; 这句是防溢出,画满容器高度就停,多出来的文字直接丢掉。想要省略号的话在这里判断一下是不是最后一行,把 line 截短再拼个省略号就行。
原文这里我修了一个 bug。单行分支里 fillText 之后直接 return 了,没有调 ctx.restore(),而方法开头是有 ctx.save() 的。save 和 restore 不配对,画布状态会一直累积,画完几段单行文字之后字体、颜色、对齐方式全乱套。这种问题特别难查,因为出问题的是后面某个不相干的元素。
最后是把这三个方法串起来的递归入口:
async drawNode (element ) { const { layoutBox, computedStyle, name } = element; const { src, text } = element.attributes ; if (name === 'view' ) { this .drawView (layoutBox, computedStyle); } else if (name === 'image' ) { await this .drawImage (src, layoutBox, computedStyle); } else if (name === 'text' ) { this .drawText (text, layoutBox, computedStyle); } const childs = Object .values (element.children ); for (const child of childs) { await this .drawNode (child); } } } export default Draw ;
drawNode 接受一棵描述树,按 name 分发到对应的绘制方法,再递归处理 children。有了它,你可以把整张海报描述成一个 JSON,甚至用一套 DSL 或者可视化工具生成这份 JSON,绘制代码就完全不用改了。原文这个类只写到了这一步,实际项目里我没走到「JSON 描述整张海报」那么远,还是手动调 drawImage 和 drawText,下面的例子就是这么用的。
3.1 页面里怎么用 结构比方案一简单,因为不需要弹层,海报页本身就是一个页面:
<view class ="df fxdc h100v" > <view class ="df jcc aic fxa posr" > <image class ="posa t0 l0 w100p h100p blur" src ="{{ bgImage }}" wx:if ="{{ bgImage }}" mode ="aspectFill" /> <canvas type ="2d" id ="poster-canvas" class ="poster" > </canvas > </view > <view class ="fxn h238 bgfff df aic jcc bdrs16t" > <view class ="fxa w0 df aic jcc" > <view class ="df fxdc posr" > <button class ="posa t0 l0 w100p h100p op0" open-type ="share" > </button > <image class ="h108 w108" src ="./assets/ic_fenxiang.svg" /> <text class ="mt16 c333 fz28" > 分享好友</text > </view > </view > <view class ="fxa w0 df aic jcc" > <view class ="df fxdc" bind:tap ="handleSave" > <image class ="h108 w108" src ="./assets/ic_baocun.svg" /> <text class ="mt16 c333 fz28" > 保存图片</text > </view > </view > </view > </view >
page { background : #5c5c5c ; } .poster { height : 862 rpx; width : 558 rpx; } .blur { filter : blur (100px ); }
这次画布是直接显示在页面上的,type="2d" 的 canvas 可以正常参与布局,不用再往屏幕外挪。用户看到的就是绘制过程本身,体感上比「转半天圈然后弹出一张图」要好。
背景那张 blur(100px) 的商品图是个小心机,用商品主图本身当模糊背景,色调自然就和海报统一了,比固定一张背景图省设计资源。
下面是绘制逻辑:
import Draw from '../../../utilities/draw' ;import bg from './assets/bg.js' ;import avatar from './assets/avatar.js' ;import { rGetGoodsDetail } from '../../../netapi/goods/index' ;import { rGetShortQrcode } from '../../../netapi/other/index' ;import { KEY_APP_ID } from '../../../constants/config' ;import { getStorageUserSettingForKey } from '../../../utilities/other' ;Page ({ data : { bgImage : '' , }, query : { goodsId : '' , shareId : '' , }, onLoad (options ) { this .query = options; }, })
query 没放在 data 里,而是挂在页面实例上。因为它只在绘制时读一次,不需要驱动视图更新,放 data 里反而多一次无谓的 setData。海报页这种一次性渲染的场景,能不 setData 就不 setData。
绘制放在 onReady 而不是 onLoad,这一点很关键。onLoad 时页面还没渲染完,createSelectorQuery 拿不到 canvas 节点。onReady 表示初次渲染完成,这时候节点才是就绪的。
async onReady ( wx.showLoading ({ title : '正在生成海报...' }); let userId = getApp ().data .authinfo .userId ; let mobile = getStorageUserSettingForKey ('mobile' ); mobile = mobile.replace (/(\d{3})\d*(\d{2})/ , '$1****$2' ); const response = await rGetGoodsDetail ({ id : this .query .goodsId }, { catcher : this , show : true }); const qrcode = await rGetShortQrcode ( { appId : KEY_APP_ID , page : 'pages/packagesOther/transfer/index' , scene : `/pages/packagesGoods/goodsDetail/index?goodsId=${this .query.goodsId} &shareId=${userId} ` , shortScenePrefix : 'page-' , width : 200 , }, { catcher : this , show : true } ); if (!response || response.code !== 0 ) { this .setData ({ error : response }); wx.hideLoading (); return ; } if (!qrcode || qrcode.code !== 0 ) { this .setData ({ error : qrcode }); wx.hideLoading (); return ; } this .response = response; this .setData ({ bgImage : response.data .goods_image [0 ].img }); const query = wx.createSelectorQuery (); query .select ('#poster-canvas' ) .fields ({ node : true , size : true }) .exec (async (res) => { const canvas = res[0 ].node ; const ctx = canvas.getContext ('2d' ); canvas.width = 558 ; canvas.height = 862 ; const ratio = canvas.width / 558 ; ctx.scale (ratio, ratio); this .canvas = canvas; this .ratio = ratio; const draw = new Draw (ctx, canvas, true );
这一段是 2d 画布的标准初始化,和旧接口完全不同,值得逐行看。
createSelectorQuery().select('#poster-canvas').fields({ node: true, size: true }) 拿到的是真实的 canvas 节点对象,res[0].node 就是它。之后 canvas.getContext('2d') 拿上下文,这一整套和浏览器里的写法对得上。
canvas.width = 558 这两行必须写。2d 画布的默认尺寸和 CSS 尺寸是两回事,不显式设置的话画布内部还是默认分辨率,画出来的东西会被拉伸。代码里还算了个 ratio 做 ctx.scale,这里因为宽度写死成 558 所以 ratio 恒等于 1,实际项目里应该把它换成 wx.getSystemInfoSync().pixelRatio,再把 canvas.width 设成 CSS 宽度 * pixelRatio。这才是海报在高清屏上不糊的正确做法,我这版偷懒了,导出的图在 3 倍屏手机上看边缘是有点软的。
new Draw(ctx, canvas, true) 第三个参数传 true,告诉工具类走 2d 分支,图片要用 canvas.createImage() 加载。
接下来就是一层层往上画:
await draw .drawImage (bg, { left : 0 , top : 0 , width : 558 , height : 862 , }) .catch ((e ) => { console .log (e); }); await draw.drawImage (response.data .goods_image [0 ].img , { left : 50 , top : 122 , width : 455 , height : 455 , }); draw.drawText ( response.data .goods_info .goods_name || '' , { left : 50 , top : 608 , width : 455 , height : 96 , }, { color : '#333' , fontSize : 28 , fontWeight : 500 , } ); await draw.drawImage ( avatar, { left : 50 , top : 720 , width : 56 , height : 56 , }, { borderRadius : 28 , } ); draw.drawText ( `${mobile} 的分享` , { left : 116 , top : 732 , width : 250 , height : 40 , }, { color : '#333' , fontSize : 24 , } ); }); }, })
看这几个调用就明白抽象成 Draw 的价值了。背景、商品图、商品名、头像,每个都是一句话,参数是一个位置对象加一个样式对象,不用再关心网络图片怎么下载、圆角怎么裁。头像那句只多传了一个 borderRadius: 28,正好是宽高 56 的一半,圆形就出来了。
背景那句还单独挂了 .catch,因为背景图是 import 进来的 base64 常量,理论上不会失败,但真失败了也不该让整张海报画不出来。其它几个没加,实际项目里更稳妥的做法是每个都兜一下。
剩下二维码和价格:
await draw.drawImage ( `data:image/png;base64,${qrcode.data} ` , { left : 380 , top : 650 , width : 146 , height : 146 , }, { borderRadius : 78 , } ); draw.drawText ( ` ¥ ${response.data.goods_info.intervalPrice} ` , { left : 144 , top : 798 , width : 200 , height : 40 , }, { color : '#ff6c1e' , lineHeight : 24 , fontSize : 26 , fontWeight : 500 , } ); wx.hideLoading (); }); }, })
二维码用 base64 直接画,这就是前面说的 2d 接口的便利。borderRadius: 78 比宽高 146 的一半还大,roundRect 里没有做上限收敛,圆角超过一半会画出奇怪的形状,稳妥起见应该传 73。
价格那行的样式里,原文写的是 lineHeigh: 24,少了个 t,Draw 里读的是 lineHeight,所以这个值根本没生效,走的是默认的 1.4em。我改回了正确拼写。这类拼错属性名的问题解构默认值会帮你「兜住」,程序不报错,效果不对,只能靠一行行对。
另外 fontWeight: 500 传了也没用,Draw 的 drawText 里压根没读这个字段,ctx.font 只拼了字号和字体。想要字重得把 font 拼成 500 26px sans-serif 这种完整写法。这是这个工具类目前的短板之一,我没补,因为设计稿里的字重用不同字号也能拉开层次。
最后是分享和保存:
onShareAppMessage ( }, async handleSave ( wx.showLoading ({ title : '正在保存...' }); const res = await wx.wxp .canvasToTempFilePath ({ canvas : this .canvas , width : 558 , height : 862 , destWidth : 558 , destHeight : 862 , }) .catch ((err ) => { wx.hideLoading (); wx.showToast ({ title : '保存失败' , icon : 'none' }); throw err; }); await wx.wxp .saveImageToPhotosAlbum ({ filePath : res.tempFilePath , }) .catch ((err ) => { wx.hideLoading (); wx.showToast ({ title : '保存失败' , icon : 'none' }); throw err; }); wx.hideLoading (); }, });
2d 画布导出时传的是 canvas 节点本身,不是 canvasId,这是和旧接口最明显的区别之一,两者混用会直接失败。destWidth 和 destHeight 控制导出图片的实际像素,这里和画布尺寸一样是 1:1,如果前面按 pixelRatio 放大了画布,这两个值也要跟着乘上去,否则等于白放大。
两个 .catch 都是先关 loading 再 toast 再把错误抛出去。抛出去是为了让上层的错误监控能收到,只吞掉的话线上出问题你完全不知情。
最终效果:
四、两套方案怎么选 写完两套之后我的判断是这样。
维度
方案一(旧接口 + 组件)
方案二(2d + Draw 类)
接入成本
引入组件调一个方法
要自己写页面和绘制调用
画布位置
必须挪出屏幕外藏起来
可以正常显示在页面上
base64 图片
要写文件系统中转
直接当 src 用
复用性
一张海报一个组件
绘制能力可复用,样式各写各的
高清屏
靠 destWidth 放大
可以按 pixelRatio 缩放画布
适合场景
海报样式固定,一两个入口
海报种类多,长期维护
一句话,入口少、样式定死的选方案一,改起来快;海报种类多、以后还要加的选方案二,抽一层能省下大量重复代码。
再补一条我自己的感受,两种方案都别指望能做到「和设计稿像素级一致」。canvas 没有布局能力,所有坐标都是手算的,字体也和设计稿里的不完全一样。跟设计对齐预期比抠一下午坐标划算。
五、这几年变了什么 这篇是 2021 年 1 月写的,小程序这边有几处变化需要说明。
旧版 canvas 接口的定位变了。文中方案一用的 wx.createCanvasContext 加 canvas-id 这套,官方后来明确推荐迁移到 type="2d" 的新接口,新项目直接从方案二起步就行。方案一的价值现在更多是给老项目做参考,以及理解那些奇怪写法的来历。
小程序后台的菜单位置调整过。文中提到的 downloadFile 合法域名配置入口随着后台改版会挪位置,请以你打开时实际看到的界面为准。
用户信息的获取规则收紧了。海报上要画的头像和昵称,2021 年还能通过老接口拿到,后来微信调整过这块的能力和口径。具体现在该用哪个接口,请查官方文档的最新说明,别照着老代码抄。这一段我只能说到这儿,因为我没有在最新版本上完整验证过。
还有一点,如果你想把海报能力做成小程序插件给别人用,要先确认插件里能不能调用你需要的那些 API,插件的接口限制比小程序本体多不少,我在小程序插件总结 里整理过完整清单。
总结 小程序生成海报的链路就三步,画布上画完、导出成临时文件、存进相册。所有的坑都长在这三步的接缝处。
画布必须存在且有尺寸,旧接口只能靠 position: fixed 加负偏移把它藏到屏幕外,display: none 会让你导出一张白图。组件里用画布,createCanvasContext 和 canvasToTempFilePath 都要把组件实例传进去,漏了就是静默失败。旧接口画不了网络图和 base64,必须先落成本地文件;2d 接口这两个问题都不存在。
ctx.draw() 才是真正提交绘制,导出必须放在它的回调里。圆形裁剪靠 arc 加 clip,save 和 restore 一定要配对,不配对的后果会出现在后面某个不相干的元素上。文字要自己算折行和对齐,textAlign 改了之后 x 参数的含义也跟着变。
方案选择上,入口少选组件封装,种类多抽一层 Draw。真正决定你要不要抽象的不是技术,是这个海报以后还会不会加。
参考